Multi–piece monuments are basically stacked stone pieces of different types and sizes placed together. They quite often totally rely on level ground and gravity to keep them standing and in place. Often they have metal pins, mortar, or some type of seal between their layers. And many times nothing at all. Multi-piece monuments are a lot like the proverbial box of chocolates. You never know for sure what they are until you bite into one. This basic standard for this process of, taking apart and reassembly is straight forward in manner, but somewhat complicated where physics and safety are concerned. It’s simple if you think about in terms like a child’s building blocks. But complicated and somewhat dangerous when you begin talking about lifting and moving 800 lb. solid blocks of stone. Having a very good grasp of leverage and fulcrum points is imperative and becomes more so as the block sizes and weights increase. The procedure this standard addresses is the most dangerous out of the 6 standards we have written about. And we will stress that several times in the standard. This procedure will also require its own set of equipment. Proper chain hoists, tripods, gantry systems, and safe nylon strapping constitutes the bulk of expense to a conservators war chest of tools.
We suggest you read this section carefully and take a class with a good qualified preservation instructor before attempting any of this on your own. This procedure more than others is an absolute hands-on learning experience. After that has been accomplished, we highly suggest you start with 5 ft., or shorter, monuments that have much more manageable block sizes weighing in the neighborhood of 200 to 500 lbs. per piece. This will allow you to gain the experience you need to stay safe in the most manageable way. I have personally found that I needed to make a balance between being confident and over confident in this area. Not enough confidence will get you hurt as easily as being over confident. These stones are unforgiving and go where gravity takes them.
Because this section touches on what we are terming as “Bonding Agents”, meaning any product or material used to join grave markers together. These will also be addressed in other sections of the website under PRO VS CON and under SOURCES…Pro VS Con Results. Please go to these sections for a more in-depth look and understanding before attempting any of these procedures.
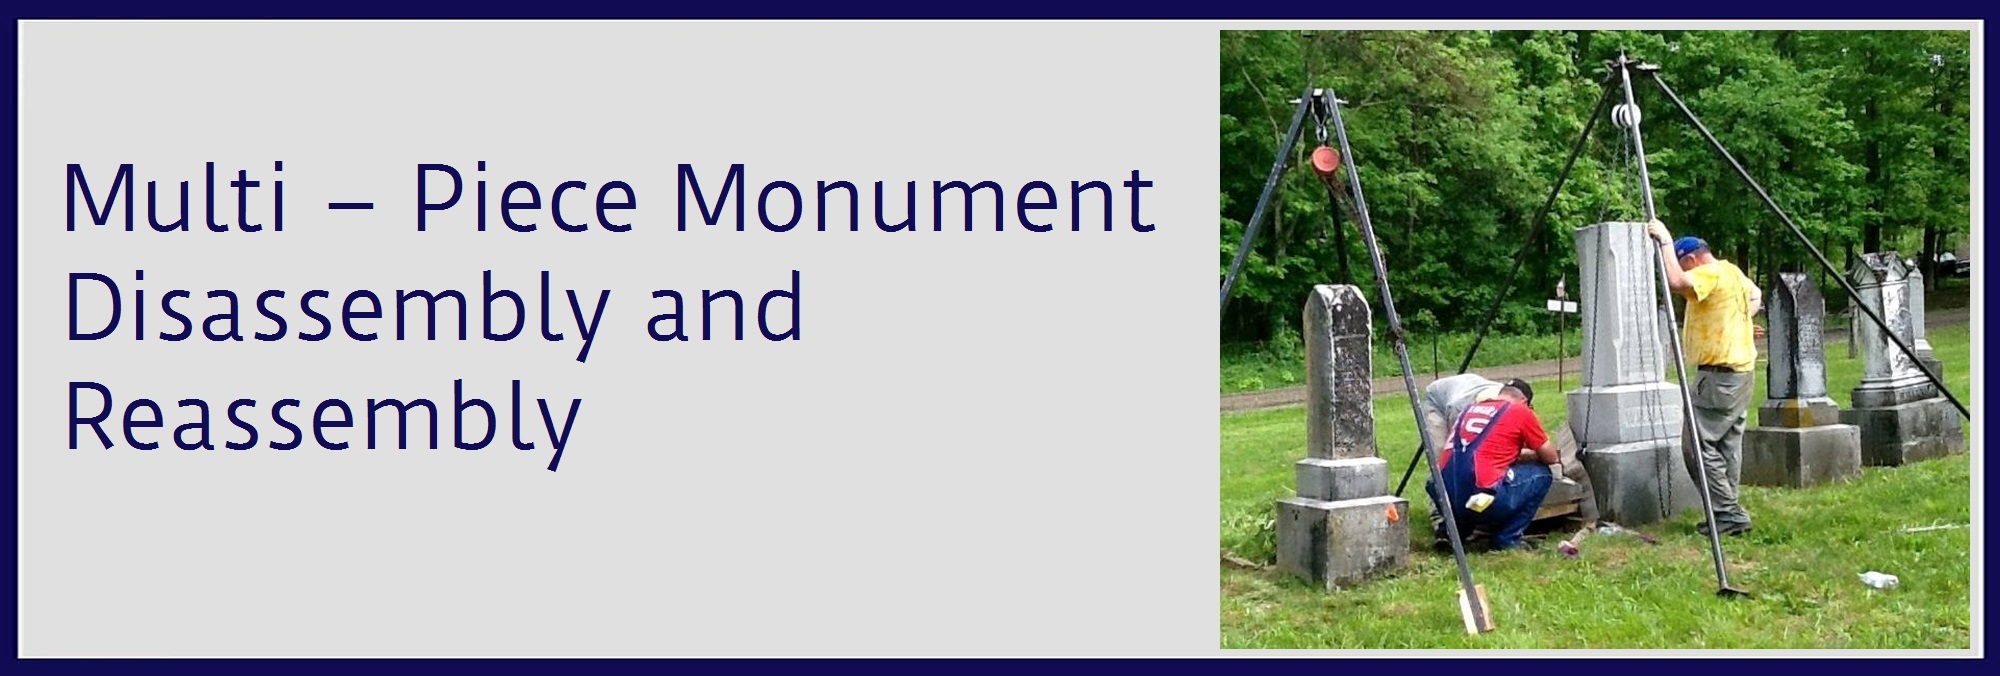
DISASSEMBLY, REPAIR, REASSEMBLY, AND RESETTING OF MULTI-PIECE MONUMENTS
By CCUS members Lloyd Collins of Polk Cemetery Savers and Mark Morton of Gravestone Guardians of Ohio
Most old multi-piece monuments have a combination of problems. Over time, due to weather, rodents, and/or compacting soil, they tilt or have fallen. Some have been vandalized. The setting compound, no matter what was used over a hundred years ago has deteriorated and the joints between pieces are no longer adhered to each other. These problems present a grave danger. Most multi-piece monuments are large and therefore very heavy. Someone leaning on them can topple them easily. If a person is on the down-tilt side they can be crushed by the falling monument.
The repair, for lack of a better word, of these loose multi-piece monuments is a task that should not be taken lightly. This task takes patience, skill, time, and the use of the proper equipment and materials. Few monuments can be repaired in a day. Most will take days before the monument can be repaired and reset to safely stand upright in the cemetery. Every monument is different and although the repair methods may be the same, the series of tasks will be different. This standard will attempt to provide basic methods and define a series of tasks that will be needed to repair multi-piece monuments.

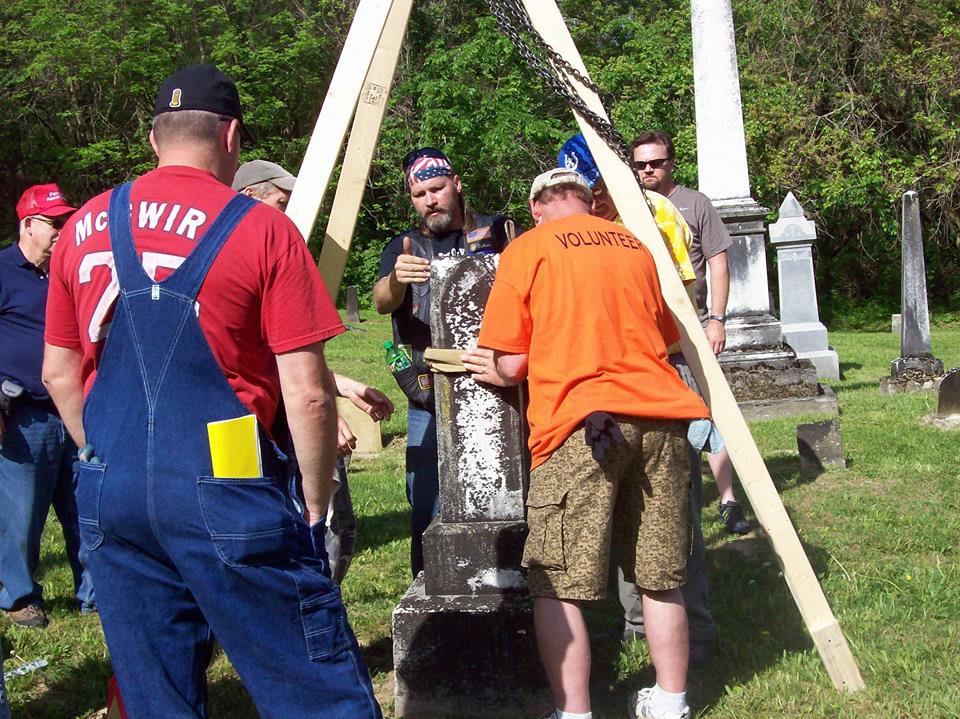
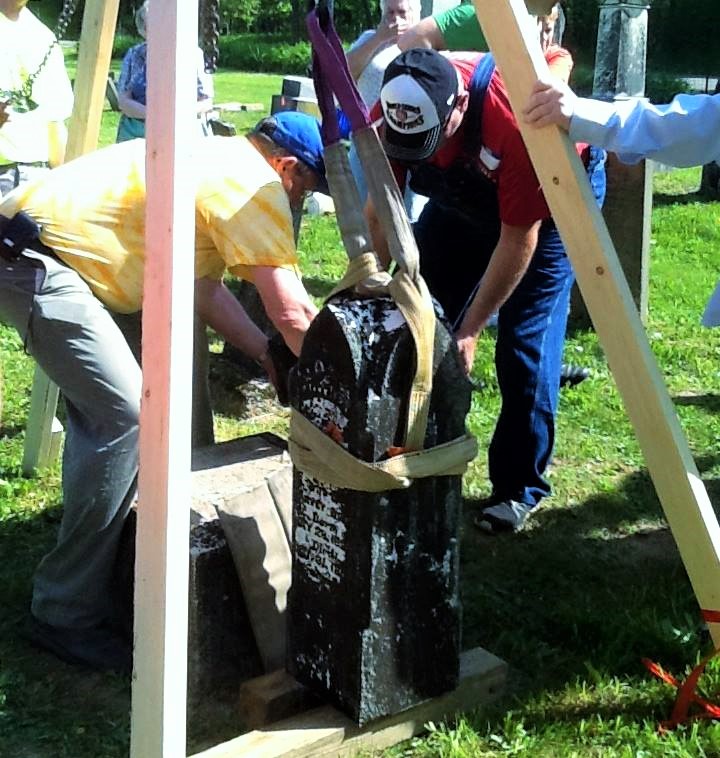
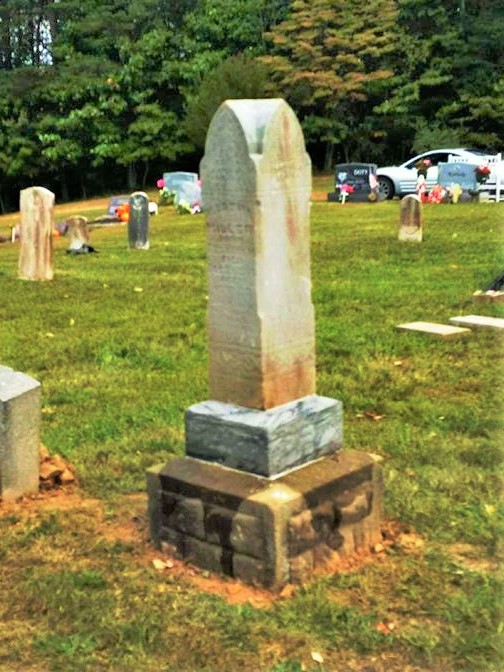
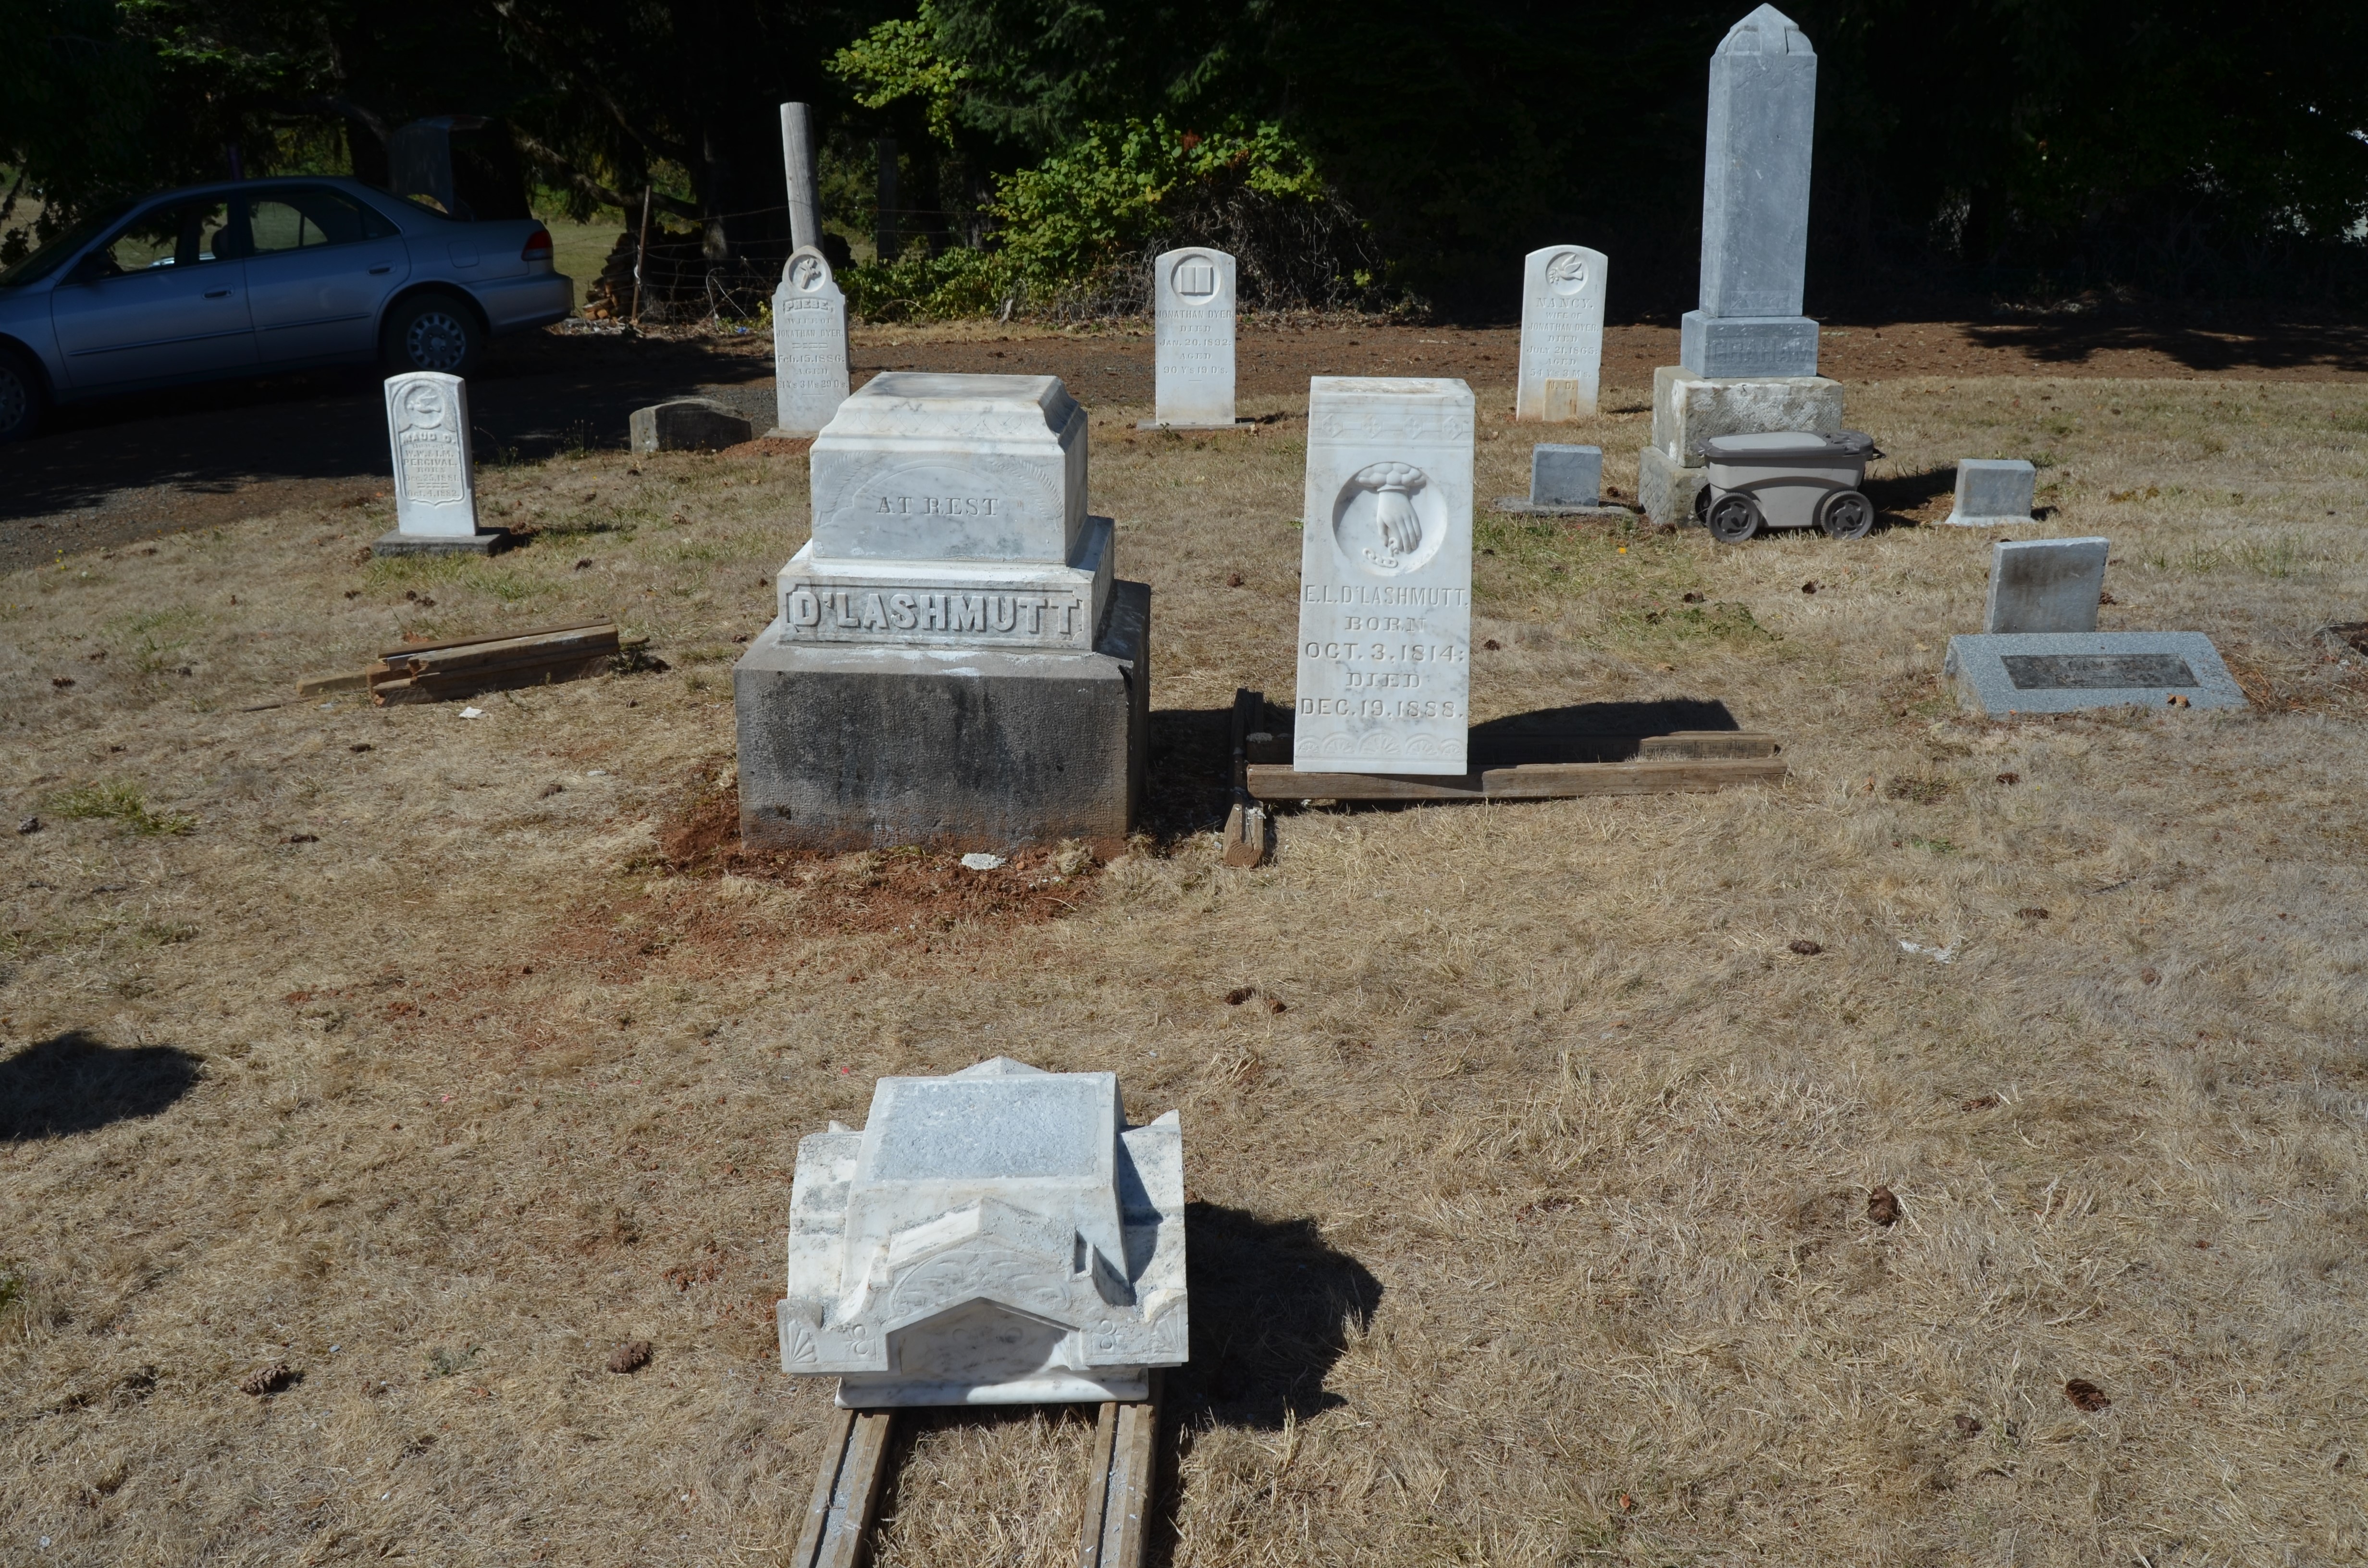
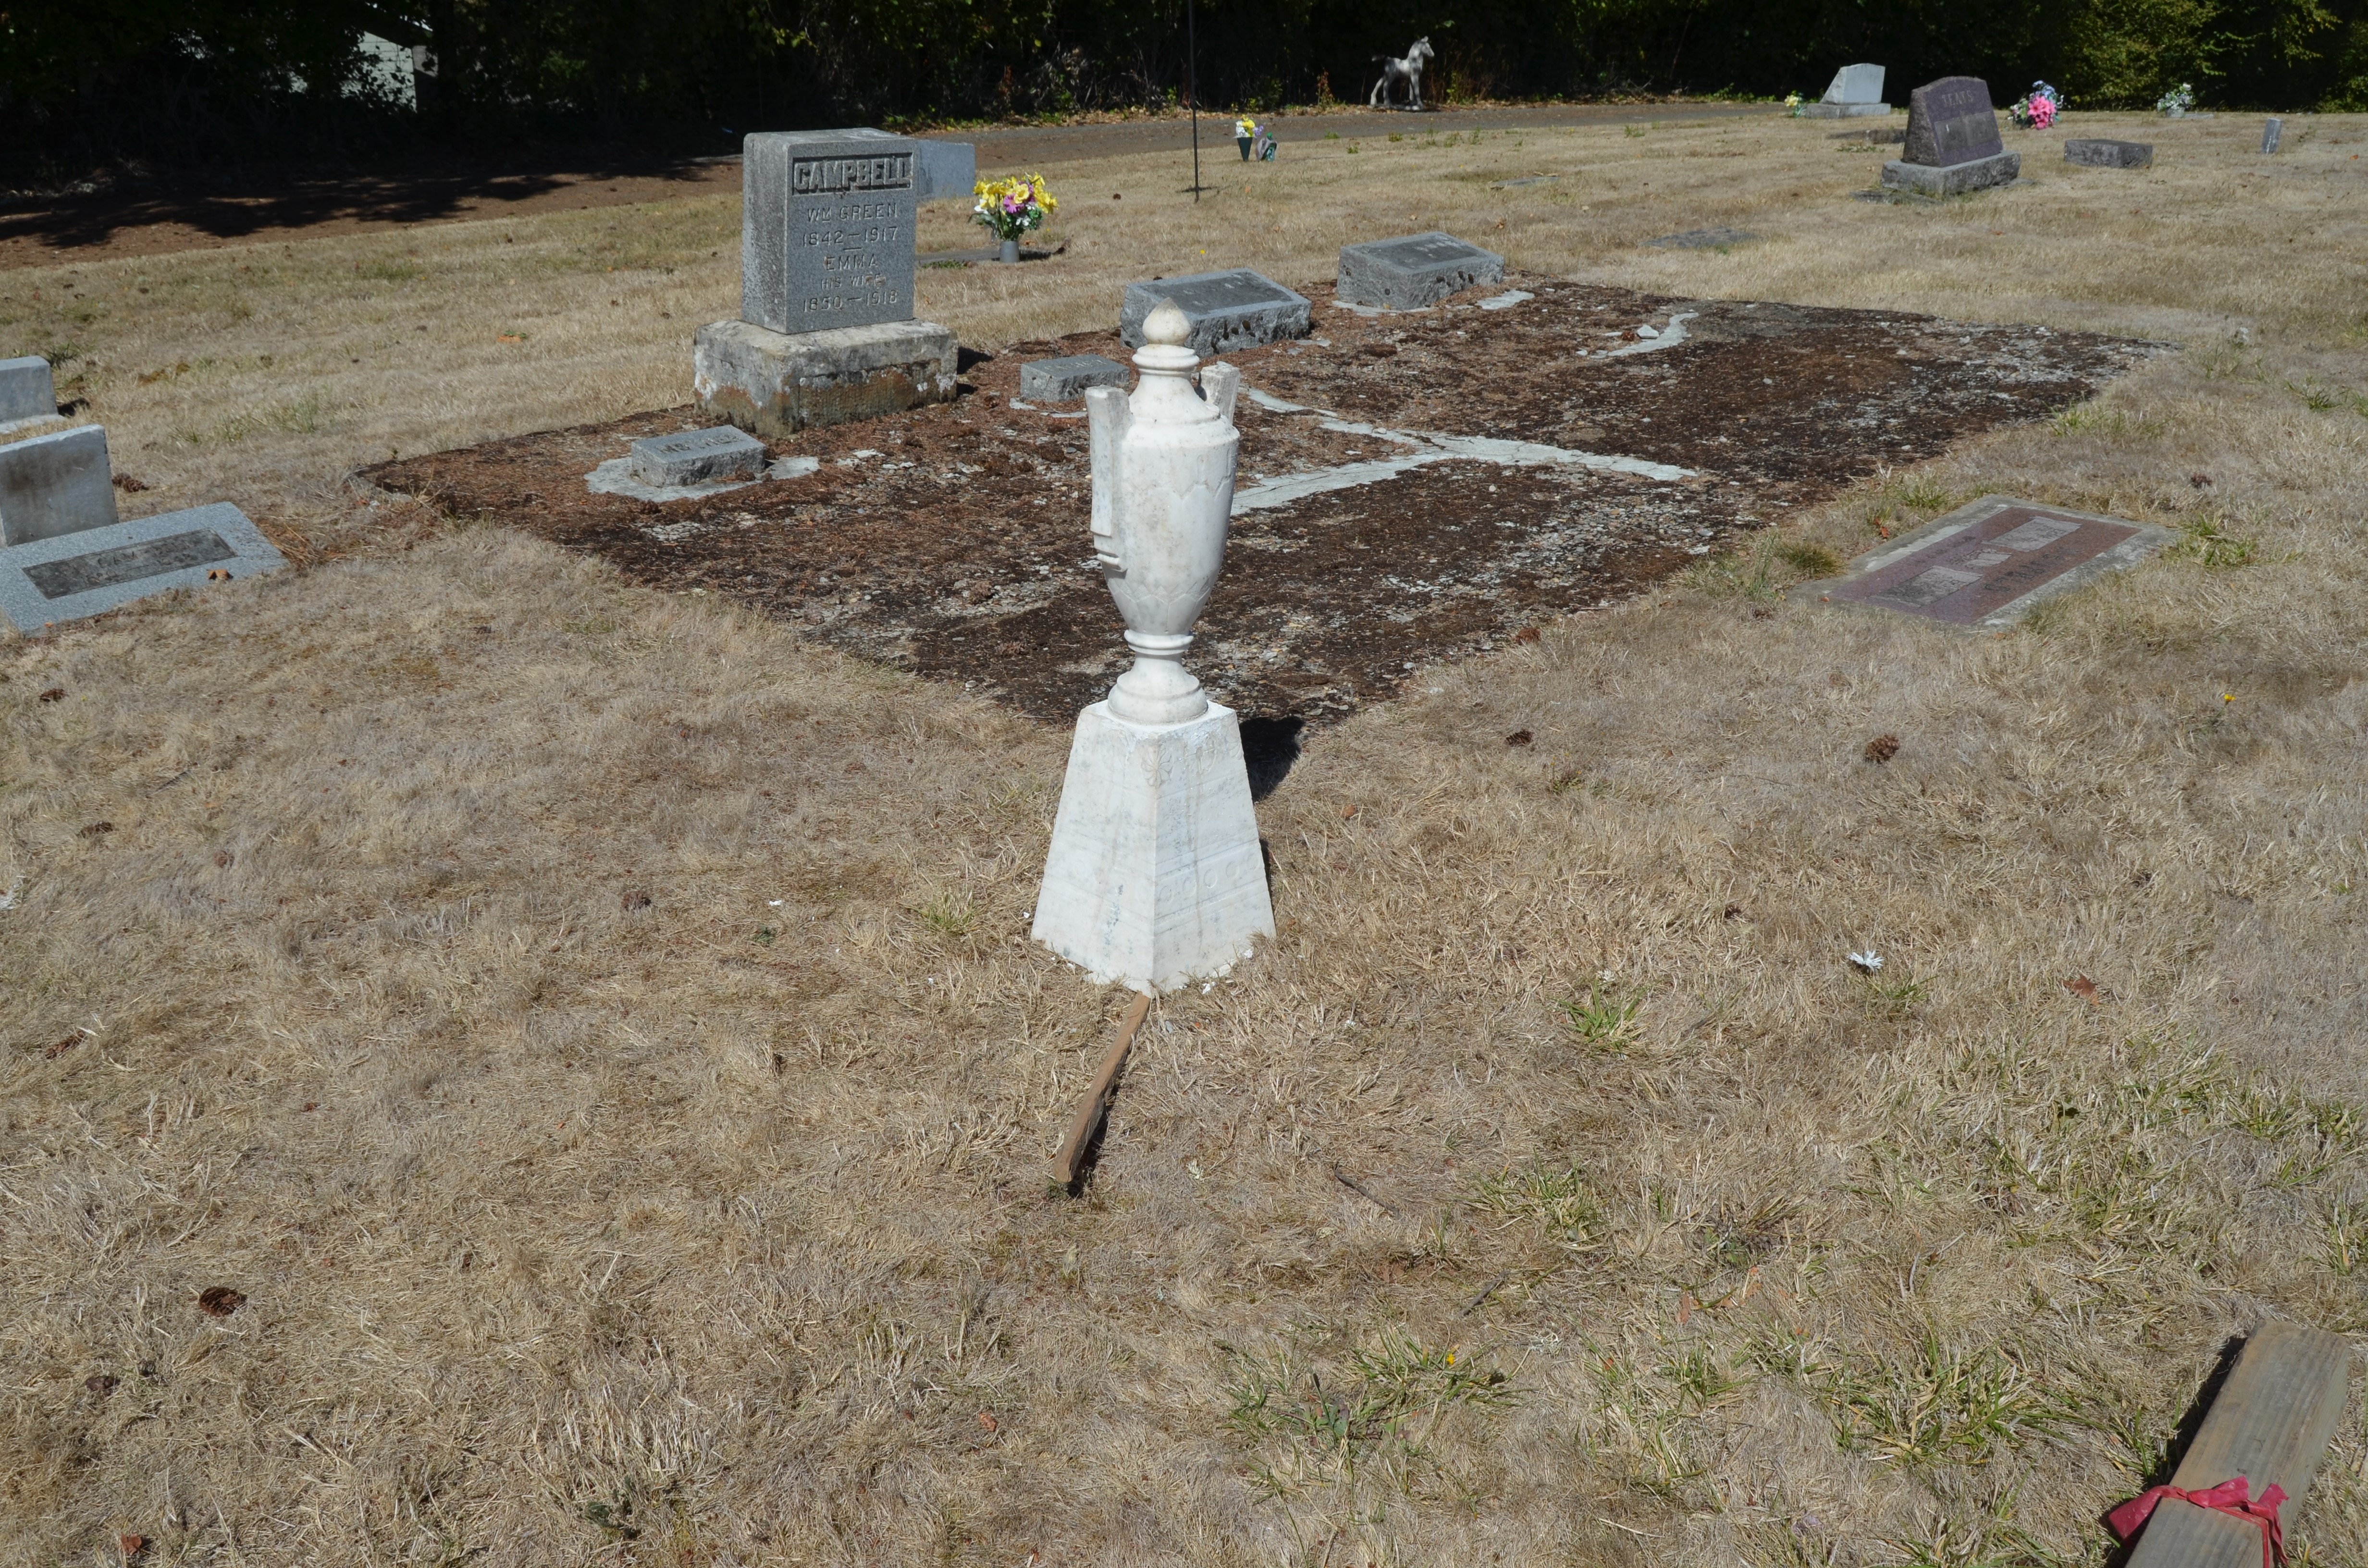
Monuments in the condition like the one to the left are common place in most cemeteries. They are quite often white and gray marble upper pieces placed on sandstone or other local quarried stone base. Many of these base stones are very decorative in nature like the one in the picture.
We will start with some smaller easier to manage 3 piece monuments that consist of an obelisk type top piece, followed by a small sub-base, followed by the larger base piece. Many of these procedures and techniques will repeat themselves as we address them in this section and we work up through larger monuments and different situations.
PRECAUTIONS AND OBSERVATIONS
This task should use a minimum of two persons well versed in the disassembly and reassembly of stone monuments. As with any work done on grave markers, small and large monuments must be carefully inspected before any work is started. Monuments, even though they are made of stone, are fragile. Over the years they may have developed damage from the environment. This damage could include delamination, stress cracks, and areas where water has infiltrated the stone and frozen causing larger cracks or other broken areas. Most monuments have fared better than their companion “tablet’ grave markers.
Inspect the monument. Determine which sections are loose. Measure the monument to determine the cubic volume of each piece. Make a plan for disassembly. Ensure you have enough wood to place under the sections. Keep them off of the ground. This step alone will make cleaning the joints easier as well as the individual pieces themselves.
For safety, you should always use at least two straps. Depending on the section you are lifting you will have to decide what type of lift to use. When you are lifting a section, stop when it is about 1/2 inch above the lower section. Ensure the piece is secure in its lift before proceeding. If the lift is uneven, reset the piece and adjust the straps until the piece is lifted straight up and balanced.
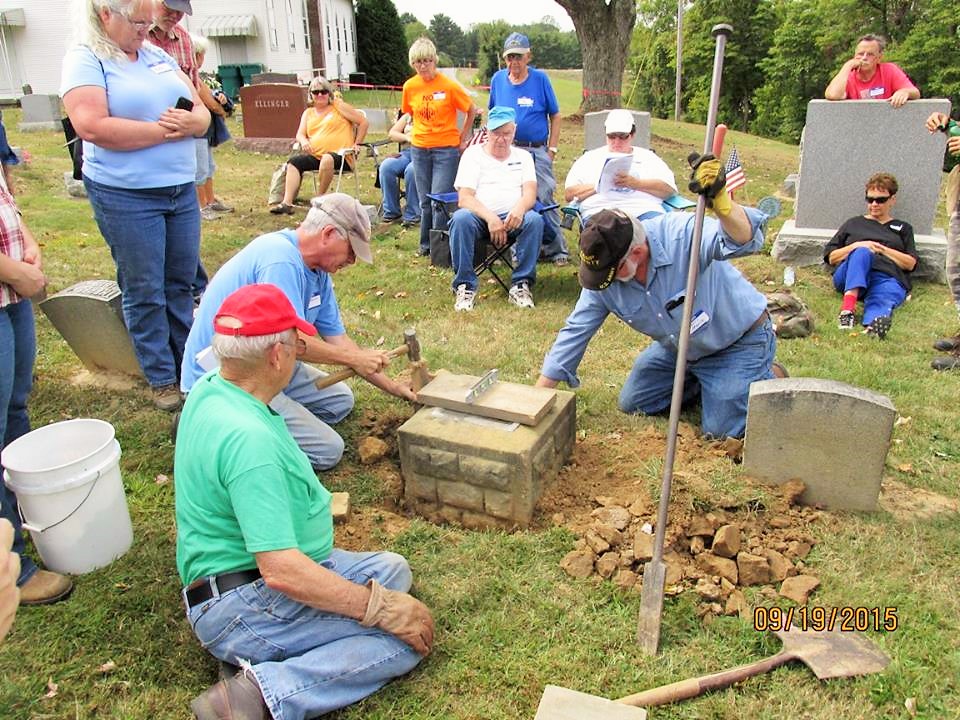
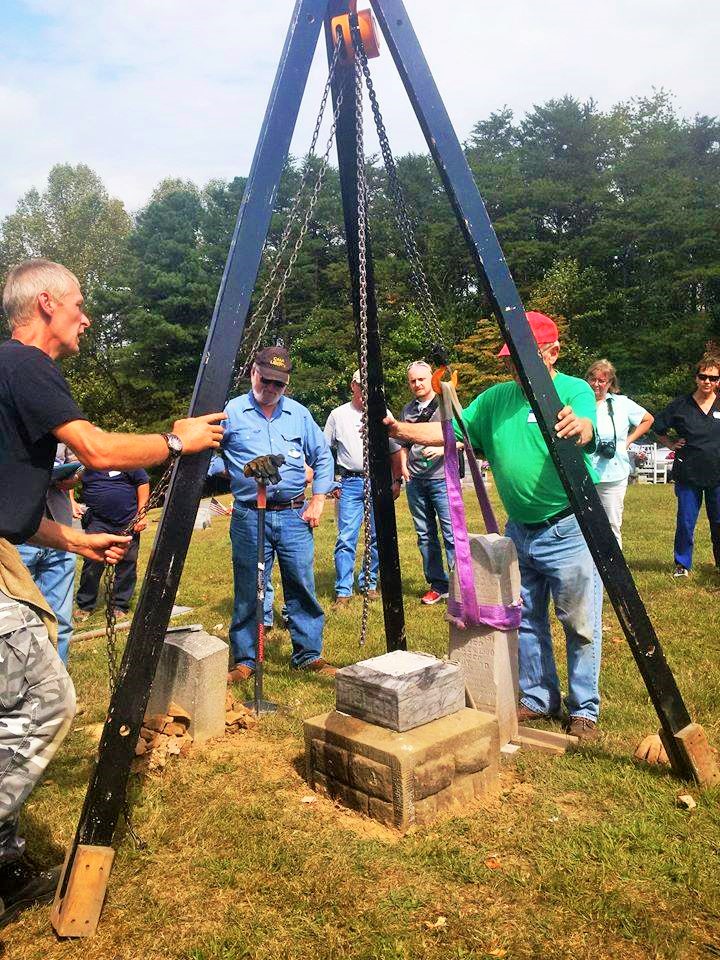
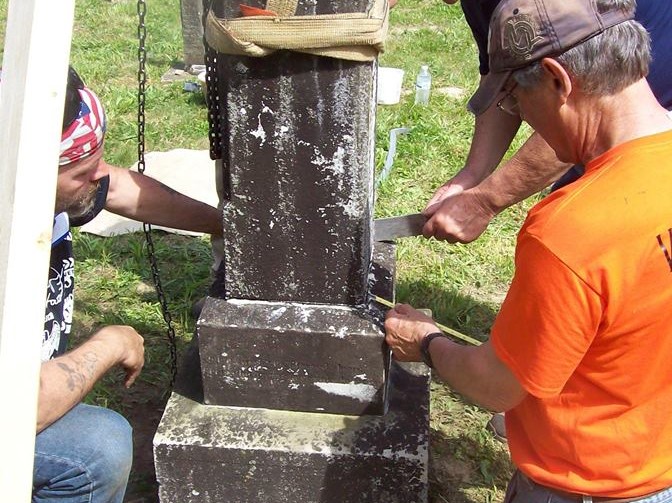
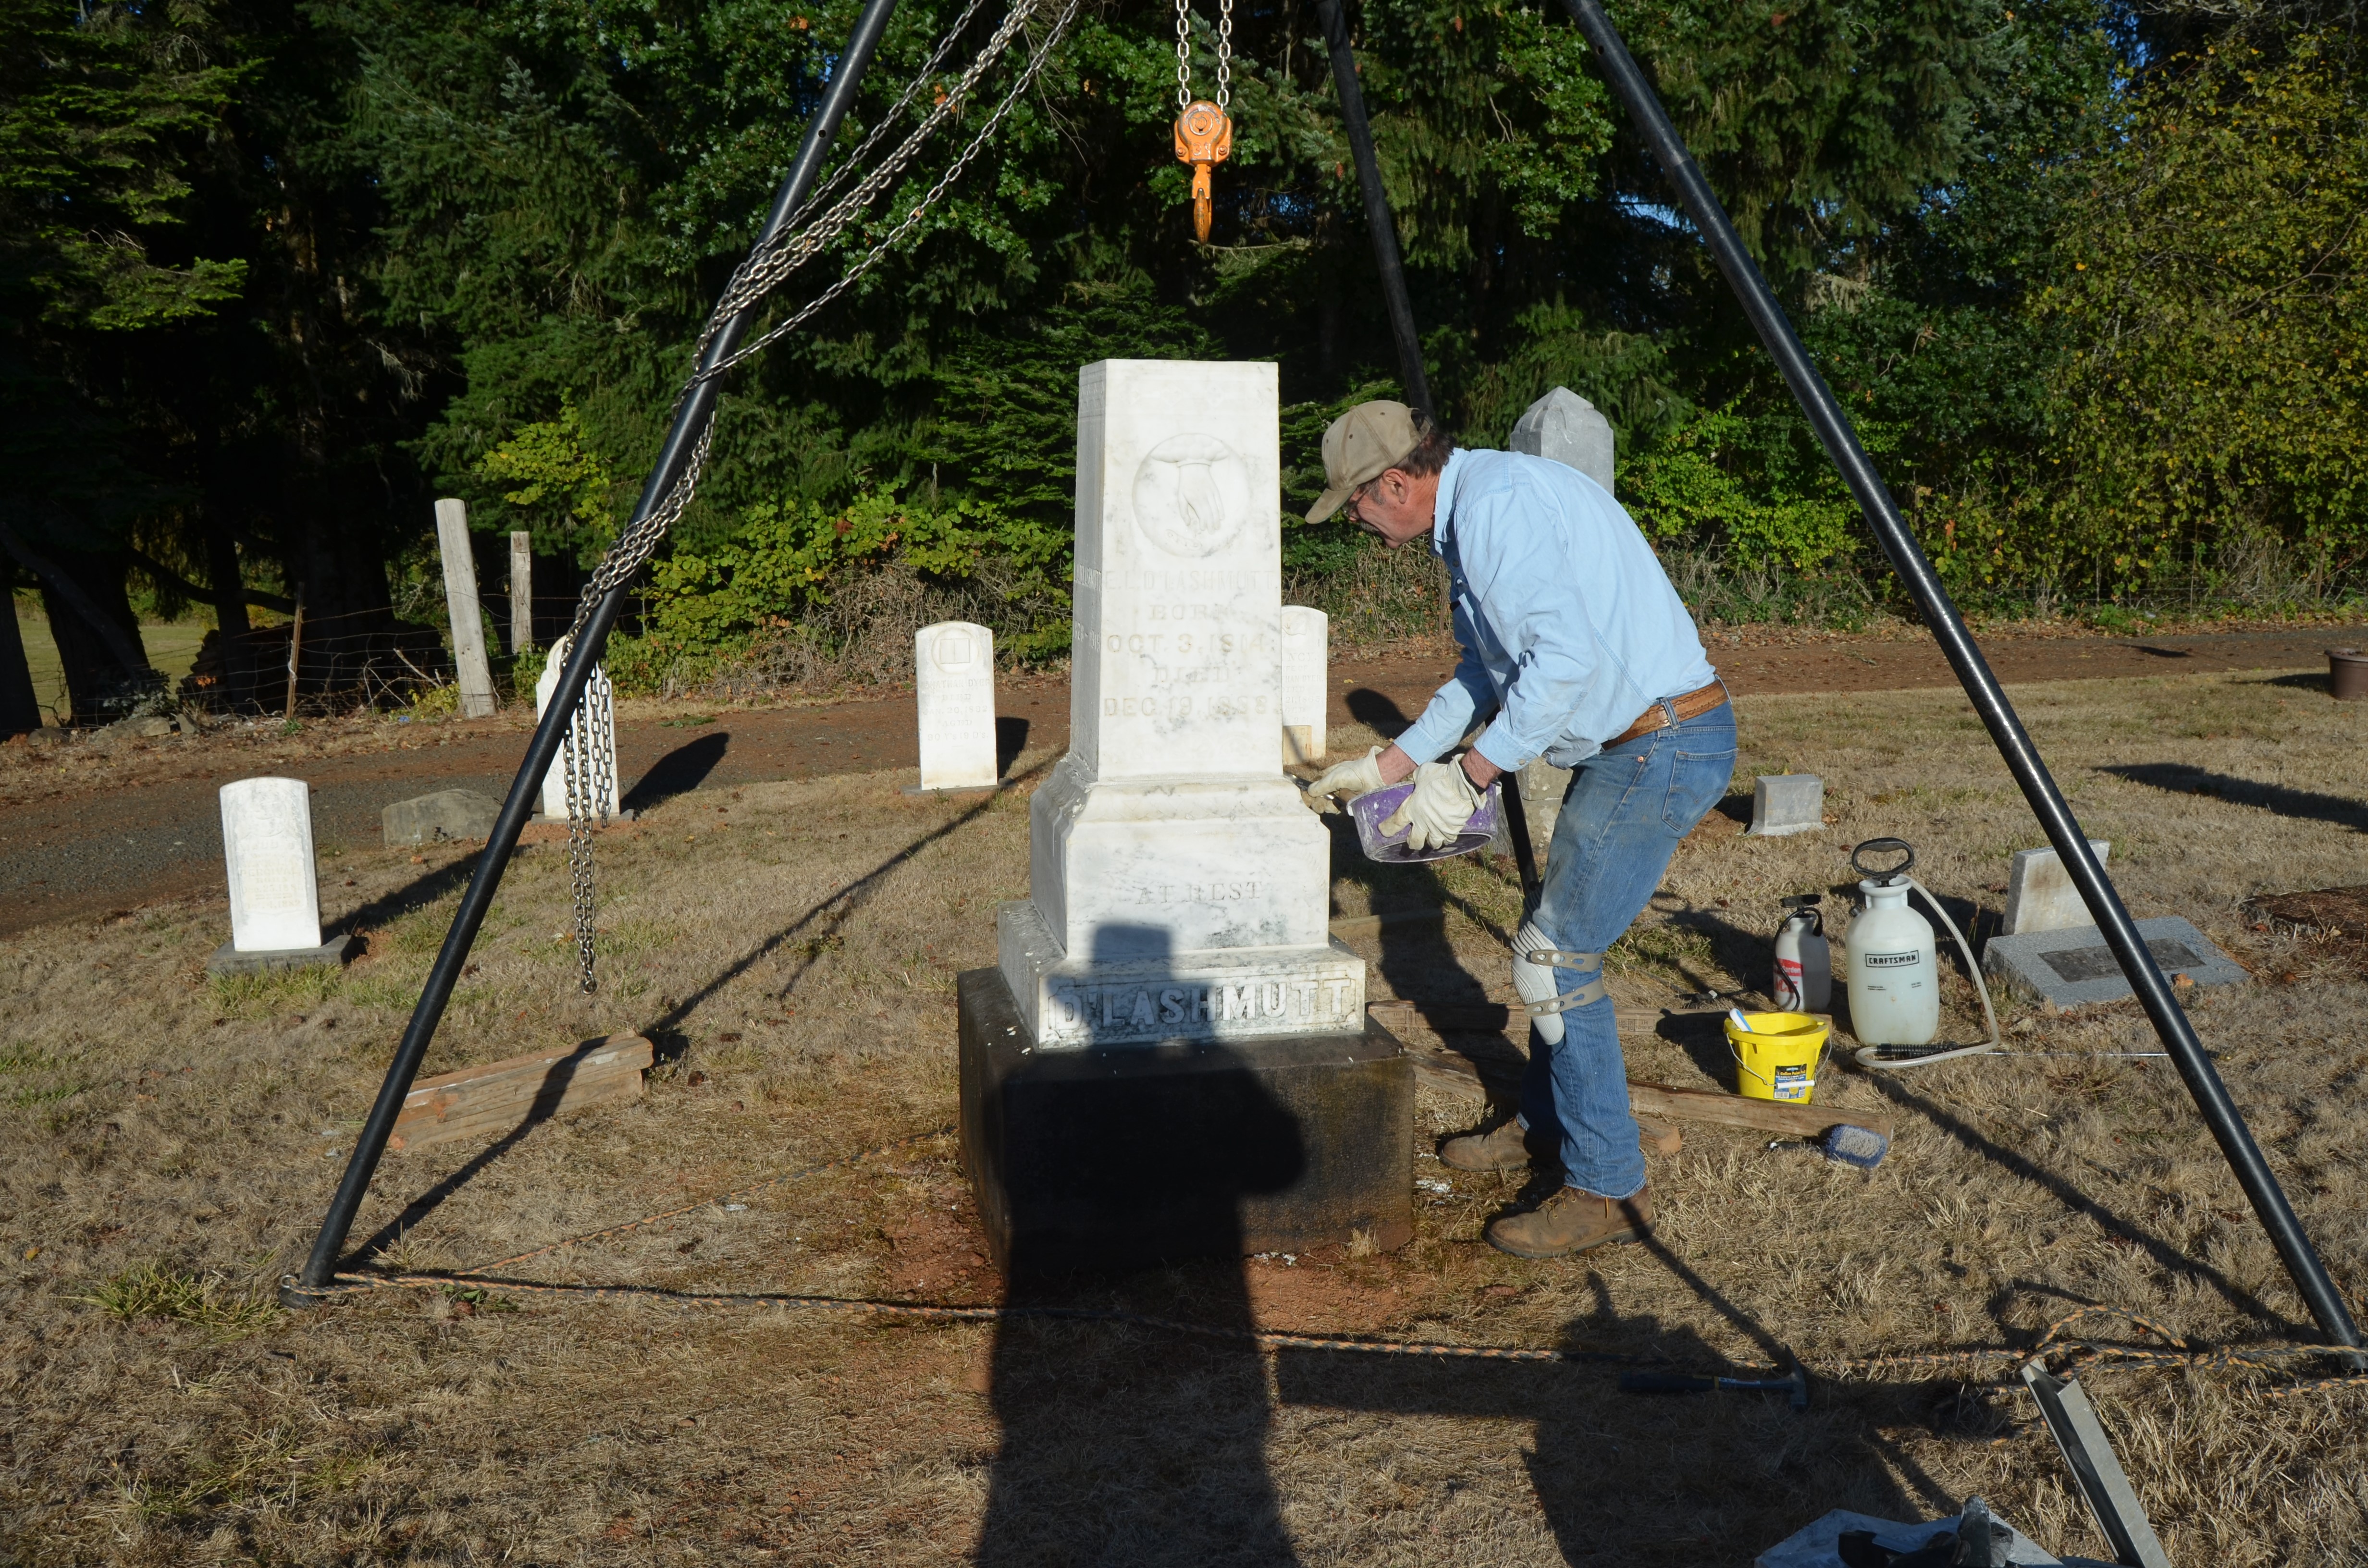
The monument first pictured, did not need its top obelisk piece removed, but like most all monuments, it needed its base readjusted and leveled. These gentlemen at a cemetery preservation class are doing just that. They have used the spud bar and wooden blocks to level the base with crushed rock/gravel, and are now tamping that and dirt into place. Notice they are keeping the level on the block as they work to keep themselves in check.
Working the bar to level the stone
This is a 2 person procedure for the most part. Experienced conservators can learn to work these smaller stones by themselves, but even they must take on an additional person as stones increase in size. In some situations 3 or 4 people are ideal. But having 2 people is always the safest way to go.
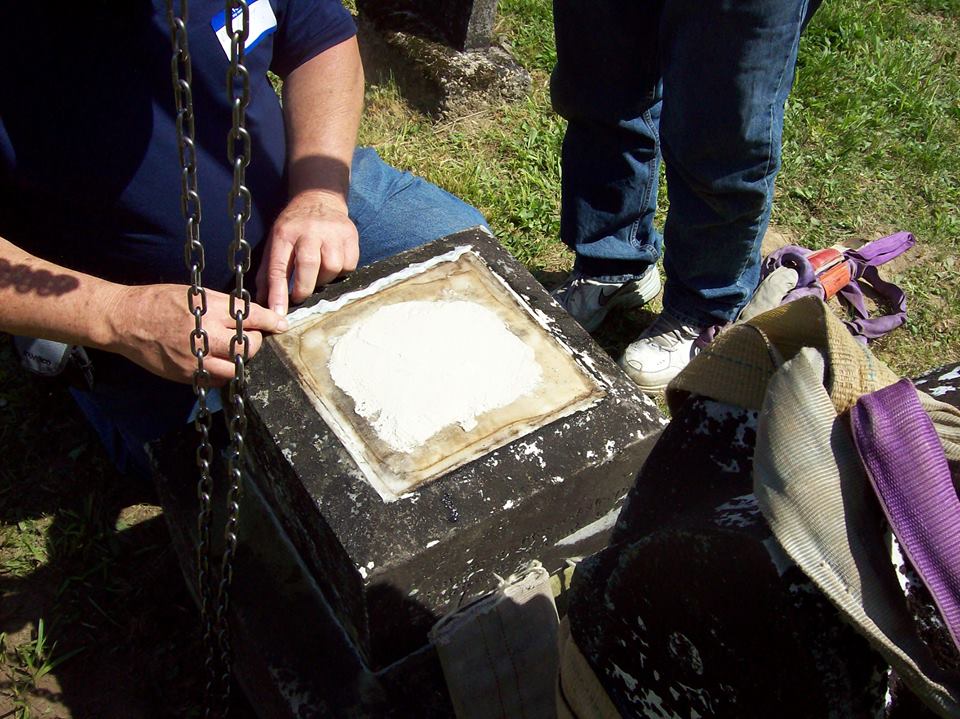
Once the base stone has been leveled, you can begin prepping its surface to accept the sub-base block. Clean all of the joints of the monument. Use a chisel if necessary, and use a wire brush to remove scale that the chisel leaves behind.The joints should be free of old material ,scale, and dust. Use the compressed air canister to blow the residue off of the joints.
Do not allow the wire brush to contact the exposed stone. It will scratch the exterior finish
After this step is completed, you can decide your method or combination of methods for reassembly. There are several widely accepted combinations that still remain in a “do no harm” manner to choose from. These combinations and methods will vary somewhat depending on a given state or areas accepted doctrine or guidelines, as you will find further down, for instance with Oregon. The following methods and combinations are ones widely accepted throughout the Midwest. Below are recipes for the most widely used.
The first method is to reassemble the pieces with a thin layer of lime mortar sometimes known as “stack mix”.
Natural Hydraulic Lime, 3.5 or 5, “with added color and fine aggregate if you so choose”. Using NHL 3.5 or 5 is often the preferred choice for convenience of being ready made and for quality of ingredients. Natural Hydraulic Lime is considered a historic mortar.
Or there is a homemade “Stack Mix” recipe that calls for 1 part white Portland cement and 3 parts hydrated lime. The theory here being that the hydrated lime proportion keeps the Portland cement
from becoming too hard so as to not damage the stones. This alternative recipe is at the bottom of the scale for acceptability and will depend on the quality of your hydrated lime and proper mix proportions.
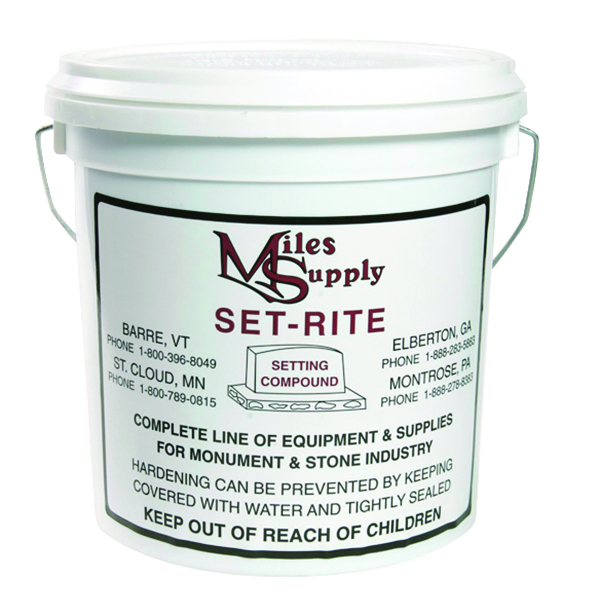
All agree some portion of lime mortar is needed, at least across the overall center contact point. But at this juncture, many do not agree, and some strongly disagree with using a monument setting compound such as SET – RITE for monuments that are not made of granite. This putty like material is designed to create a seal between the monument pieces to keep out water and to aid in adhesion between the stones. The problem many are finding has to do with porous non-granite stones. Porous stones will pull out the oiliness of this setting compound, and in turn transfer these unwanted and possibly harmful byproducts into the stone. While at the same time only serving to dry out the setting compound, rendering its function useless over time. We are addressing this at this point because many still use and teach this as part of the multi-piece reassembly process. At this time we are gathering more finite factual information to make a better conclusive determination. You can read more on this discussion under PRO VS CON…Bonding Agents and under SOURCES…Pro VS Con Results.
Many are simply choosing to use an NHL 3.5 or NHL 5 mortar or mortar mix all across the contact surface. And when it comes to the much larger heavier marble and sandstone monuments, some are choosing to use NHL 5 for a better bond between heavier pieces. Some are also choosing to use a couple of spots of epoxy at the centers of contact, with a mortar around the outer contact points. This can be tricky to do, because wet mortar and epoxy do not work if mixed together. So keeping the two separate during reassembly can be problematic. There is also a lot of controversy towards epoxies all together because of a lack of permeability and issues with permanence. You can read more on this discussion under PRO VS CON…Bonding Agents and under SOURCES…Pro VS Con Results.
Thoughts on taking this step are mixed. It can be difficult to work with because to do so, you must be able to set the stone directly straight down level and square, or risk your compound shifting. At this point you have to start all over again. These types of compounds have a very limited shelf life and begin to dry out as soon as you open the container. Other conservators who are more purist don’t like the oils in the compounds and would just rather use lime mortar alone.
So whether you use mortar and setting compound or just mortar, you still need lead spacers commonly known as “lead wedge”. Cut and place lead spacers, no more than 1/4 inch thick under each corner about 1 inch from the edge. These serve three purposes. First they keep the section from slipping and, second, they allow for adjustment of the section to level it. Third, the spacers allow a gap between the sections so the setting material can adhere to both sides of the joint.

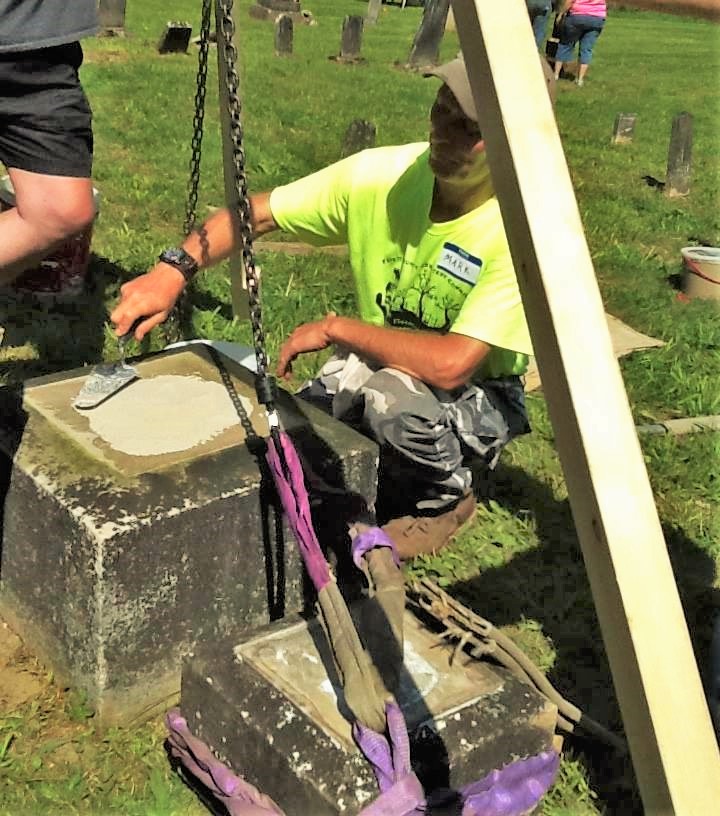
After you have determined your method of reassembly with mortar and lead wedges in place, it is time to put this small 3 piece back together starting with the sub-base then the top obelisk piece. Note: in both pictures above you will see 2 pieces of flattened firehose leaned against the base & sub-base. These are there to cushion for stone to stone contact and guard against damage. You will find this item listed below under RECOMMENDED TOOLS AND MATERIALS
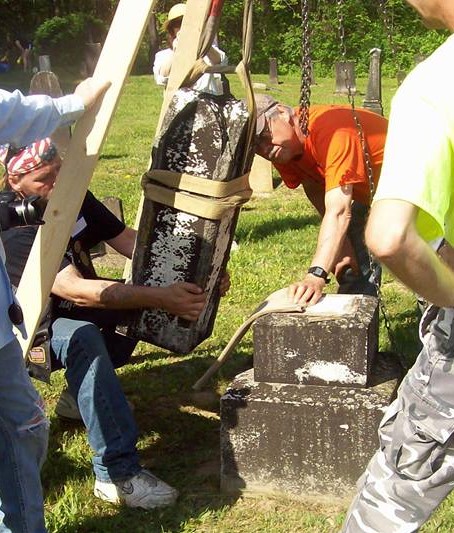

Setting the top obelisk type piece straight down using mortar and setting compound
Taking those last measurements on all 4 sides of the blocks to ensure the pieces are square in relation to each other. Quite often you will find these stone blocks themselves are not entirely square. Keep this in mind as you reassemble them and adjust accordingly. At this point the main goal has been achieved concerning all things being level and with no lean. These last adjustments in relation to being square are more for aesthetics.
The two small 3 piece monuments in this example did not contain any metal pins and all of the pieces were loose. If metal pins were discovered they would have been removed. This removal process is discussed further down in this section on the large 7 piece monument from Oregon. Old cast iron pins rust and cause swelling that can crack the stone or force it apart over time. There are two schools of thought when it comes to replacing them. Some replace them as you will find in the next section. Others mortar or epoxy over the holes after the pins are removed. Either method is generally acceptable, but again will pertain to doctrines and/or guidelines set by a given organization or state.
Your finished product
Working With a Larger Multi – Piece Monument
The disassembly, repair, reassembly, resetting, and plumbing of a large multi-piece monument is very dangerous. It should only be done by experienced conservators with proper equipment and training.
A novice should not attempt any of the procedures contained in this standard.
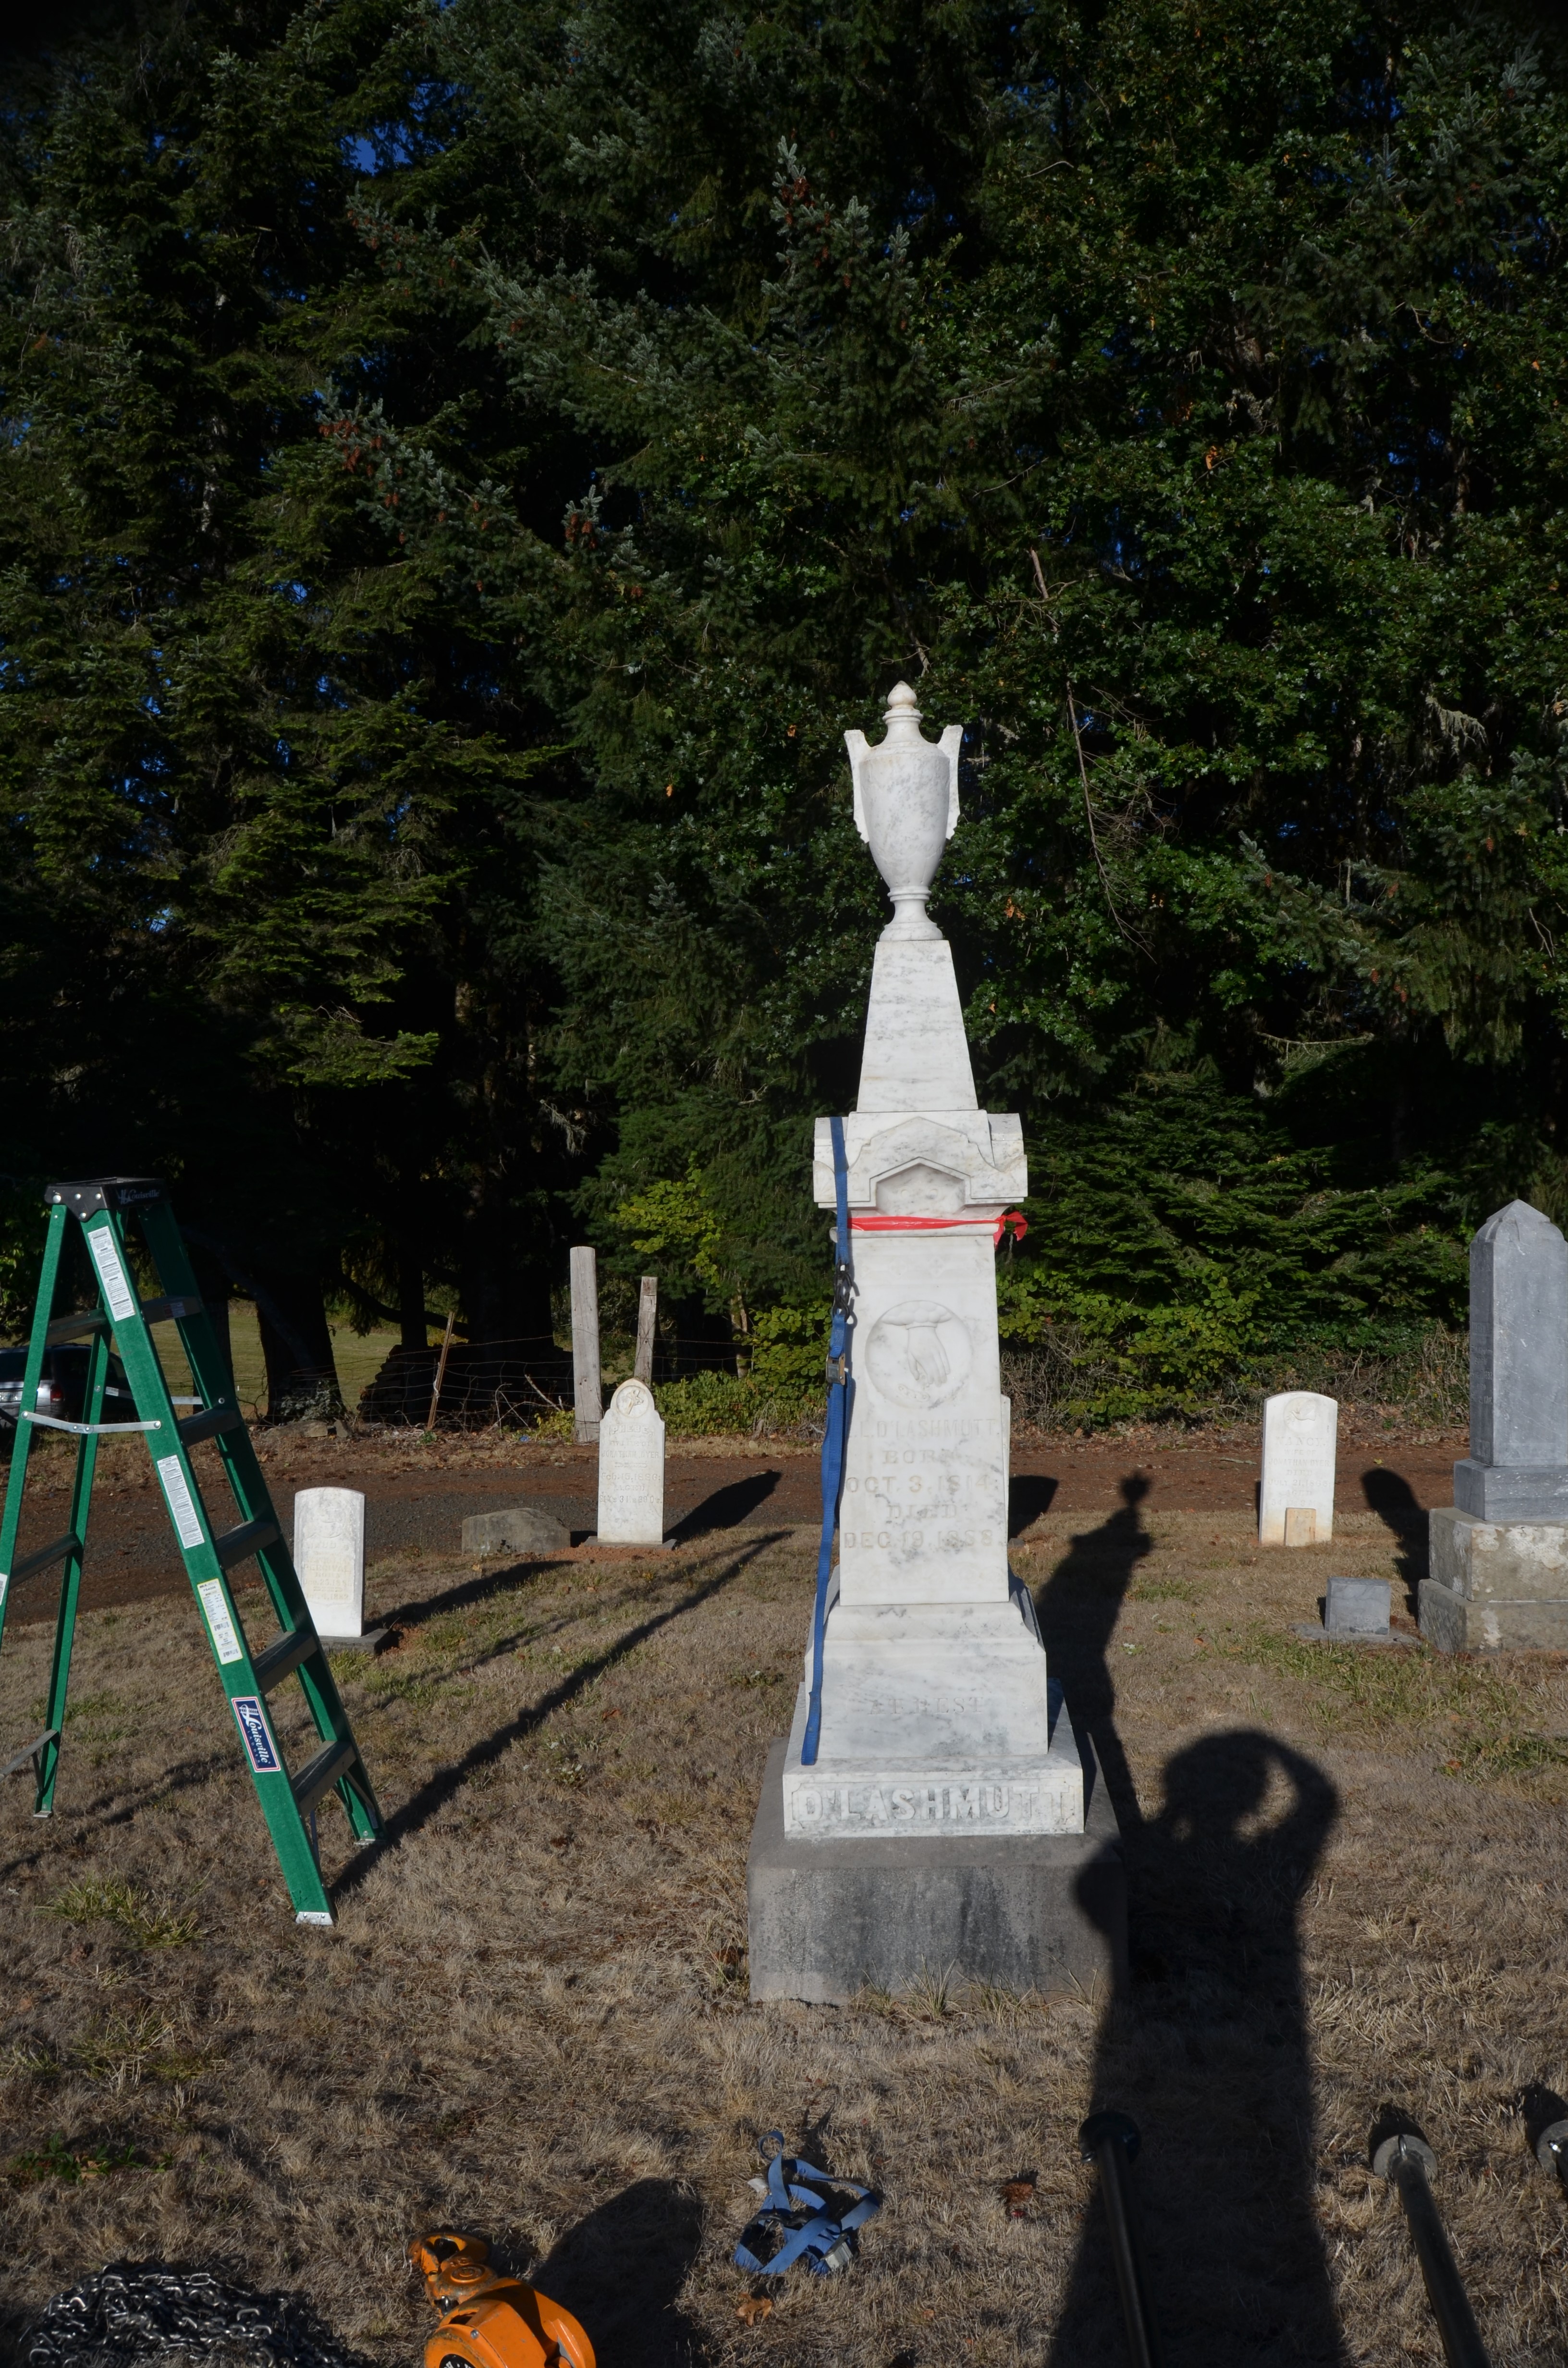
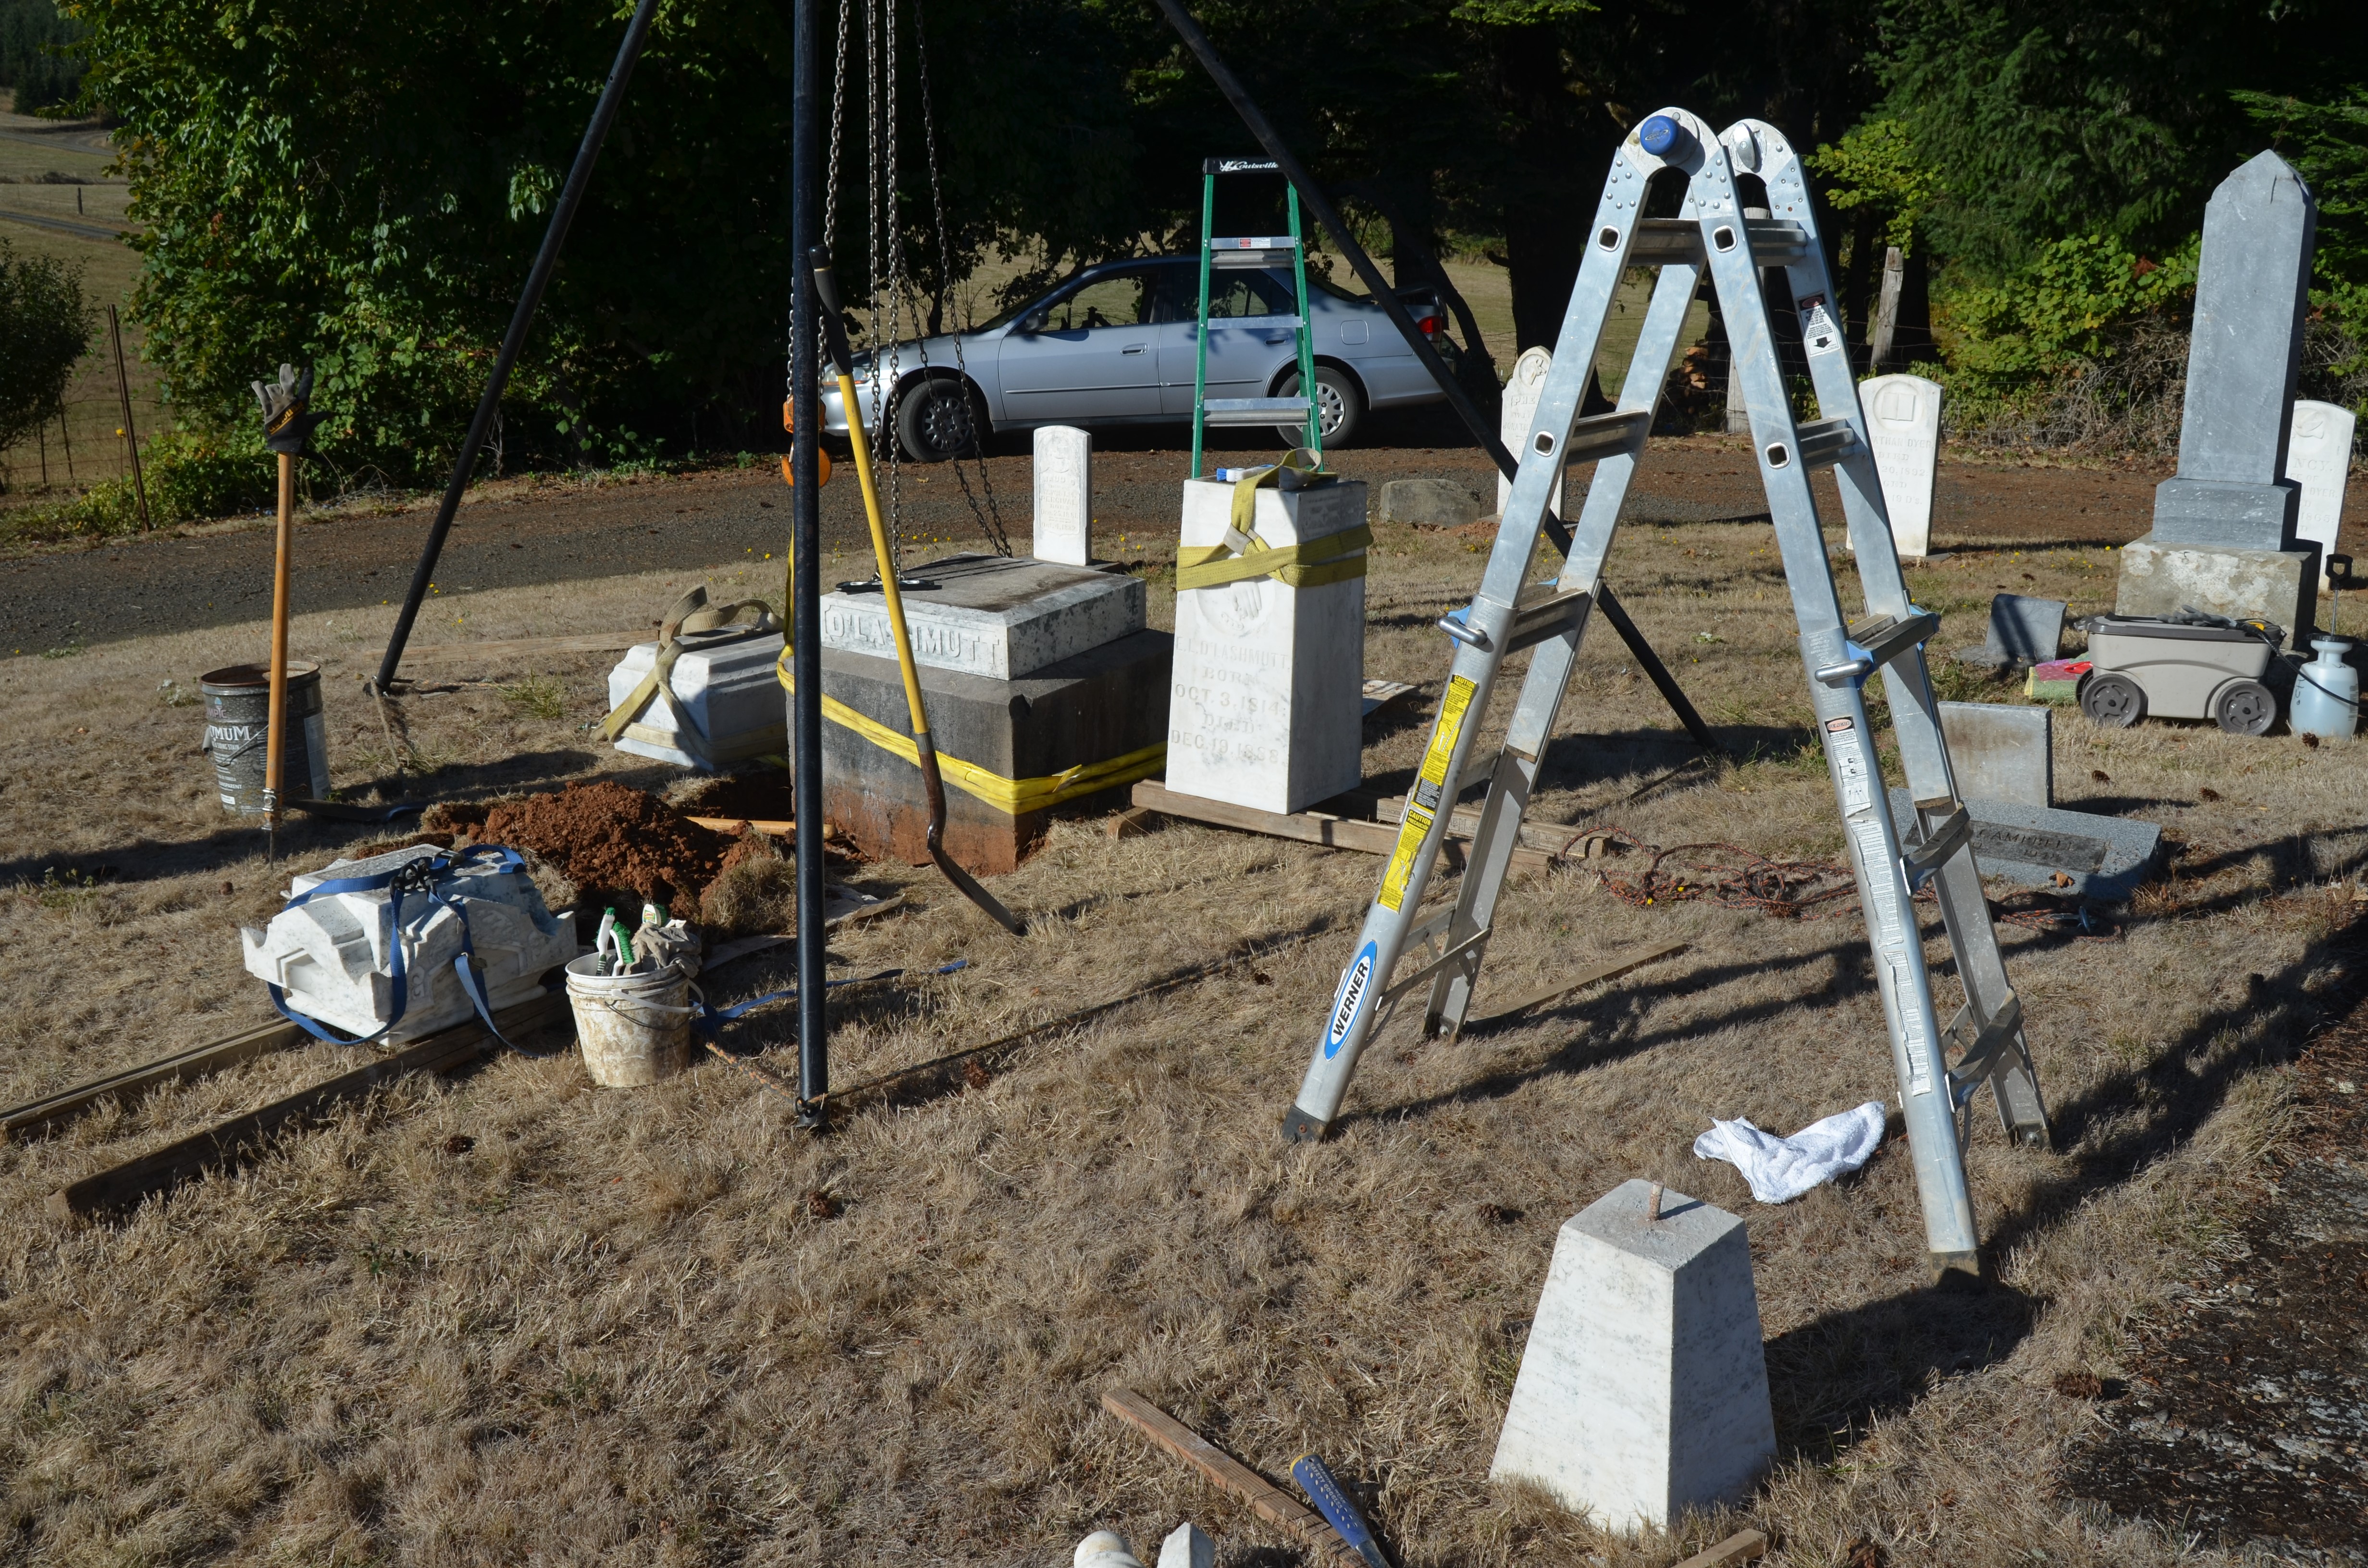
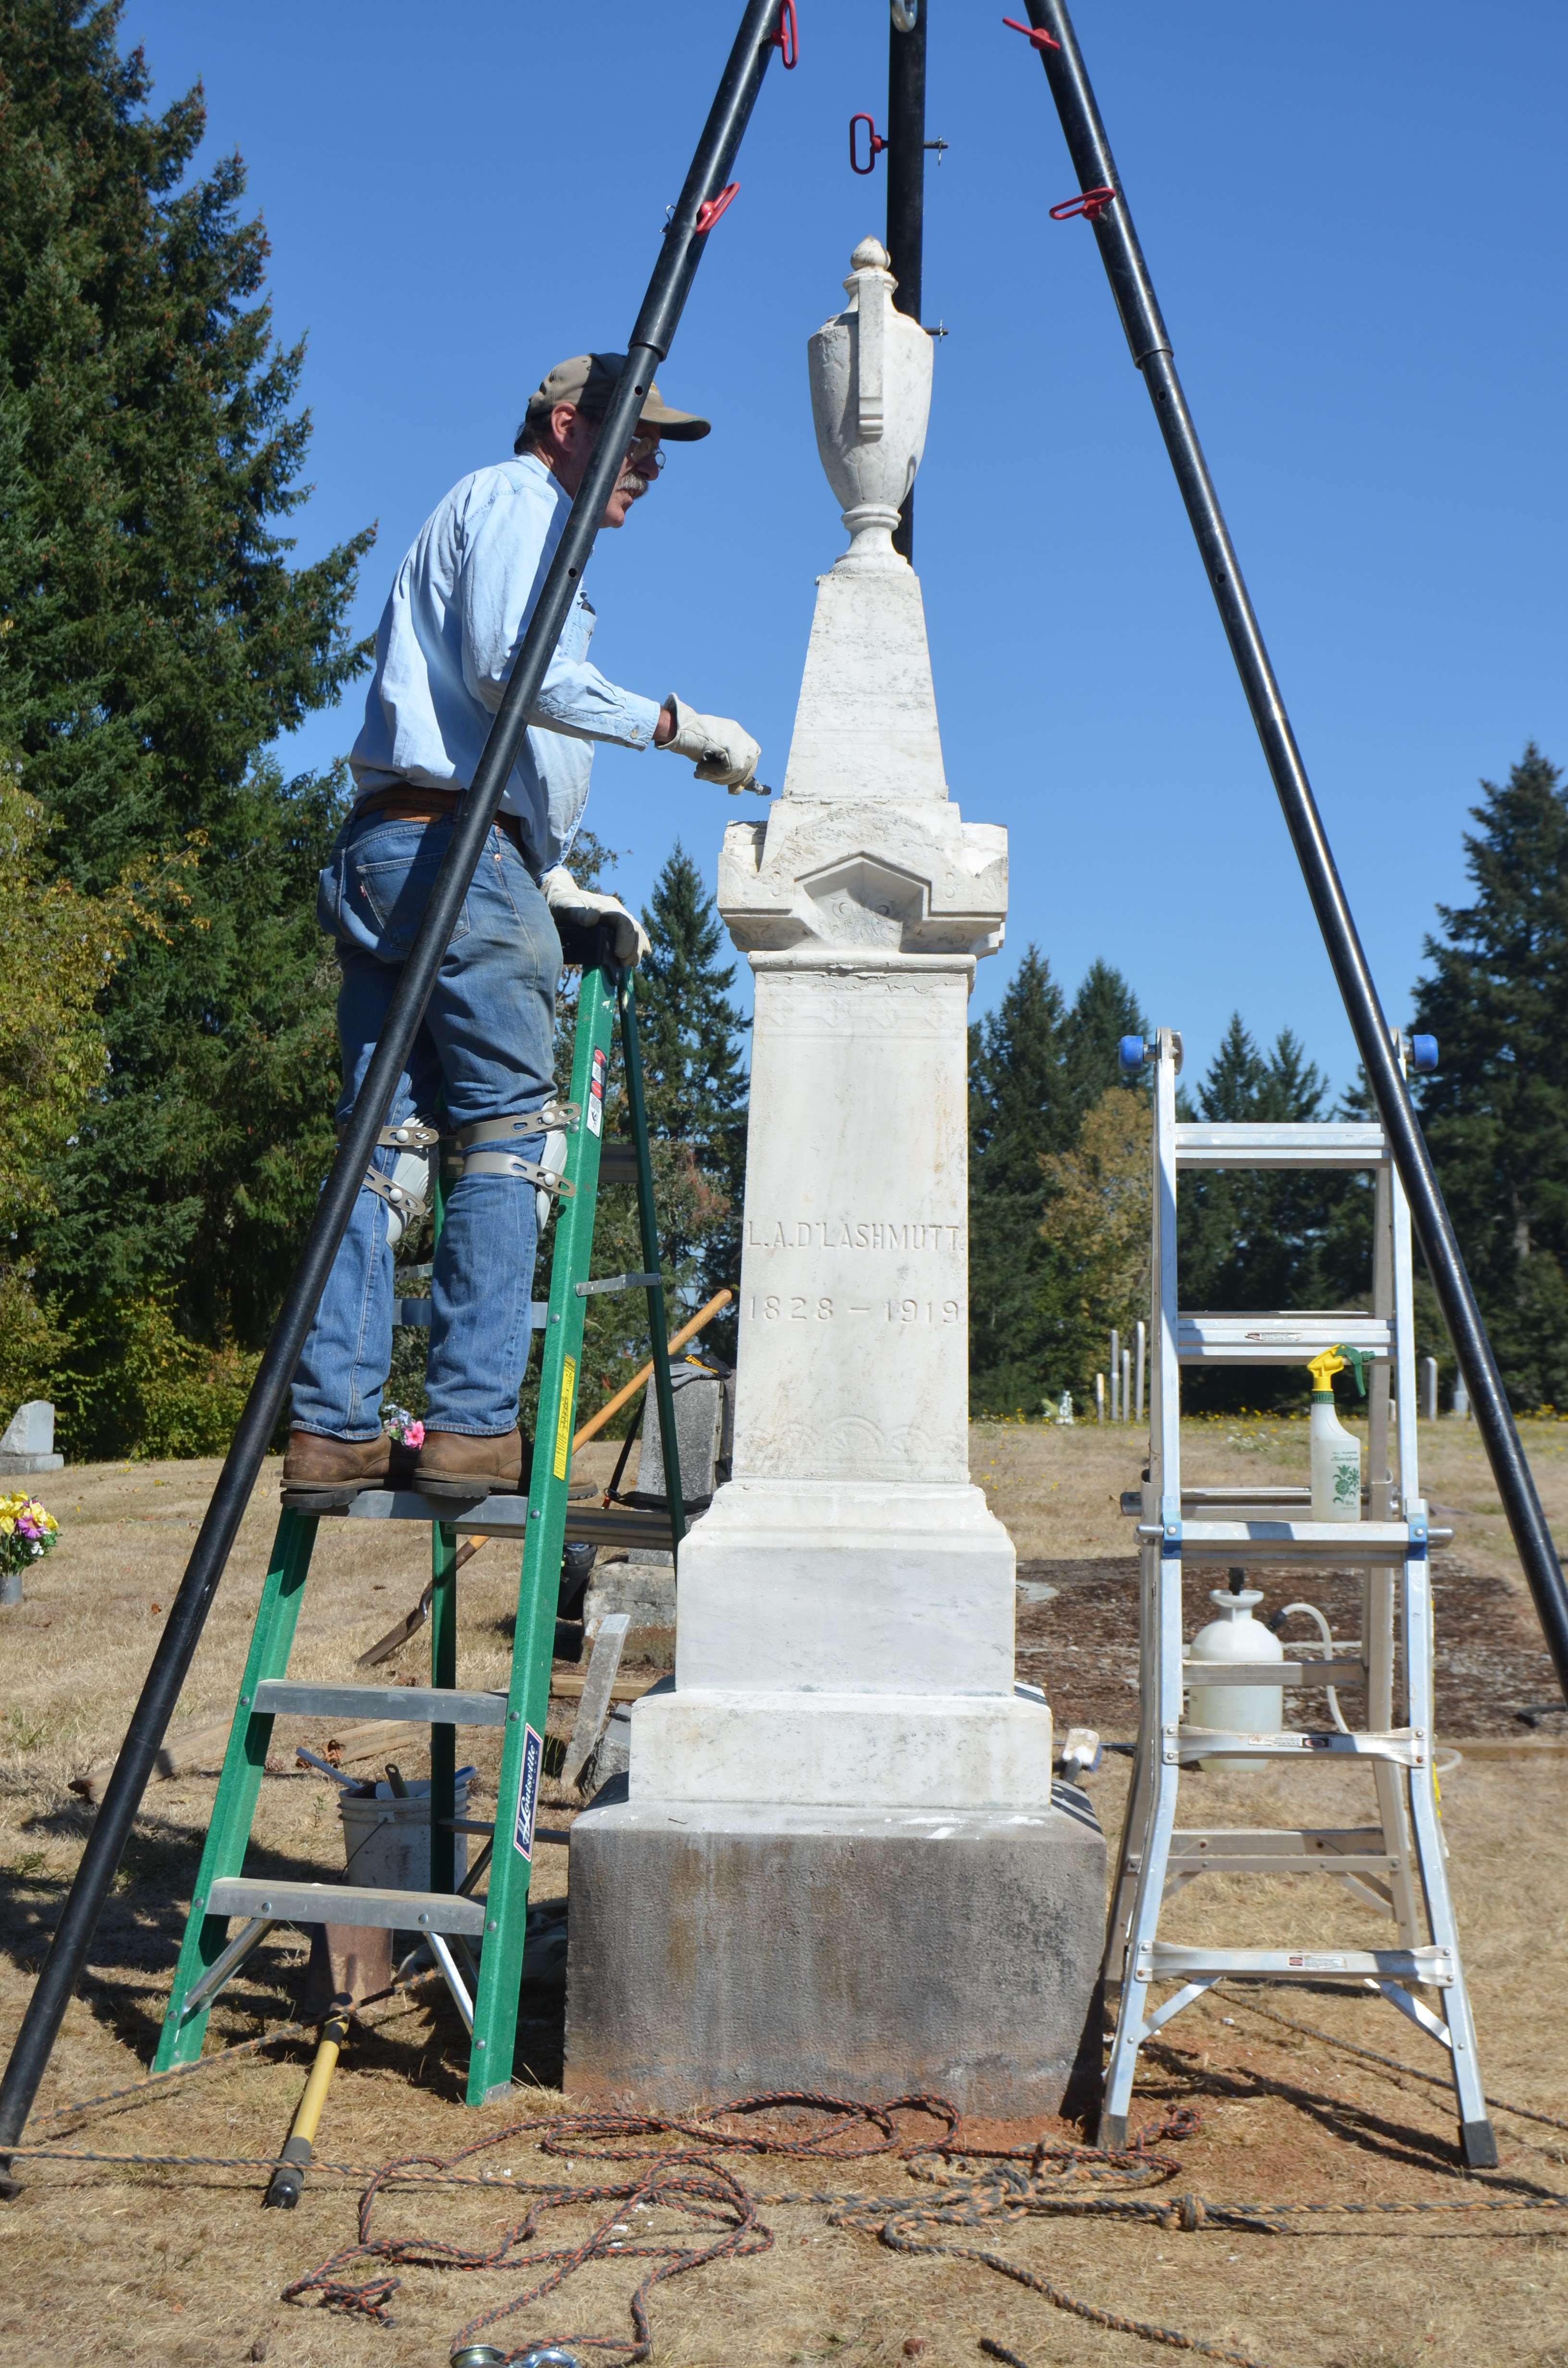
This section of the document will define the procedures and methods used to repair the seven piece monument pictured below.
These procedures and methods have been previously detailed. They will be mentioned again in this section for further clarity, and as a reminder.
This monument is made of white sandstone. It is almost nine feet high. It is estimated to weigh over 2600 pounds not including the base. The base is a block of grey sandstone, slightly less than nine cubic feet. The joints between all seven pieces are loose. It is slightly off plumb.
PRECAUTIONS AND OBSERVATIONS
As previously mentioned this task should use a minimum of two persons well versed in the disassembly and reassembly of stone monuments. As with any work done on grave markers, the large monument must be carefully inspected before any work is started. Monuments, even though they are made of stone, are fragile. Over the years they may have developed damage from the environment. This damage could include delamination, stress cracks, and areas where water has infiltrated the stone and frozen causing larger cracks or other broken areas. Most monuments have fared better than their companion “tablet’ grave markers.
Inspect the monument. Determine which sections are loose. Measure the monument to determine the cubic volume of each piece. Sandstone weighs about 170 pounds per cubic foot. Make a plan for disassembly. Ensure you have enough wood to place under the sections. Keep them off of the ground. This step alone will make cleaning the joints easier.
RECOMMENDED TOOLS AND MATERIAL
TOOLS
Before we start the disassembly we will cover the materials and tools needed for this task. Below is a list of possible tools you may need when repairing multi-piece monuments.
tarp
tripod or lifting apparatus
lifting straps
lead wedge
chain hoist
eight or ten 2 X 4 X 6 ft. sections of wood
ladders
firehose
gloves
shovels
crushed rock
setting mix
mixing pan
trowels
24 inch level
wire brush
wooden wedges with rubber backing
clean water
buckets
cleaning brushes
chisels
wooden mallet
eye protection
sponge
Orvus soap
pump sprayer w/water
plastic scrapers
compressed air
D/2
hard hats
steel toe boots
12 inch strap spreader
pointing tool
rebar (24 in)
steel bar (1/8 X 1 X 24 in.)
You should have several sets of different length lifting straps as well as adjustable tie-down straps.
SETTING MATERIAL
Natural Hydraulic Lime, 3.5 or 5, manufactured by Saint Astier®, “with added color and fine aggregate if you so choose”. Using NHL 3.5 or 5 is often the preferred choice for convenience of being ready made and for quality of ingredients. Natural Hydraulic Lime is considered a historic mortar.
Monument setting compound such as set SET-RITE. This putty like material creates a seal between the monument pieces to keep out water and to aid in adhesion between the stones.
However, recommended material used to infill headstones varies by State and National Organizations. Check your State and/or local requirements for their list of setting materials.
For instance, the material shown below is specified for use in Oregon.
Oregon “STACK MIX” Mortar for Resetting Stacked Markers with Multiple Components 1 part white Portland Cement (recommended: ASTM C-150. Type 1) 3 parts Hydrated Lime (recommended ASTM C-207, Type S) Clean water, use sparingly, mixture should be very stiff.
There is a commercial product available special ordered from Home Depot, that with added lime, closely matches Oregons’ recommendation. We have received permission to use this.
Quikrete White Glass Block Mortar Mix with 5 parts added hydrated lime. This type “S” mortar mixture consists of 2 parts White Portland Cement, 1 part lime and 9 parts fine white sand. (12 parts) By adding the extra lime, three extra parts, the mixture is very similar to the state recommended mix. The added aggregate weakens the mix slightly.
Mix ratio… add slightly less than 1 cup of hydrated lime to two cups of the Quikrete mortar mix.
DISASSEMBLY
For safety, you should always use at least two straps. Depending on the section you are lifting you will have to decide what type of lift to use. When you are lifting a section, stop when it is about 1/2 inch above the lower section. Ensure the piece is secure in its’ lift before proceeding. If the lift is uneven, reset the piece and adjust the straps until the piece is lifted straight up and balanced.
For the top section you need a safe lift to protect the top heavy urn. For the top hat section under the tapered base of the urn, a cradle lift is a safe type of lift. Cross the straps if possible to prevent one from slipping off. For the tall center section a dual choke lift can be used providing the straps do not slip on the stone. If the straps slip, use the wooden wedges between the straps and the stone. The rubber backing will grip the stone and the straps will tighten up around the wedges. If the straps still slip you will need to place a third strap under the piece and fasten it to the choker straps. You can do this carefully by placing wood spacers under the piece as you lift it and slipping a strap under the section. Most smooth tapered monuments made of marble and granite will require the third strap to prevent slippage. Place wood between the section being removed and the rest of the monument. Allow the piece to slide down on the wood to prevent any contact between the section being removed and the remaining pieces of the monument. This will prevent any damage from the two pieces scraping against each other.
Always check a lift to ensure there is no strap slippage and that the piece being lifted is balanced before proceeding.
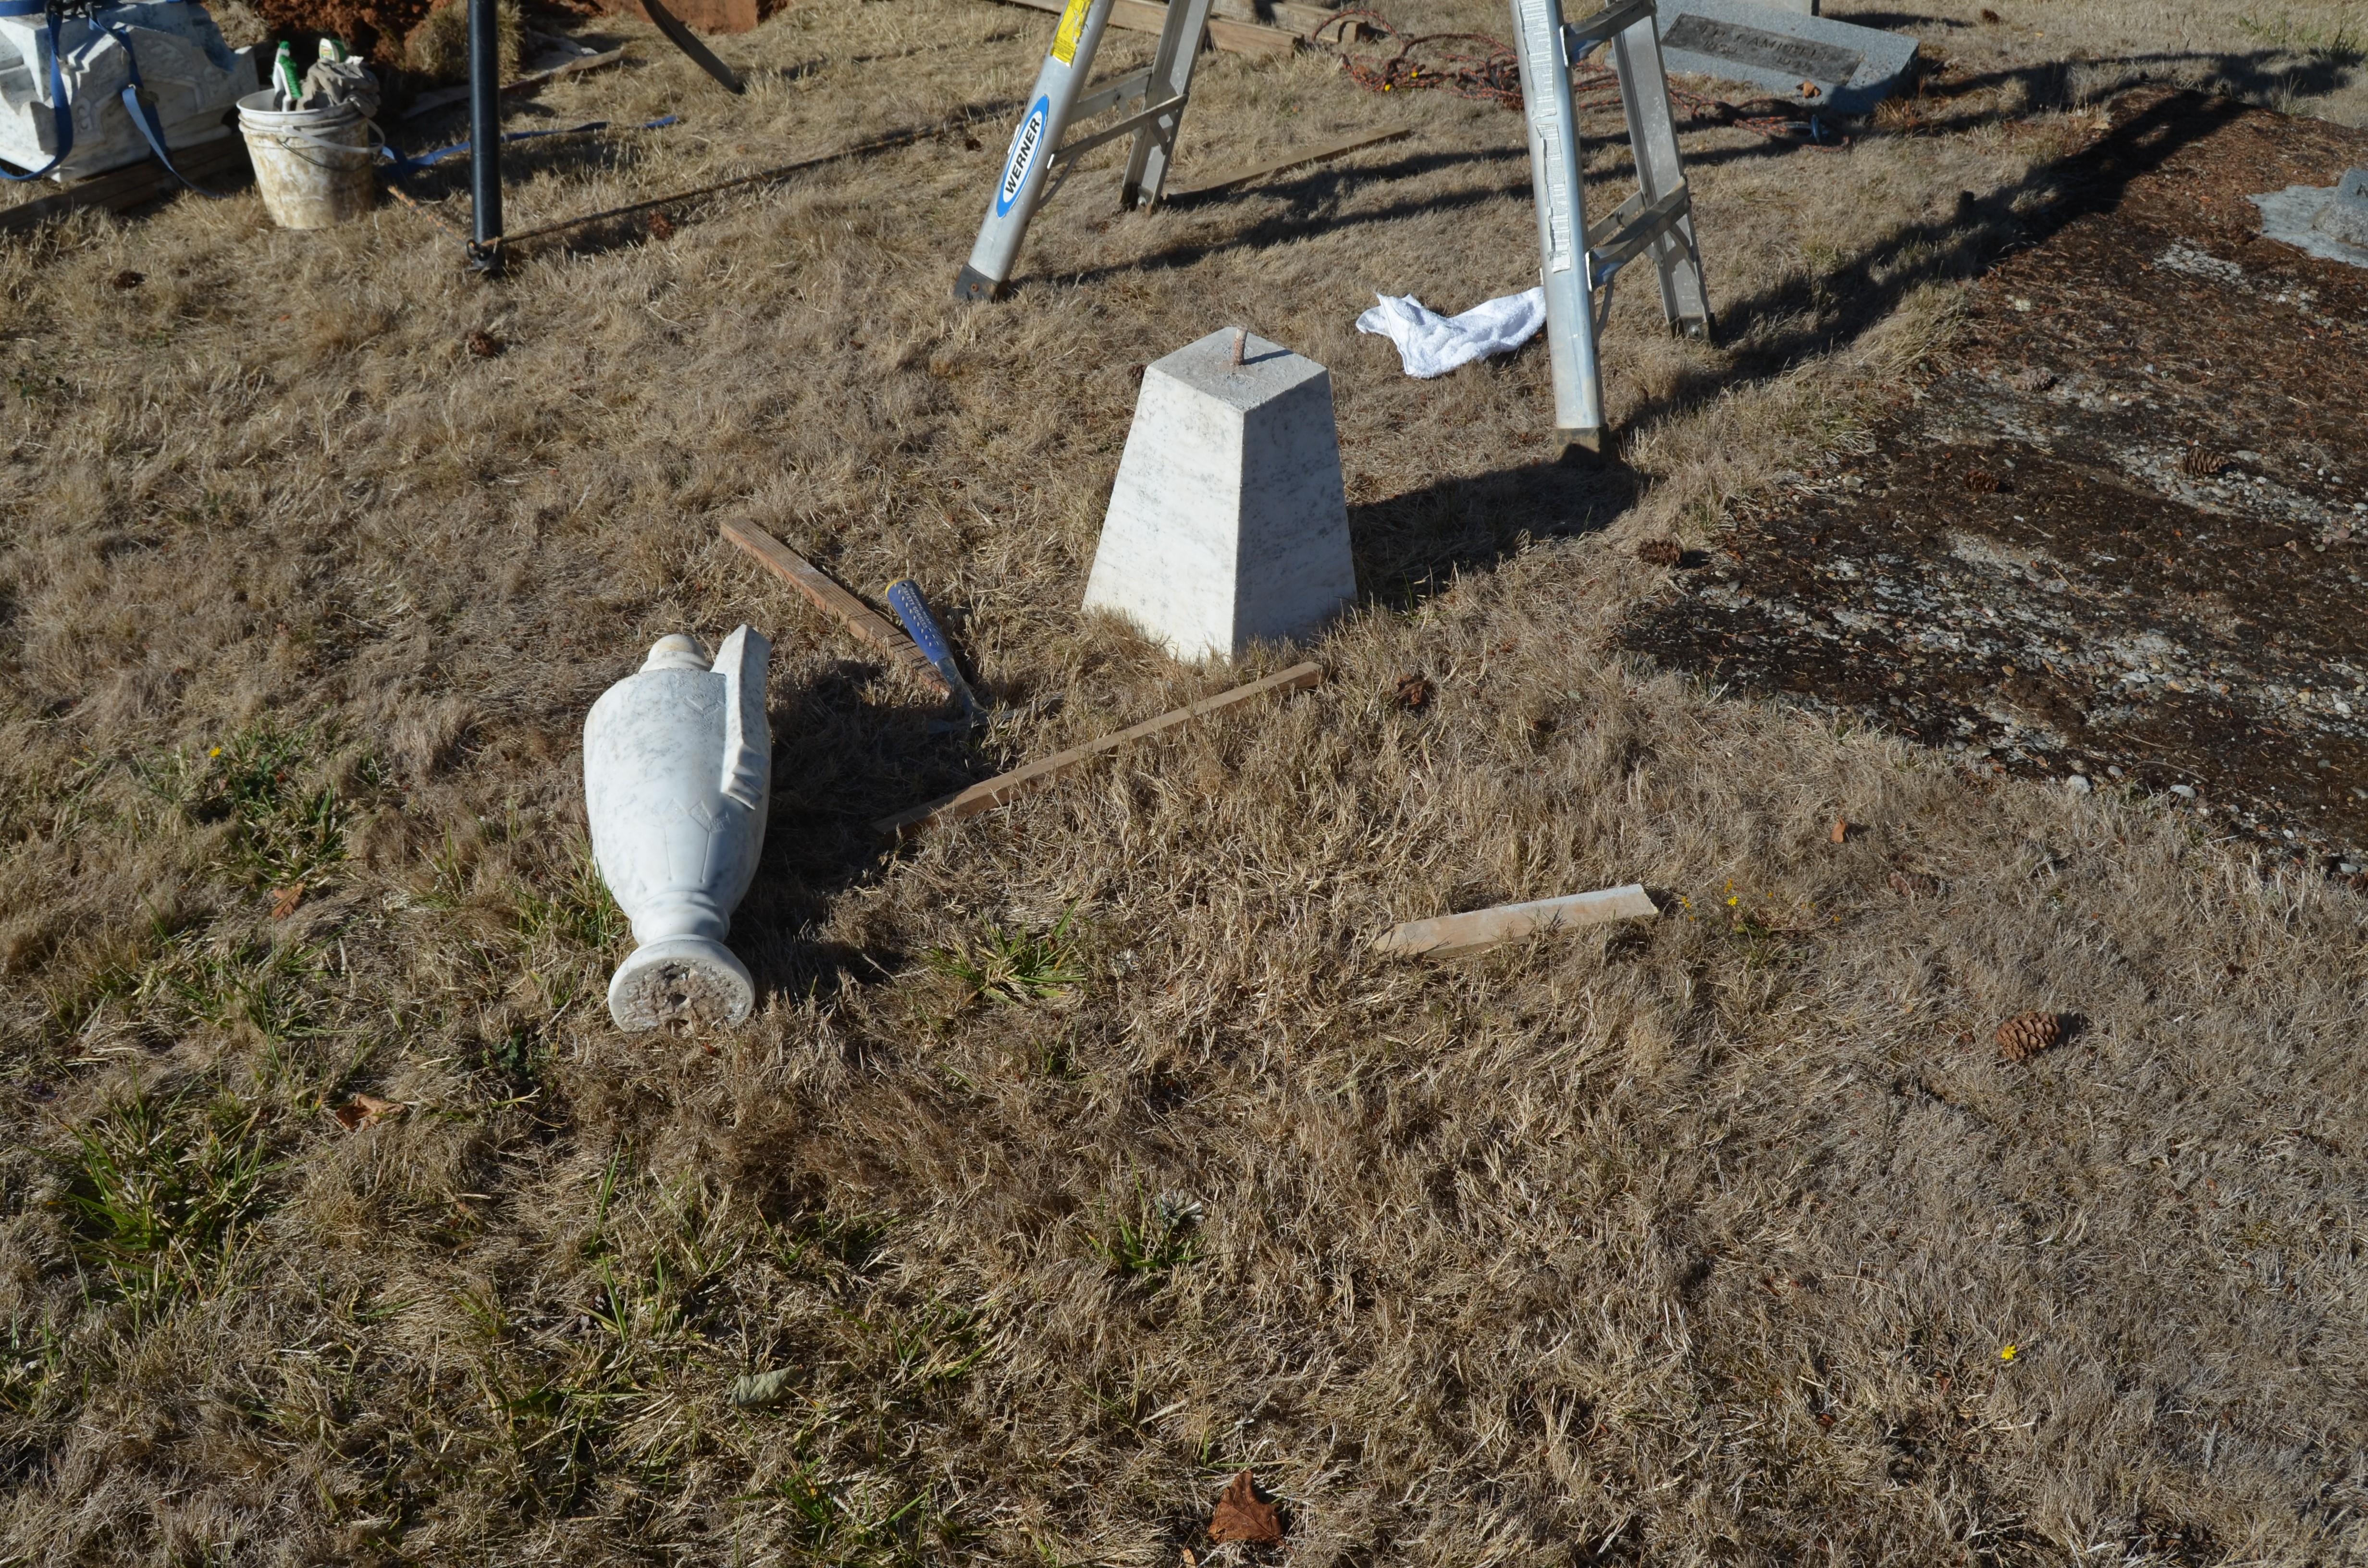
During inspection, it was discovered that the urn was loose but pinned to the tapered section. To remove both sections together required a special set of lifting straps. Since the urn made the two pieces top heavy, we had to place two straps at right angles under the tapered section. A third strap was placed around the top of the urn, outside of the two lifting straps, to prevent the urn from toppling.
When the pieces were on the ground the urn was removed from its’ tapered base. The pin was made of lead. You will find most pins in the old monuments are made of iron and are rusted. They should be removed and replaced with stainless steel or fiberglass. While these pieces are on the ground, they can be cleaned. The old setting material must be removed from the joints. You may have to carefully chisel the old material off. If you use a chisel always start from the edge and work toward the center. Use a small chisel and a wooden mallet. This will help protect the edges of the pieces from chipping. The joint should be clean, flat, with no old material left in the joint. You may need to use a wire brush to remove some joint material.
The top hat section was lifted off using a cradle lift and then carried away from the work area. The piece can be cleaned and the old setting material in the joints removed. Ensure you document which way the top hat sat on the main section. It must be reassembled correctly.
The center section of the monument can now be removed. Since this is rough sandstone, the lift used is two choker straps. Place the tripod over the center of the monument with two legs facing the area where you are going to temporarily place the section. In case the section is unbalanced or it decides to fall over, the two legs will provide stability in the tripod. While lifting the center section, check the bottom of the section to see if there is old material to be removed. If so, you will have to move the tripod so you can lay the section on its’ side for cleaning. Always attempt to center the tripod over the lift. For this monument it appears as though the installers just placed this section on the lower piece with no mortar. It has stood that way for over 120 years. All the joints needed was a good cleaning. The bottom of the center section was cleaned before placing it on the wooden platform. When lowering the section onto the wooden platform, use pieces wood to act as protection and allow the section to slide down to its’ temporary storage place. Make sure it is plumbed so it doesn’t fall over.
The next task is to level the base and the second section. If the second section is not very heavy, it can be left on the base while leveling. The second section and the base will still have to be separated to clean the old mortar, if any, from the joints. This can be done after leveling is completed.
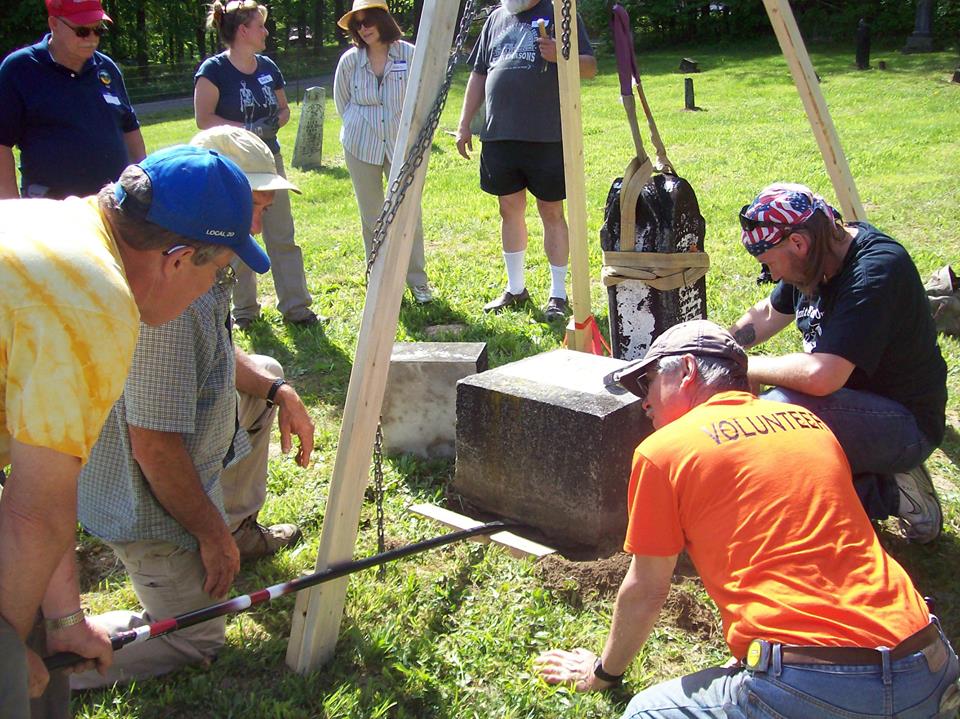
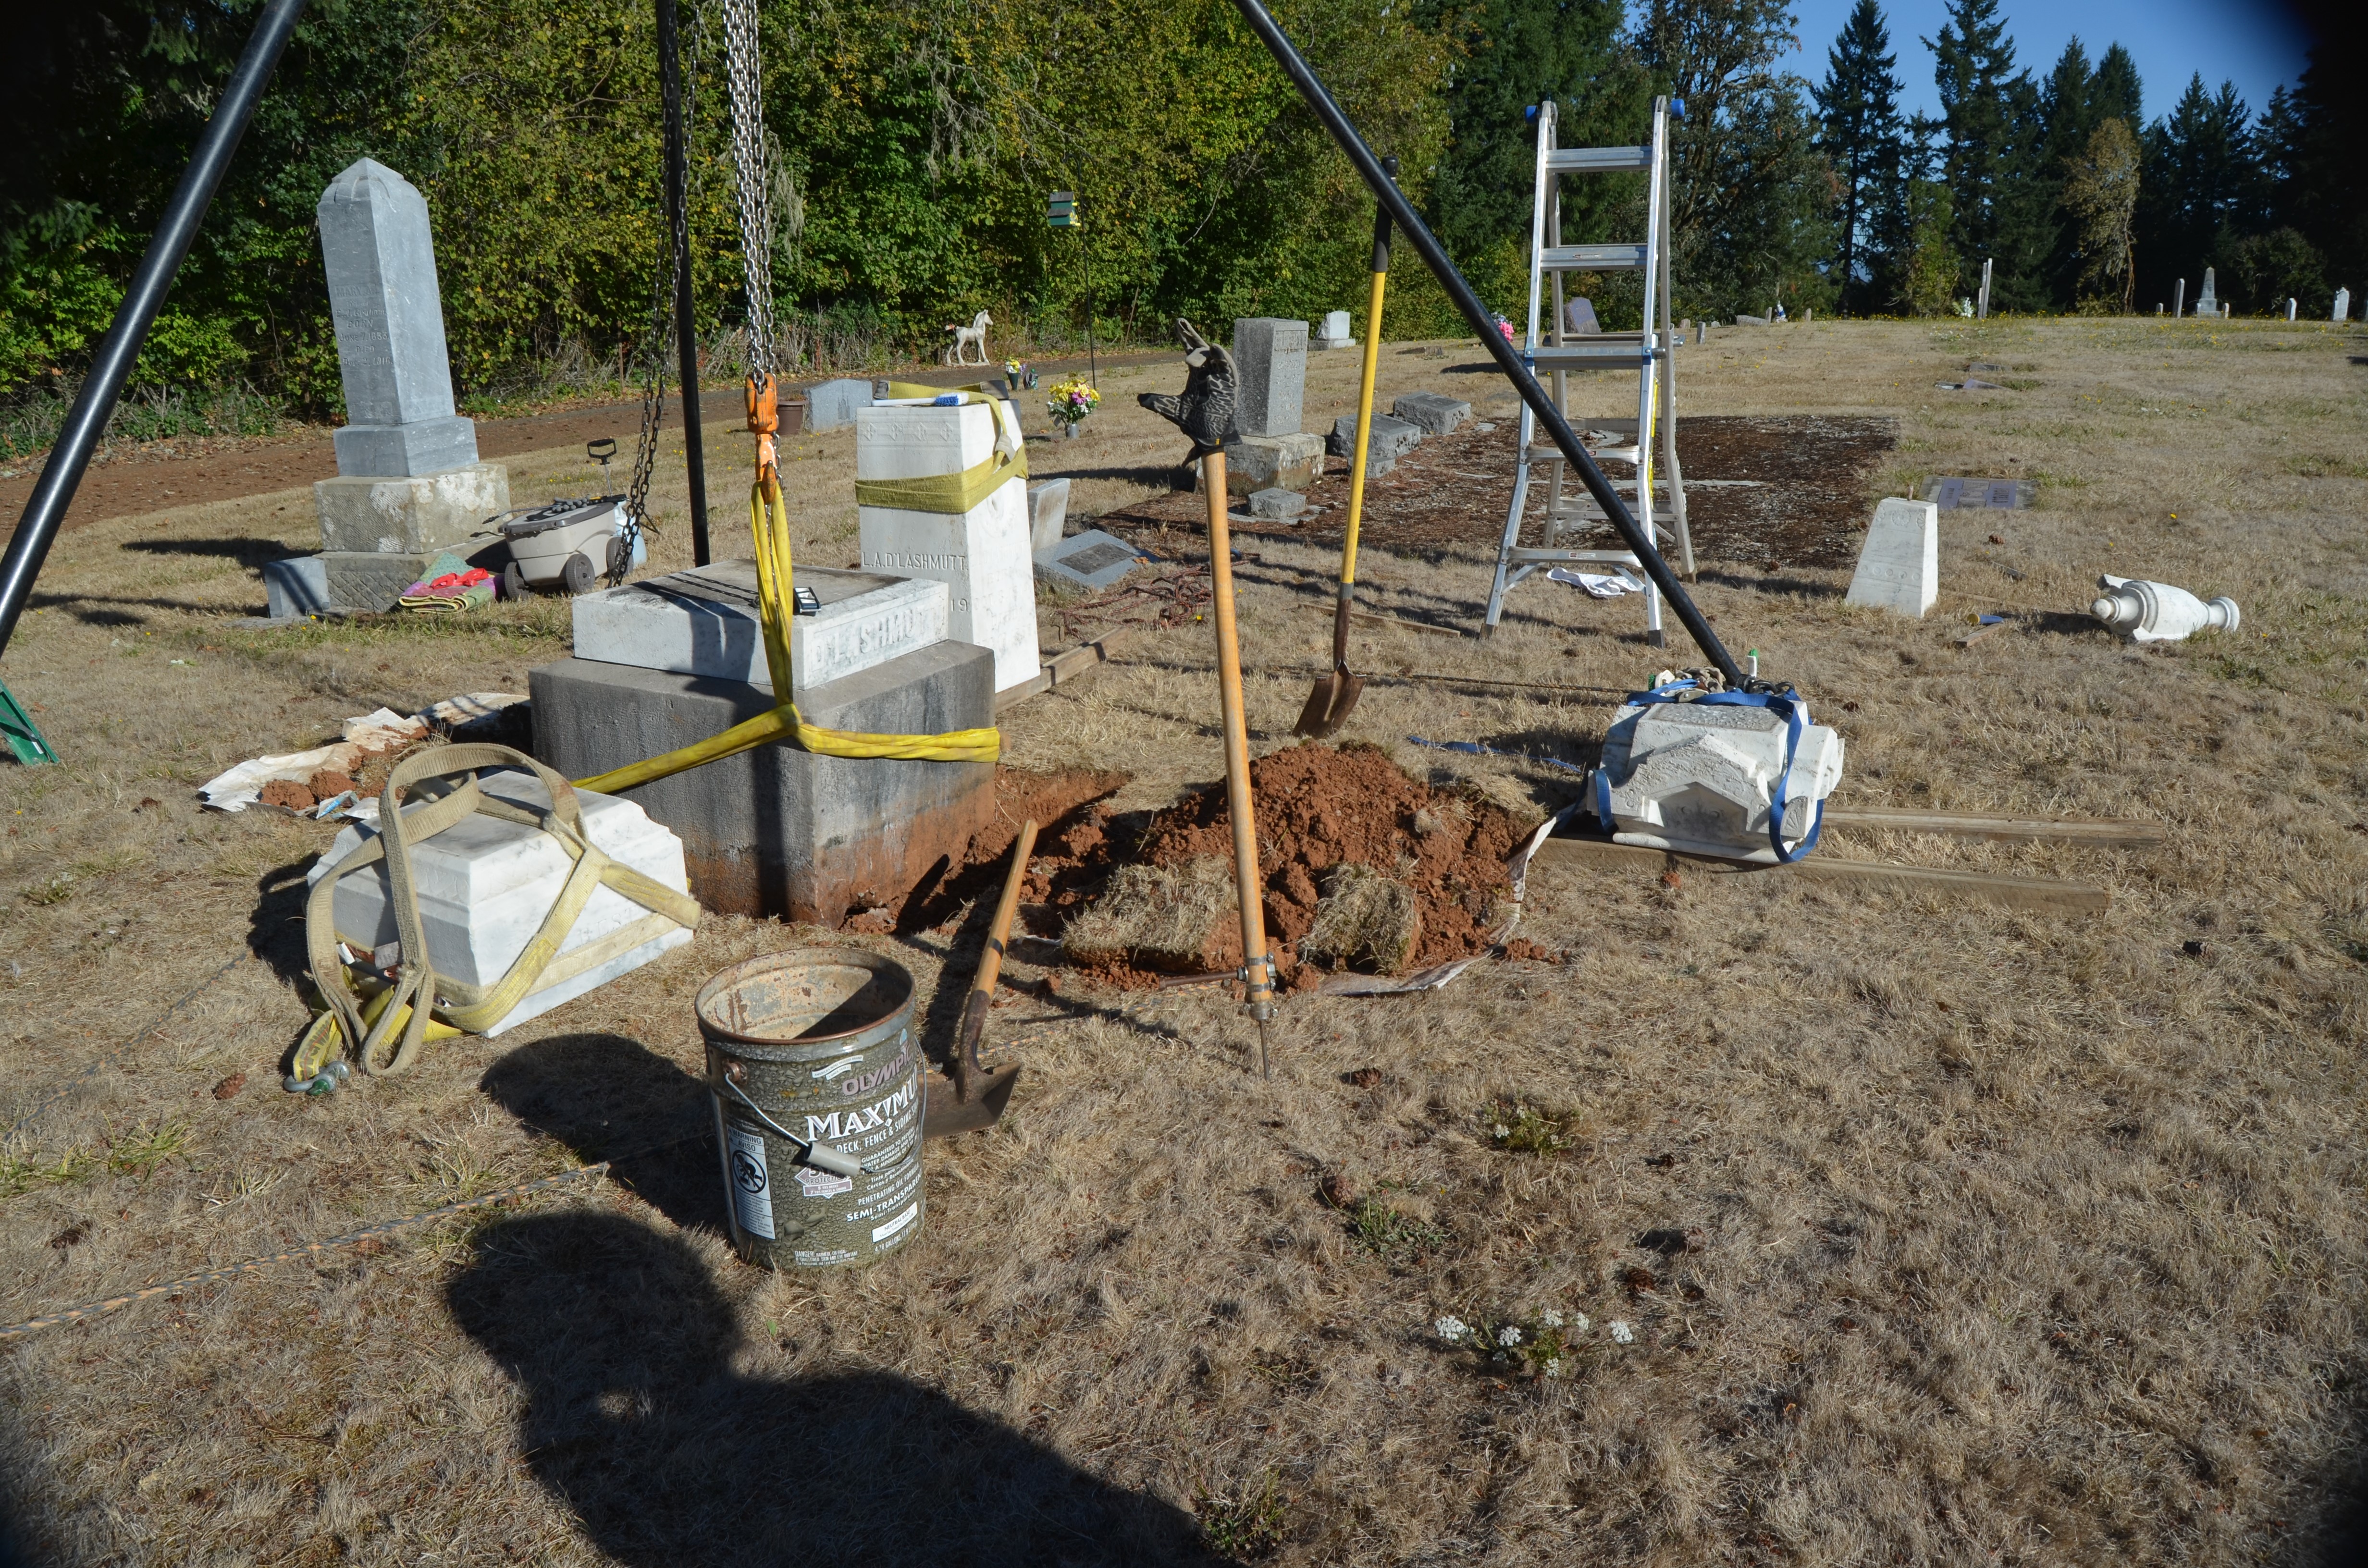
Determine how much tilt is in the base and which side/corner is low. Center the tripod over this spot so you can lift straight up from the low spot. Excavate the area around the base deep enough to determine if the base is attached to the footing. If it is attached, you must excavate the entire area around the footing. Place the dirt on a tarp. This base was not attached to the footing. The footing appeared to be compressed dirt and gravel. It was very stable.
Place a long strap around the base so the choke is at the low portion of the tilt. Lift slowly to ensure the strap will hold and that the lift is stable. See the next two pictures. As you lift the base, use the level to determine how much lift is needed. Lift the base so it is just slightly more than needed. Using a small board, (1/2 X 1 X 2 ft) to push crushed rock between the base and the footing. Another tool you can use for this purpose in a piece if 1/2 inch rebar about 2 feet long. After you have packed the crushed rock under the base. Use a small flat piece of metal or the rebar to smooth out the rock. Lower to base onto the footing and use the level to determine if any more adjustment is necessary. If so, repeat the previous process until the base is level. Sometimes you may have to remove some of the crushed rock.
If the base is attached to the footing the task just got more difficult. Old footings were rarely flat on the bottom so the base will be much harder to level. You may have to excavate deeper to be able to place crushed rock under the footing. The process is the same but is much more difficult and may take several tries to level the base.

Backfill the excavated portion around the leveled base. Place about 3 inches of dirt in the hole and tamp it with the edge of one of the pieces of wood. Do this as many times as needed to completely backfill the excavated portion.
REASSEMBLY
The second section now can be removed and the joints cleaned in preparation for resetting. Lift the second section off of the base. Use an appropriate lift so the straps do not slip. We used a cradle lift. The section was lifted slightly so wood could be placed under it. Then we slipped thin lifting straps under the section. Set the section on wood for cleaning.
Clean all of the joints of the monument. Use a chisel if necessary, and use a wire brush to remove scale that the chisel leaves behind. The joints should be free of old material ,scale, and dust. Use the compressed air canister to blow the residue off of the joints.
Do not allow the wire brush to contact the exposed stone. It will scratch the exterior finish
After the joints are cleaned, prepare to reset the sections, one at a time. This task takes extra time because the mortar from resetting the lower joint must set before placing another section on top. It is best to wait at least 12 hours unless the next section is very light.
Place the next section on the base. Ensure it is in the right orientation. Determine if it is level. Place lead spacers, no more than 1/4 inch thick under each corner about 1 inch from the edge. These serve three purposes. First they keep the section from slipping and, second, they allow for adjustment of the section to level it. We have found that oval fishing sinkers about 3/8 thick work well for this task. They can be flattened so they don’t roll and can be adjusted easily to level the section. You may use whatever spacers that are readily available as long as they are not iron. Third, the spacers allow a gap between the sections so the setting material can adhere to both sides of the joint.
When the section is leveled, lift it off of the base about 6 inches. Make sure the spacers are on the bottom section. Prepare the setting mixture. Before troweling the mixture in the joint, wet both sides of the joint with clean water. Use a sponge to soak up excess pooled water. Trowel the mixture onto the top of the base. Make sure the leveling shims do not move. Ensure there is enough mixture to allow some of it to be pushed out when the upper section is lowered in place. The tricky part of this process is removing the straps without disturbing the setting mixture. Lower the section onto two pieces of wood placed very close to the edge of the section. Remove the straps. Place narrower pieces of wood near the edges and remove the thicker wooden pieces. Remove one piece of the narrow wood so that one side of the section is resting on the mixture. Remove the other piece of wood. The entire section should now be resting on the setting mixture. Carefully align it to the base and press on the top until it is setting on the lead spacers. Make sure the lead spacers were not pushed out by the setting material. If you have placed too much material on the joint this is a real possibility. Check the level of the section. If all has been done carefully, the section should be level. If not, you may have to lift it off and try again. In some cases you may be able to push a spacer back under the section.
After resetting each section, remove the excess mortar that has been pushed out, clean the top edges of the bottom section where the mortar has been pushed out and point the mortar in the gap to prevent any water from getting into the joint. Let the mortar set for at least 12 hours, Clean any excess mortar from the pieces before it cures.
This picture shows two sections of the monument leveled and mortared in place.
As you reassemble the monument, use spacers and the same methods as described previously to place section on top of section. Test for level, place spacers, test for level again, wet the joints, mortar together, align it to the lower section, and clean off the excess mortar. Don’t forget to clean the gap and point it. Let set for 12 hours before proceeding to the next section.
If the section is tapered like the center section of this monument, you will not be able to accurately plumb it by placing the level on the sides. You will have to use a smaller level on the top to level the section. If you want to use a level on the sides to check for plumb, set the upper bubble to level and measure the distance from the edge of the level to the stone. This will take two people. Check all four sides. If the distance from the level to the stone is the same, the section is plumbed.
Pointing the mortar in the joints
Place the top hat section on top of the center section using the same methods , We used a cradle lift to both remove and reassemble the top hat. The top hat sides are square so a level can be used to check the plumb of the monument. A small level can also be used on the top to level the section. You have to be careful using a level to check the plumb of the monument. The South and West side of this top hat section had a stone “growth” that was caused by the hot sun over the years. We have seen it on other tablets and monuments. It appears as a ripple growth along the grain of the stone.

This picture shows the top hat reassembled on the monument.
Now that the setting material has set sufficiently, we can reassemble the last two sections of the monument. The urn and tapered base have been test fitted off of the monument. It is sometimes easier with tall monuments to do some of the fit work on the ground rather than standing on ladders. The cemetery ground is hardly ever level so ladders are not a stable platform for working. The lead pin was replaced with a 1/2 inch diameter fiberglass rod.
Pointing the mortar in the joints
The two top sections, being fairly light, were assembled and mortared the same day, just hours apart. The mortar at the joints is shown being cleaned and pointed. Since the sections were cleaned previously, there was very little additional cleaning necessary
The procedures and methods described in this document are basic descriptions of how to repair a multi-piece monument. As has been said before, all monuments are different. You will have to decide on a plan to repair this type of monument. This monument was not damaged or broken. Some monuments will be. You will have to repair the damage before attempting to reassemble the monument. If you think you are not ready to do this type of work, by all means work with an experienced conservator until you are confident you can do this without doing any harm. And please, be very careful. Any one of these pieces, if not handled correctly can do damage not only to itself or the rest of the monument, but to those attempting to repair the monument. BE SAFE.
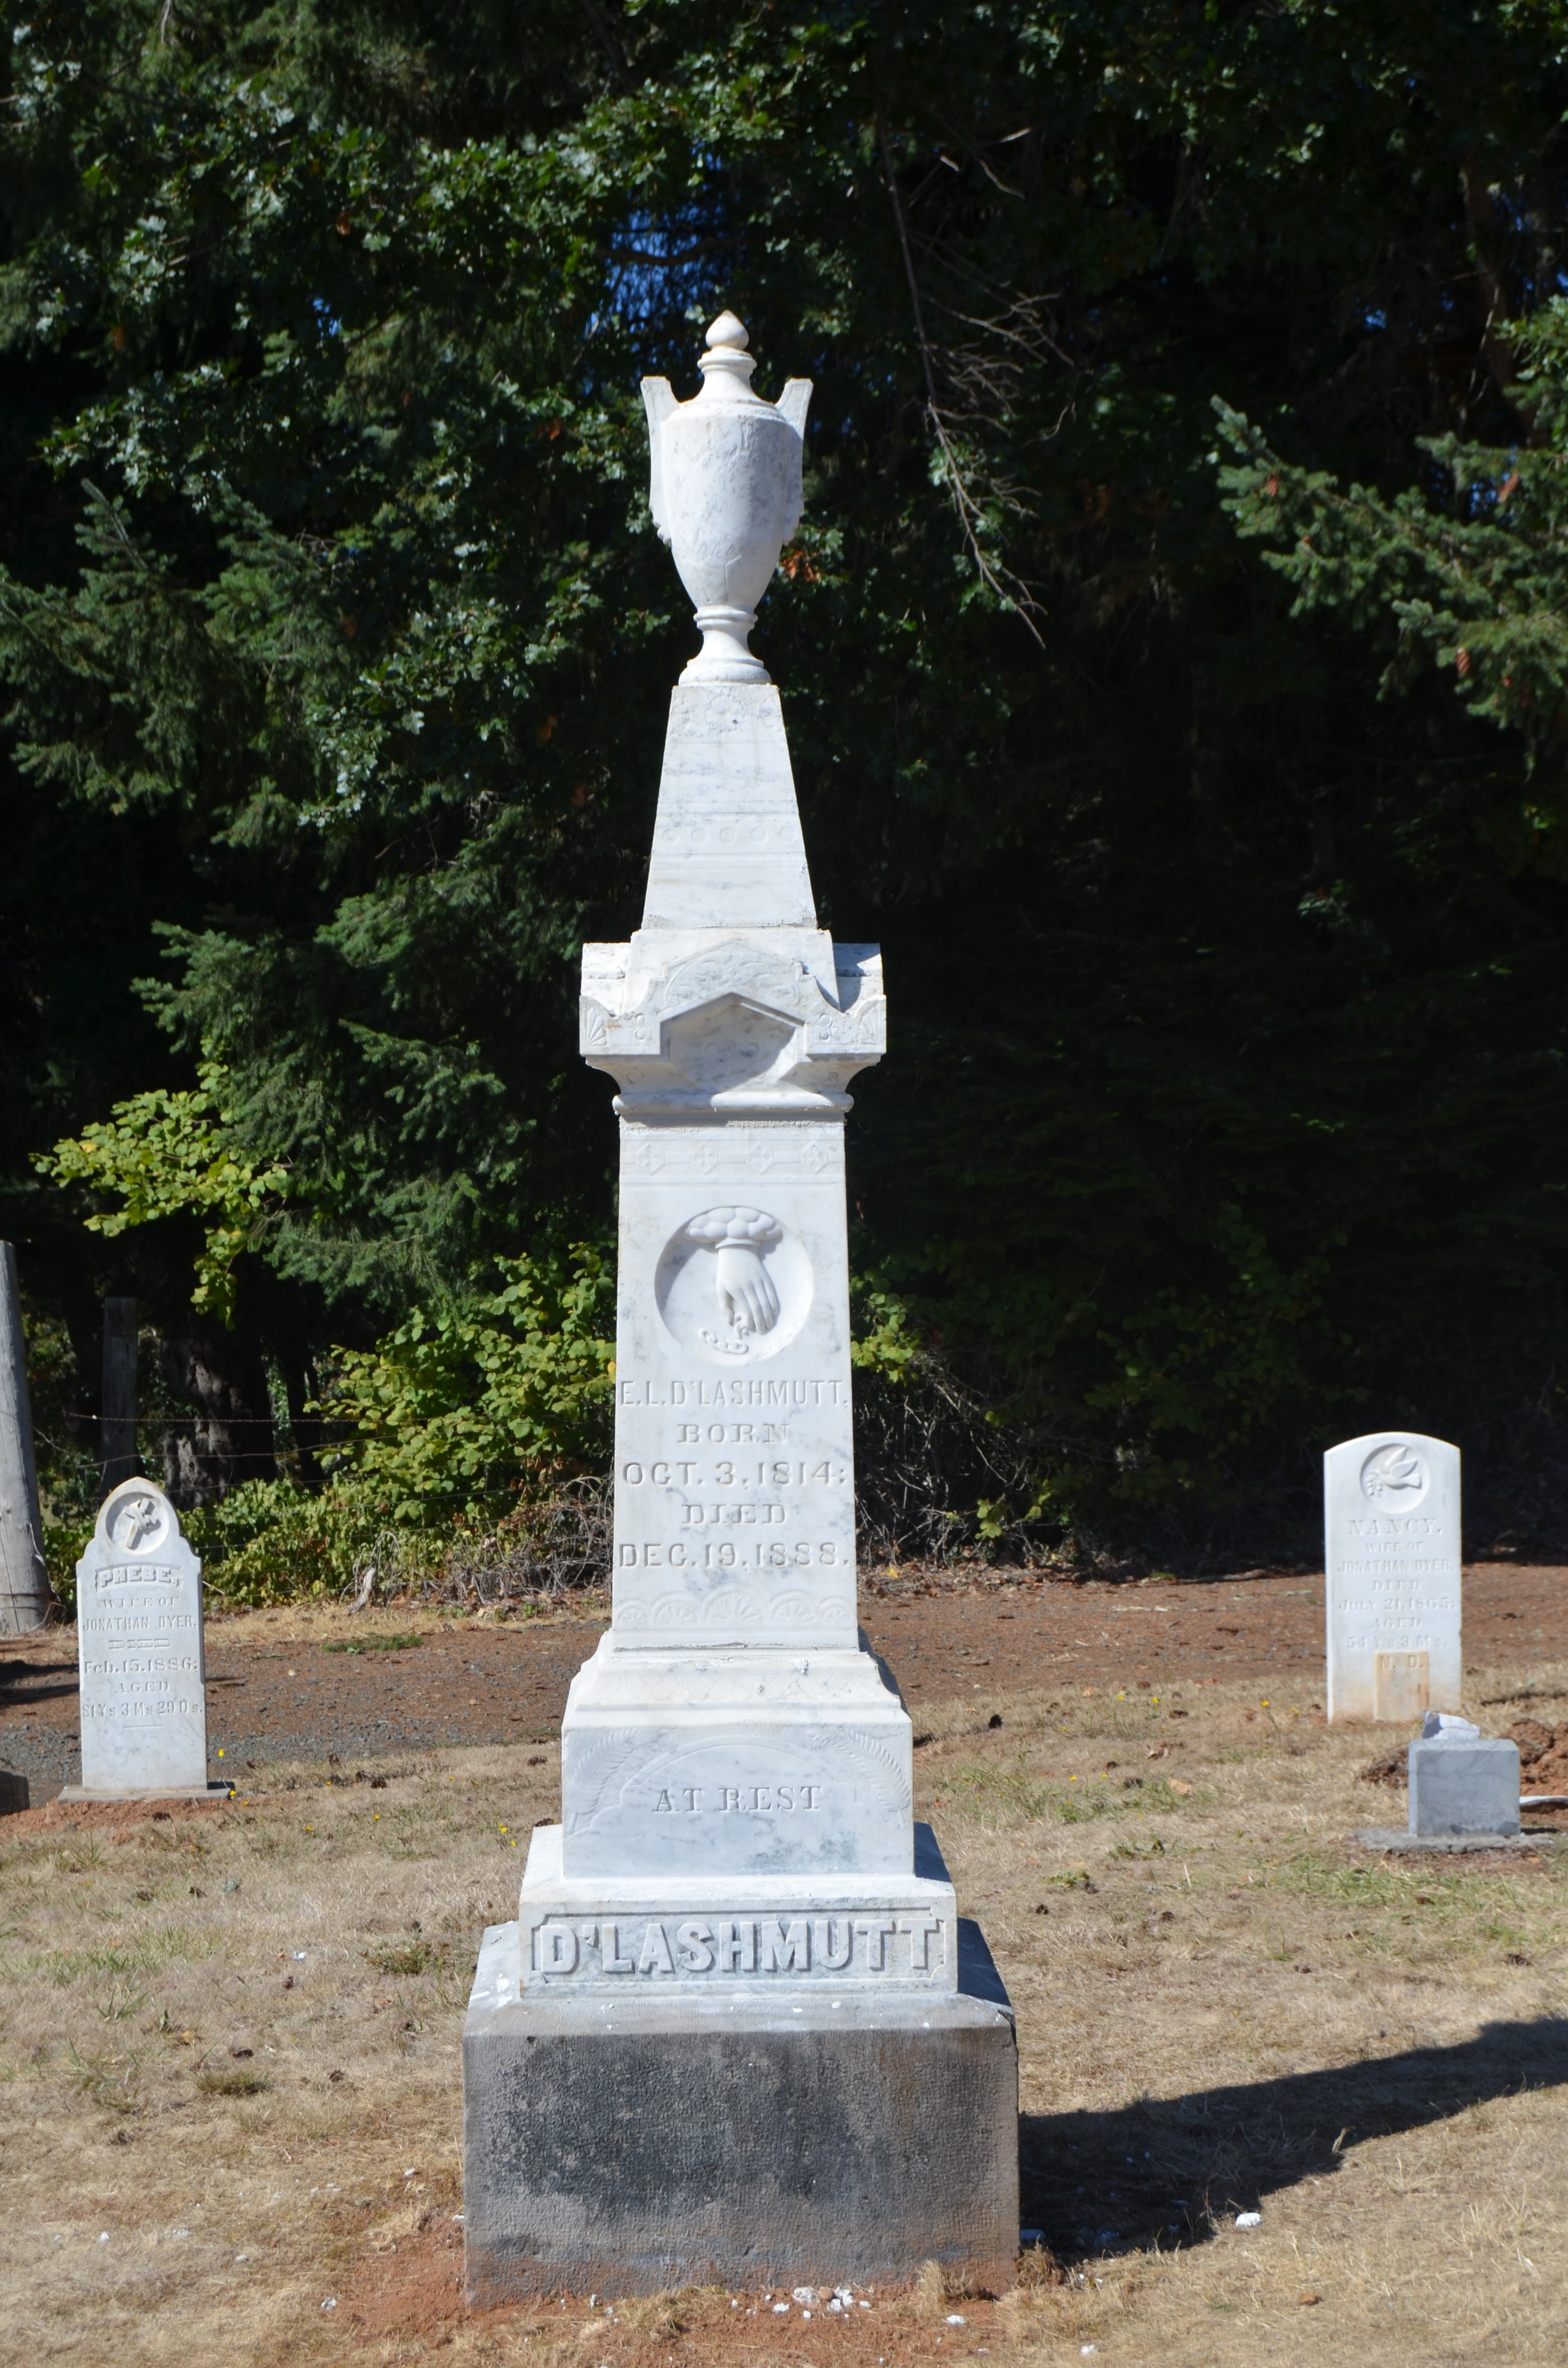
Reassembled, mortared together, cleaned, and hopefully standing tall for another 120+ years.