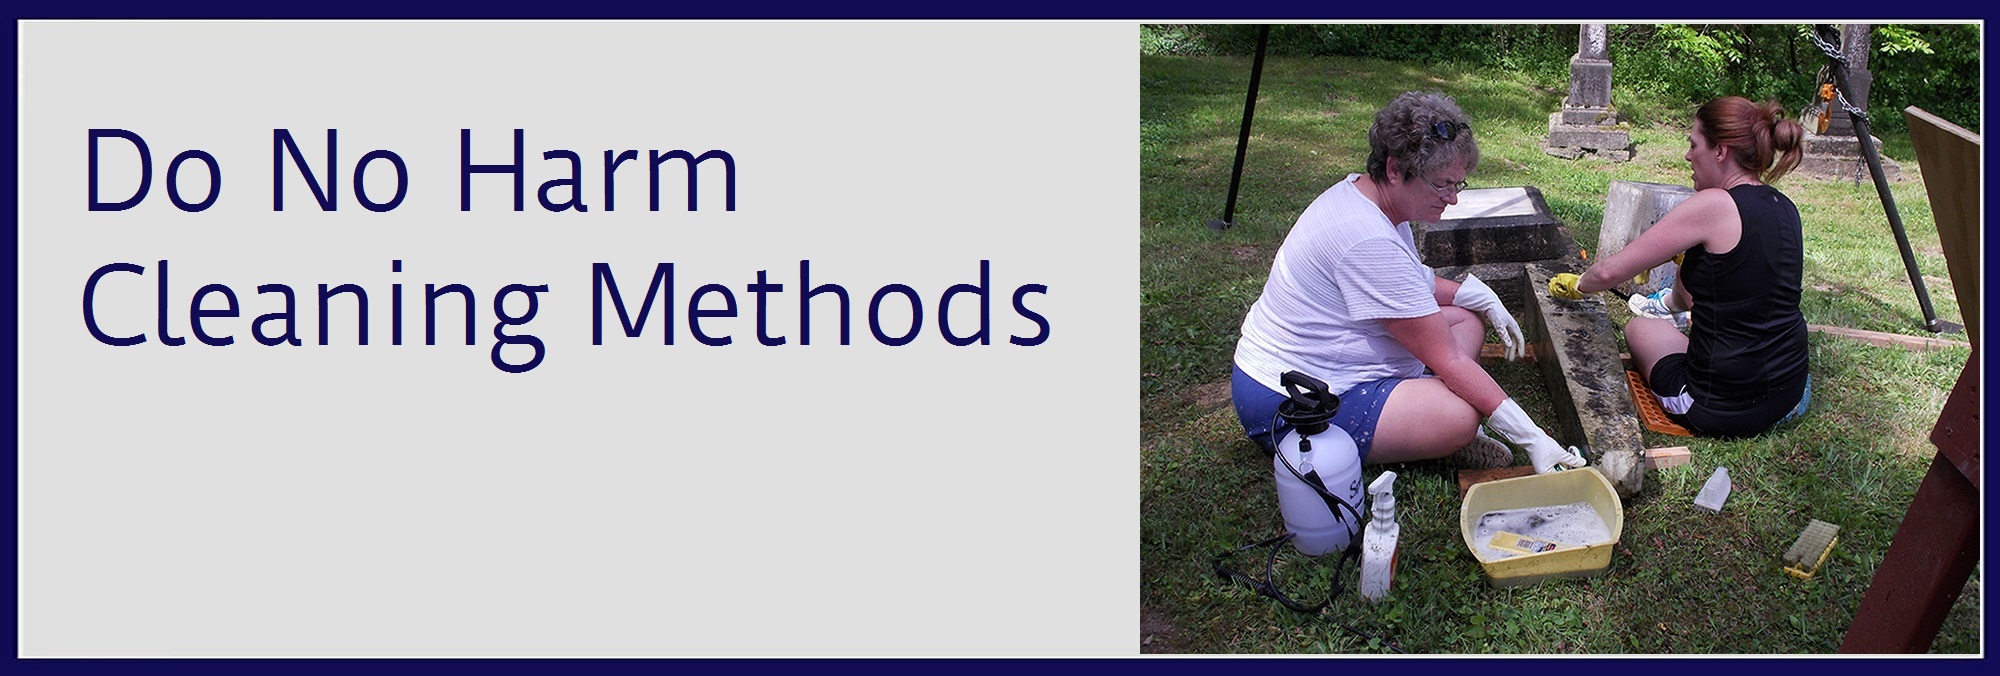
Cleaning Basics
Cleaning tombstones and monuments has become quite popular among many individuals and groups. Some groups do it as part of reading cemeteries to gather historical documentation or as a way to beautify a cemetery. Others are individual descendants doing much the same things. And others take on tombstone cleaning for things like Eagle Scout projects. The following are the best and easiest ways to accomplish this in the most do no harm manner available at this time. You will find more information on harmful cleaning under HARMFUL METHODS…Don’t clean with. Make sure your method is not a harmful one. For your safety, please always make sure the tombstone or monument you are working with is sound and doesn’t present a danger of falling. And for the sake of the stone, please check for sugaring and delamination so you don’t inadvertently damage it further or permanently.
The following is a great tutorial on good safe cleaning instruction and habits that covers the gamut of cleaning most natural substances, with a focus on biological growths. We feel this is a great place to start. More on other cleaning methods and products for other cleaning issues will be addressed below this article.
HOW TO PROPERLY CLEAN HEADSTONES AND MARKERS
By CCUS member Susan Dunham of Maine Gravesite Maintenance
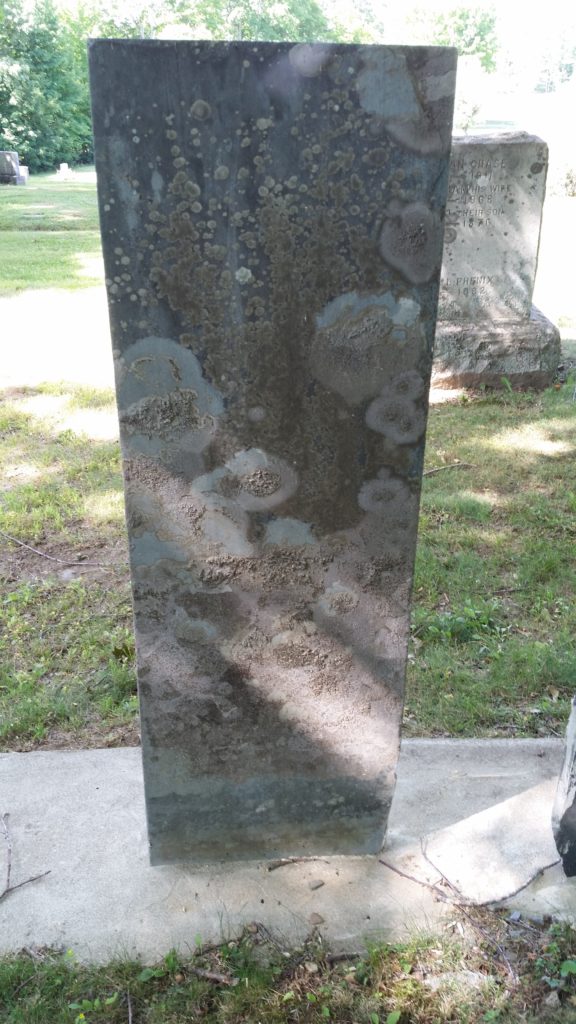
Most of us have visited cemeteries with headstones and markers covered with environmental grime and biological growth such as moss, lichens and mold. The grime and dirt can be removed with a proper cleaning, which will avoid causing any harm to the stone. Even though the markers are made of stone, most old markers are incredibly fragile. They suffer from “invisible’ stress cracks, delaminating layers of stone, and other age related issues.
Anyone desiring to clean the headstones and markers in a cemetery should get permission from a descendant, the sexton, cemetery superintendent or the town, in that order. If unsure who to ask, go to your town cemetery keeper and inquire. It is not acceptable to take it upon yourself to clean the headstones without permission, without learning the correct methods or not using approved materials. You may however, clean your own family members’ stones. The standard that Professional Cemetery Preservationists and Stone Conservators work on is “Do No Harm”, and it is imperative that you perform your work to the same “Do No Harm” standard.
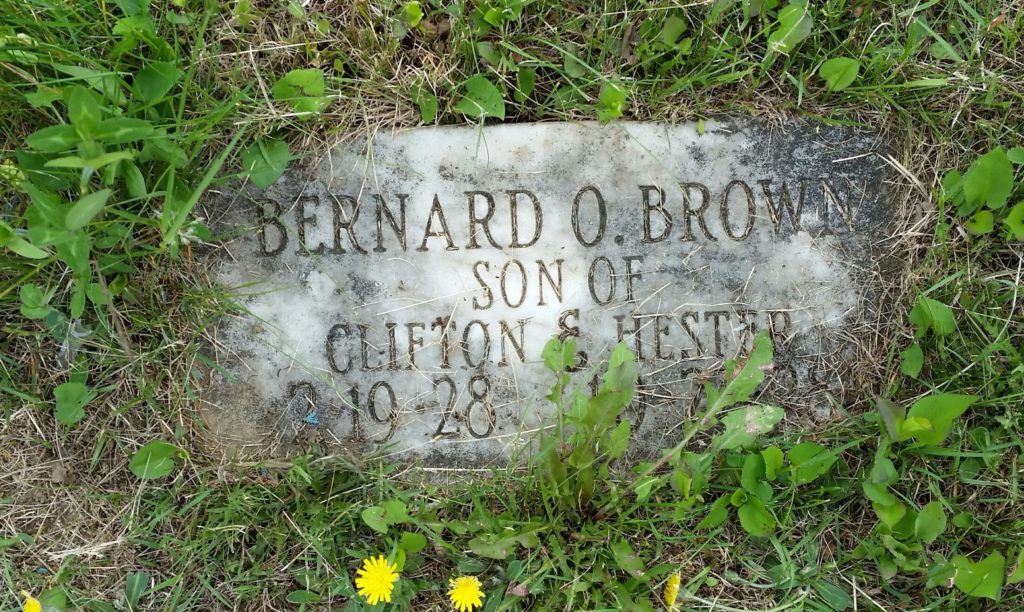
Every time a marker is cleaned, minute particles are removed from the surface of the stone. It can be harmful to clean them too often. Most markers in cemeteries are made of limestone, sandstone, slate, marble, granite, or in some cases concrete. However, each marker’s condition is different and you should base your cleaning on the condition of that stone. Cleaning headstones helps to preserve them and it should never be your intent to make them look new again, just clean.
We, Cemetery Conservators for United Standards, have established and follow standards, precautions, procedures, and have listed materials that we use for cleaning cemetery headstones and markers. Be sure to read this information completely and understand the proper procedure before proceeding to clean stones in a cemetery.
PRECAUTIONS
- Ensure the stone is stable, secure, level and that all sections are securely attached to each other. Also check that the stone is not in danger of falling if you put pressure on it. Your safety is of the utmost importance.
- If the weather is hot and the stone surface is hot to the bare hand, do not put cool water on it. It may cause stress cracks in the stone. Cover the stone to cool it or let the water warm in the sun before using it.
- Do not clean a stone if there is any chance of freezing temperatures. Water will get into cracks and freeze. Water expands when frozen and may crack the stone.
- Do not attempt to clean a broken headstone.
- Make sure you have enough water to thoroughly clean and then rinse the stone several times. Leave no residue from the cleaning agent on the stone as it could cause permanent streaking.
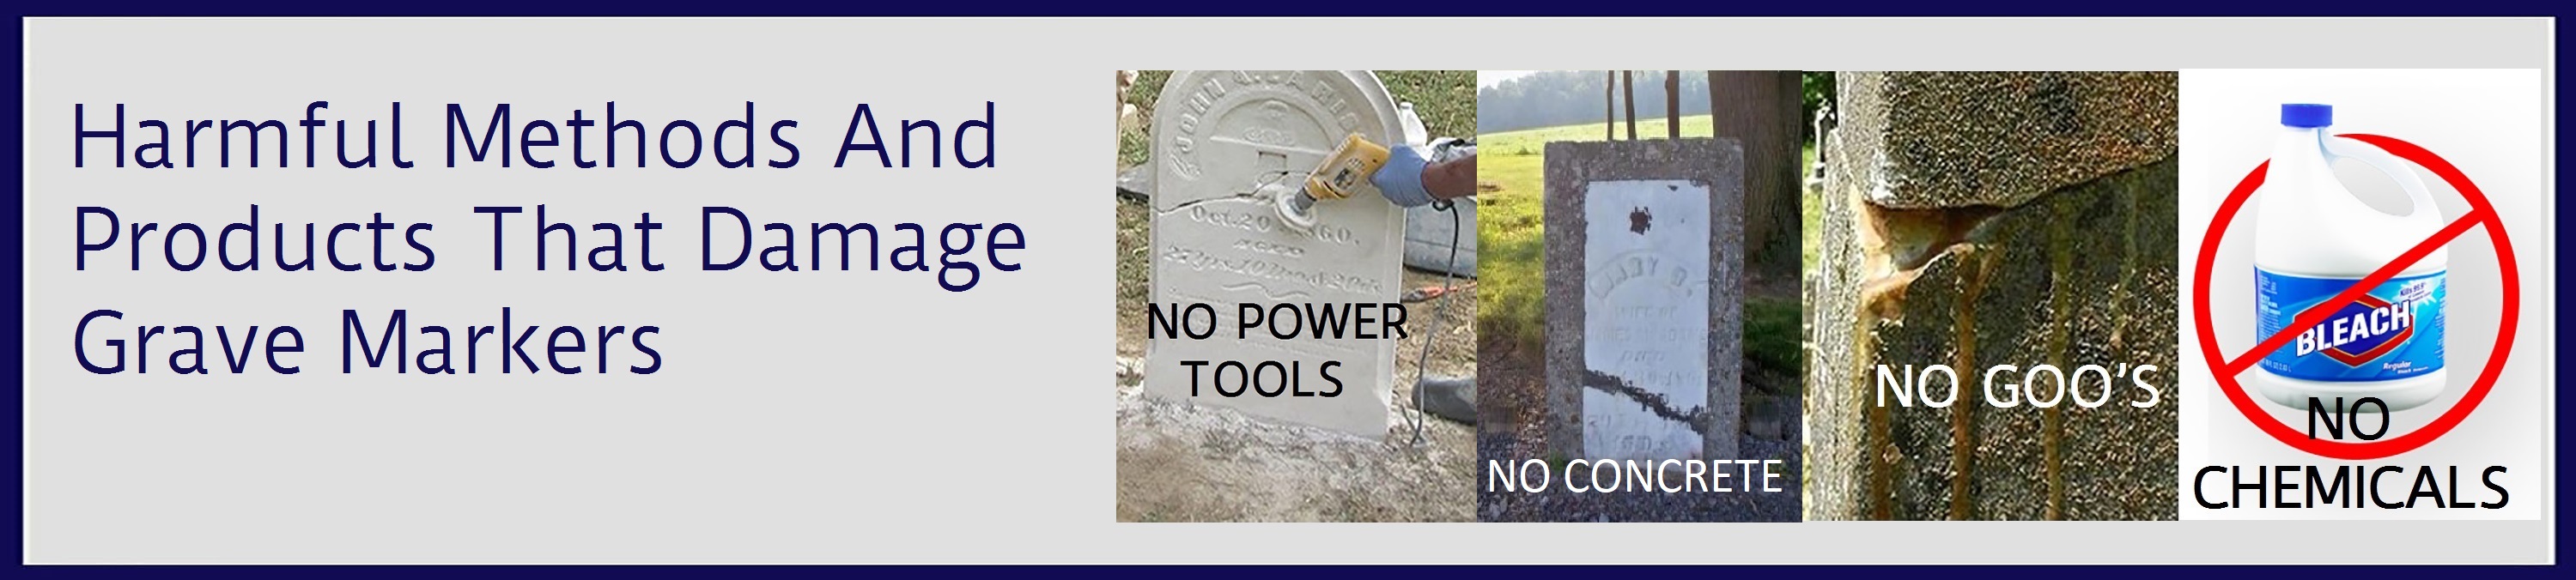
- NEVER use household cleaners, bleach, metal tools, scouring pads, wire brushes, power tools, pressure washers or nyalox brushes. A newer product called Wet and Forget has not been thoroughly tested, and this is not a product we can recommend.
INSPECTION
Check for delamination of the stone, this is where layers of the stone begin to separate. Lightly tap on the stone with your knuckle or other soft object. If you hear a ‘hollow’ sound, the stone is probably delaminating. Do not attempt to clean. This should be left to a professional stone conservator or preservationist.
- Check for stress cracks. This is an easy check. Thoroughly wet the stone with water. Observe it while it is drying. Stress cracks will show up as wet ‘streaks’ because the water has entered the crack and will take longer to dry than the surface water. If the stress cracks are wide or severe, again leave this stone to the professionals.
- Check for loose sections in the marker. If it needs to be secured, leveled or reset stop. This is a job for a professionals. Always err on the side of safety.
- Check to see if biological growth has cracked the stone. The growth must be carefully removed and the stone repaired before cleaning. Material at the cracked edges is very fragile and will chip off even with gentle cleaning.
BASIC CLEANING PROCEDURE
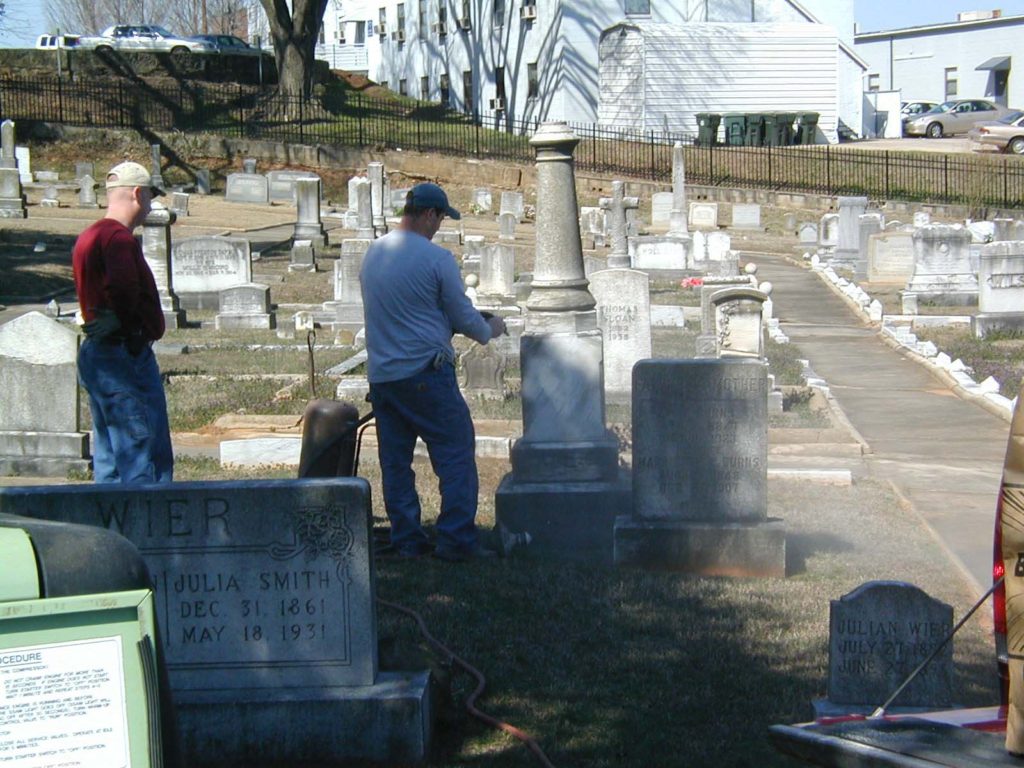
- Soak the stone with water and wait a few minutes. Gently remove loose materials from the surface. Once saturated, the lichens and moss on the stone will loosen and can be removed easily with a plastic scraper or wooden spatula. This helps remove the big particles so you will not be rubbing them back into the stone. Rinse thoroughly.
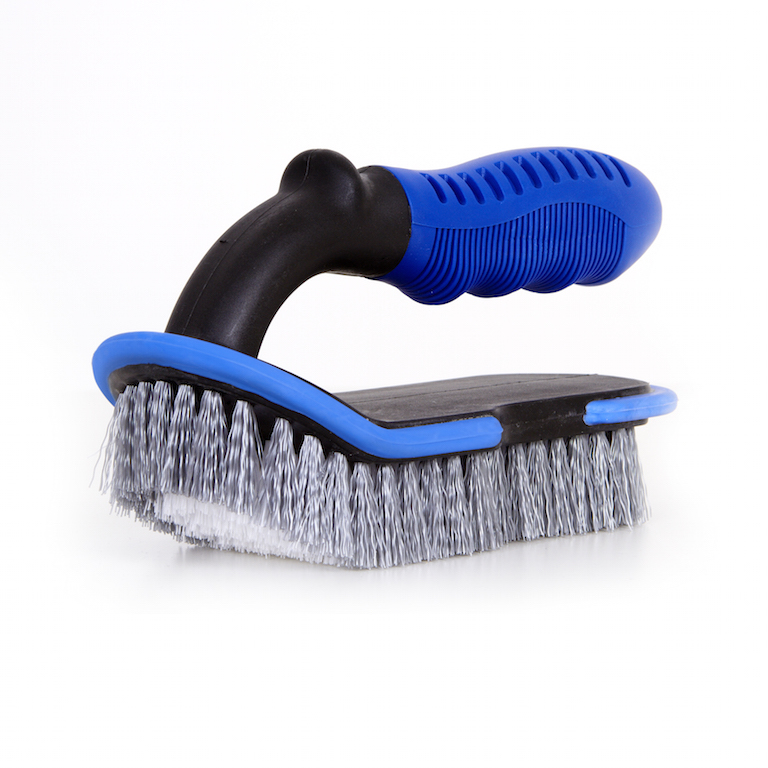
- Clean the wet stone with a wet brush by making random circular motion, and rinsing frequently to remove dirt and biological growth. Always be as gentle as possible.
- Keep both the brush and the stone wet at all times while cleaning. Be sure to clean the entire stone. Normally, clean water and soft scrubbing will remove the dirt and grime. If not, use one of the recommended cleaning agents from the materials’ list (see further instruction below). Be sure to rinse often and thoroughly.
SPECIAL CONSIDERATIONS
REMOVAL OF PLANT GROWTH
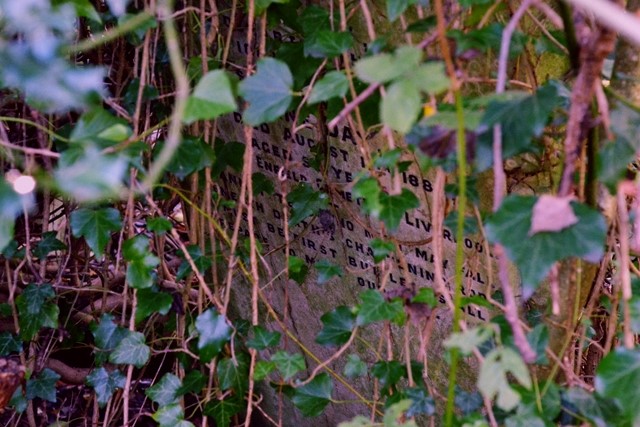
- If plants, especially members of the Ivy family are attached to the stone, do not pull them off. Cut the plants at the base and let them die. If you can, cut the plants about every six inches. This will decrease the amount of time it takes them to die. You may not be able to clean the stone at this time and have to wait until the plant is dead. When the plant has died, wet the stone and gently remove the plant from the surface. Proceed with a basic cleaning.
REMOVAL OF BIOLOGICAL STAINING
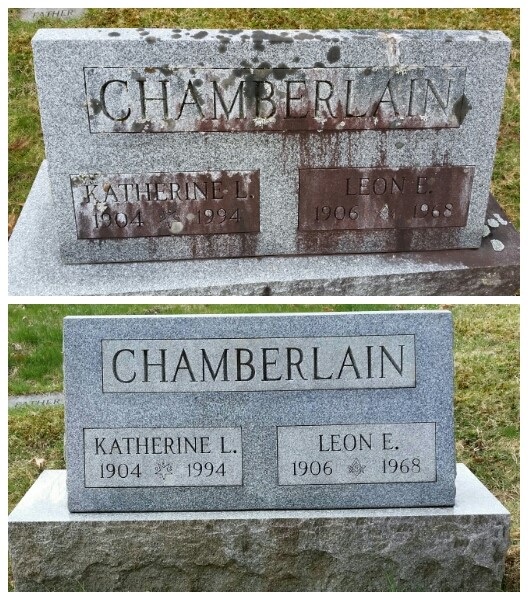
- Lichens, moss, mold and other biological growth, especially bird droppings can cause severe damage and staining to headstones and markers. We use D/2, a non-toxic biological, that kills and deters biological growth.
- Soak the stone and while it is wet, spray the stone with D/2.
- Wait 10-15 minutes and using your brushes scrub the D/2 into the stone, with special emphasis on areas that have been stained. Rinse thoroughly. You may have to apply more D/2 to certain areas.
- Even if the stain is not removed after D/2 has set on the stone, been scrubbed in and rinsed, have faith it will continue to work for weeks, working its way into the pores killing biological growth that may have grown inside the stone. Don’t be surprised if certain areas of the stone change color. That is the D/2 working, this is normal and the stone will return to its usual color in a few days.
For further instruction you can view the following videos on proper cleaning:
RECOMMENDED EQUIPMENT AND MATERIALS
Safety glasses and protective gloves.
Knee pads and boots. Old markers may have broken glass around the base.
Natural or plastic soft bristle brushes of various shapes and sizes & plastic grout brushes.
Wooden scrapers, craft sticks, tongue depressors, and wooden skewers,
Plastic scrapers, various sizes.
Buckets for holding your supplies and water.
Quart size plastic spray bottles.
1 to 2 gallon garden type pump sprayer filled with clean water.
A Small can of compressed air or mini leaf blower.
Rags and old towels.
Gallons and gallons of water. Old clean plastic milk bottles work great for transporting water to the markers.
D/2 biological solution. It works best at 45 degrees and above. Use undiluted for best results. (Our group recommends D/2 as the first choice in cleaning headstones and markers)
Orvus non-ionic cleaner can be used to remove heavy environmental deposits, grime and bird droppings, if water alone doesn’t remove the grime.
Enviro Klean, Biowash, Modec MDF-500 and Revive are also approved biological cleaners.
October 7, 2016 – CEMETERY CONSERVATORS FOR UNITED STANDARDS
These are the other approved safe biological cleaners mentioned above. We hope to be able to add more information on them as time goes by.
The reason D/2 biological seems to be in the spotlight more than these other biocides is simple. It has the most extensive testing, it is the most well-known of these cleaners, it is the most widely used, and it is the most readily available.
Further Do No Harm Cleaning Methods…The Most Basic
By CCUS members Mark Morton and Larry Betts
When it comes to do no harm cleaning methods, less is more. The least invasive and gentlest methods are always best. The goal is to clean the stone for either a repair purpose, or to make it legible for documentation. Cleaning should never be about making everything looking brand new. Cleaning should have a purpose and not completely detract from the character of the cemetery.
Some very simple cleaning procedures can be achieved with just a dry nylon brush or nylon brush with water. This of course is after you have determined all the personal and stone safety issues that are addressed above, and have determined what it is you are trying to clean of the particular grave marker. This will chiefly depend on the condition of the engraving and the stubbornness of what is obscuring it.
Mud, dirt, and other dry or easily removable substances may be removed by gently using a dry nylon brush. Or add some water so you can clean the stone better and be able to rinse away the loosened debris.
Orvus…A Gentle All-Around Cleaner
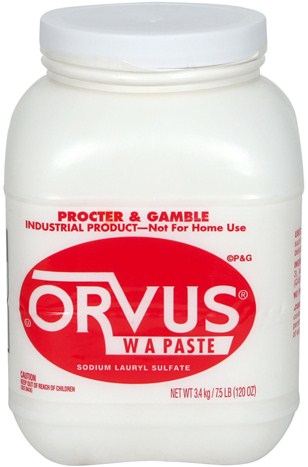
Orvus is a sodium lauryl sulfate. It is completely biodegradable, non-ionic, and does not contain phosphates. Sodium lauryl sulfate is a “surfactant” – it removes stains and residues that are oily, so it’s found as an ingredient in lots of surface cleaners. It is versatile stuff and is used to clean vintage textiles, linens, needlework, and quilts. All things very prone to delicate dies and fibers that must be treated very gently. Orvus paste is very concentrated so it does not take much to clean with.
There are several ways to use Orvus Paste, and you can’t really go wrong with any of them. They are simply a matter of preference.
Below is a simple step by step instruction on using Orvus, water, and a nylon brush.
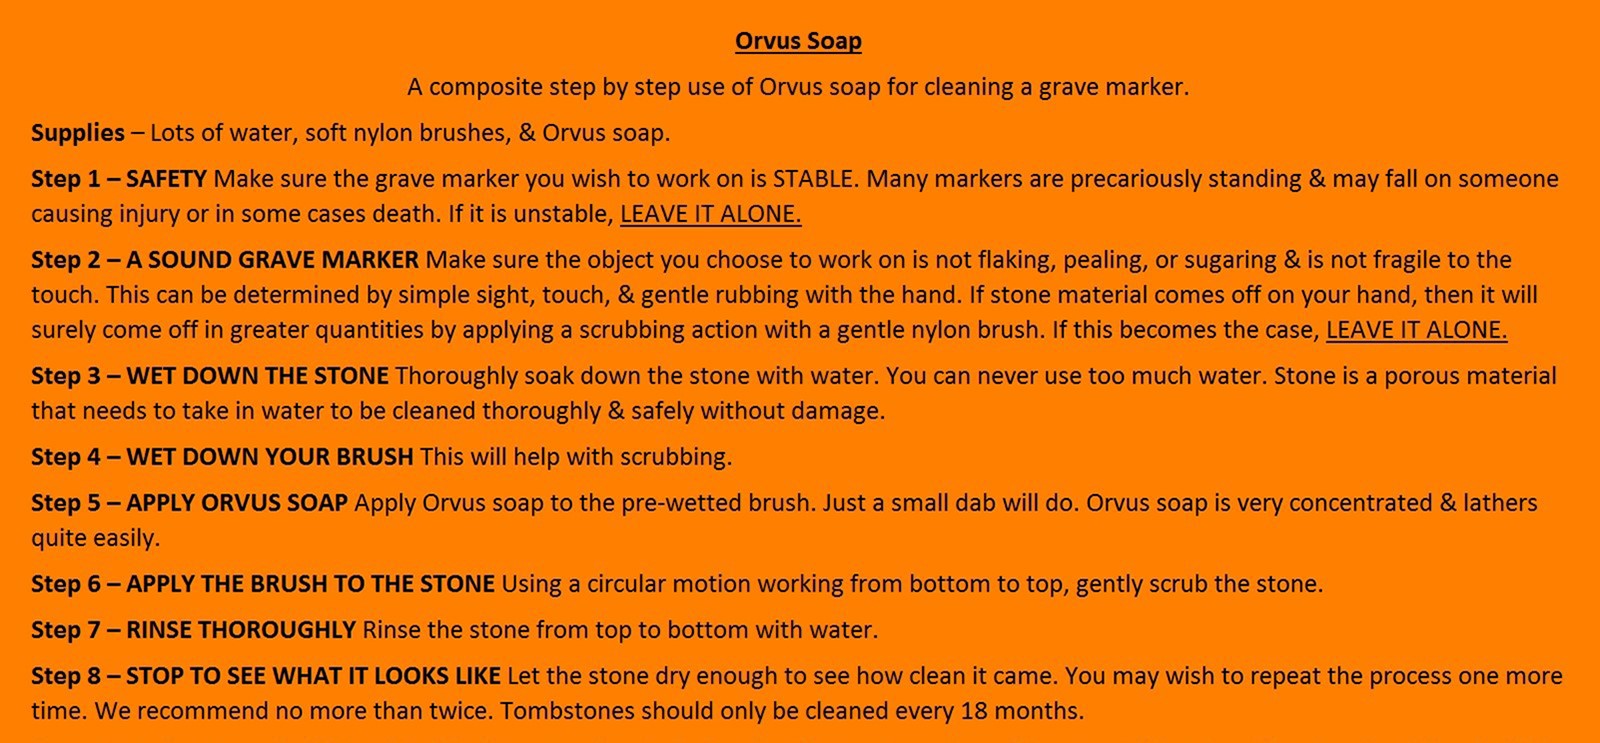
Our goal is to address the most basic preservation and restoration issues that make up the majority of what most try to accomplish. These beginning steps are the most important. And usually decide whether the project will begin with success or meet with permanent damage. Being a cemetery conservator does not happen overnight and we all continue to learn new things. But at the same time, anyone can become proficient in the basics with some knowledge, skill, training and practice. We are here to help you with that.
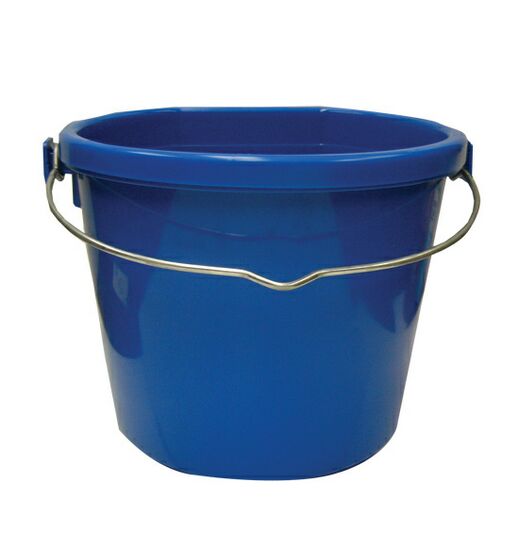

Another way that many prefer and find very easy is with a bucket of water and a little Orvus Past. Fill any given bucket up about 2/3’s with water and add a couple tsps. of Orvus into the water. Mix around in the water with your hand until it dissolves, and now you have a bucket of soapy like water. Use with nylon brush until water is dirty, and mix a new bucket. This method also helps you keep you brush much cleaner than the other methods because you can easily rinse your brush out in the bucket

With any of these methods you will need a nylon brush and a generous amount of water for both scrubbing and rinsing. A 2 to 5 gallon pump sprayer works well for rinsing. You can usually find them for between $10 and $20 at most any DIY type store. Finding or brining your own water supply will be hardest thing to figure out.
The Spray Bottle Method
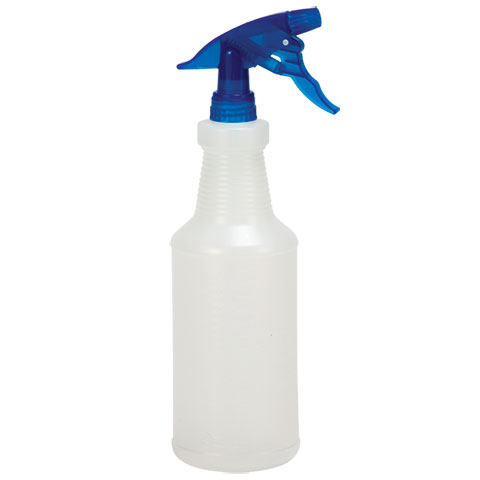
Rather than apply Orvus directly on a brush or use it out of a bucket, some prefer to premix Orvus and water and bring it with them gallon jugs. Mix the Orvus and water like above in the bucket method, but pour it into transportable containers to refill your hand sprayer with.
D/2 Biological Solution
A safe well tested cleaner to kill biological growth
There are a variety of ways to use D/2. Here are two methods that come straight from the manufacturer.
The Immediate Result Method
Apply D/2 Biological Solution with a brush, roller, hand pump sprayer (garden style pump sprayer) or low pressure power sprayer.
- Allow undiluted D/2 to remain on the surface 10-15 minutes.
- Apply additional D/2 as necessary to maintain a wet surface.
- Scrub with soft nylon or natural bristle brush. DO NOT USE METAL BRUSH.
- Lightly mist with water and continue scrubbing.
- Rinse thoroughly with clean, potable water.
- Reapply if rain occurs within 12 hours of application.
The No Scrub/No Rinse Method
- Using a sprayer (pump-up, low pressure, or other,) wet the entire surface with D/2.
- Allow to air dry.
D/2 works with the elements and results occur within one week to one month, depending on severity of soil. Reapply if rain occurs within 12 hours of application.
Our goal is to address the most basic preservation and restoration issues that make up the majority of what most try to accomplish. These beginning steps are the most important. And usually decide whether the project will begin with success or meet with permanent damage. Being a cemetery conservator does not happen overnight and we all continue to learn new things. But at the same time, anyone can become proficient in the basics with some knowledge, skill, training and practice. We are here to help you with that.
Method 1
- Dry brush and scrape the biological growth off first
- Wet down the marker with water and scrub it thoroughly with water
- Rinse off the marker thoroughly with water washing away the biological debris
- Thoroughly mist coat the stone with D/2 and walk away
Method 2
- Wet down the marker thoroughly and brush and scrape the biological growth off
- Wet down the marker with water and scrub it thoroughly with water
- Rinse off the marker thoroughly with water washing away the biological debris
- Thoroughly mist coat the stone with D/2 and walk away
Method 3
- Dry brush and scrape the biological growth off or Wet down the marker thoroughly and brush and scrape the biological growth off
- Wet down the marker with water and scrub it thoroughly with Orvus Paste
- Rinse off the marker thoroughly with water washing away the biological debris
- Thoroughly mist coat the stone with D/2 and walk away
Whichever method you choose, or combination of methods, you cannot go wrong because D/2 is a proven safe product that involves no mixing. There is nothing you could make too strong or get wrong.
From the Manufacturer…A Further Treatment and Maintenance Program
Add years to the life of your property. After initial treatment of substrate, a once-a-year light spraying will help maintain a clean, stain-free surface. NOTE: Heavy biological deposits can be loosened using a low pressure washer (600 psi), and may require repeat applications of D/2 to achieve complete cleaning after detachment. Alternatively, heavy growth can be detached by manual scraping using wooden or plastic tools immediately after application. In the event of excessive plant exposure, rinse all plants and water-in all planted ground areas contacted by D/2.
More to be added in the near future pertaining to other cleaning issues such as tree sap, bird droppings, industrial pollution, and paint due to vandalism.
December 23, 2017 – CEMETERY CONSERVATORS FOR UNITED STANDARDS
Harmful Cleaning Methods
Before we begin delving into harmful cleaning methods, we want to mention a further article we have written addressing biological cleaners and Orvus that you may also want to read. This article will head off some disinformation being spread around concerning these two product types being used in conjunction with one another.
We can’t stress enough the damage that can be caused to old soft tombstones and monuments, when harsh chemicals and procedures are applied. We have given you the shortest and simplest means to damage free cleaning under BASIC STANDARDS…Cleaning. That list is quite short. The long list consists of the many bad things that are used and have been used over the years for cleaning. We will try to list as many of these as we can and focus on the most prevalent culprits. We will also give the best explanations science and studies have to offer on this subject. Remember: anything other than what we have as an approved cleaner, will do some degree of damage. It’s merely a matter of what degree of damage. Stone is much like wood when it comes to taking in moisture. Softer stones can be like giant sponges and that is the biggest danger and concern over what to apply on them. Common everyday soaps to harsh chemical will travel deep into the stones and cause damage from the inside out. This is the type of damage that can’t be detected until it’s too late.
Harmful Cleaners and Cleaning Methods
When it comes to tombstone and monument cleaning, the most important thing about any liquid cleaning solution is ph neutral.
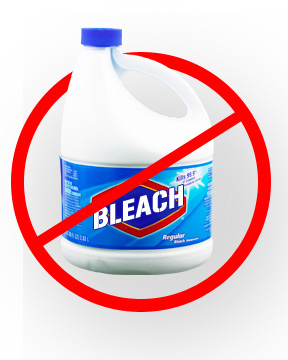
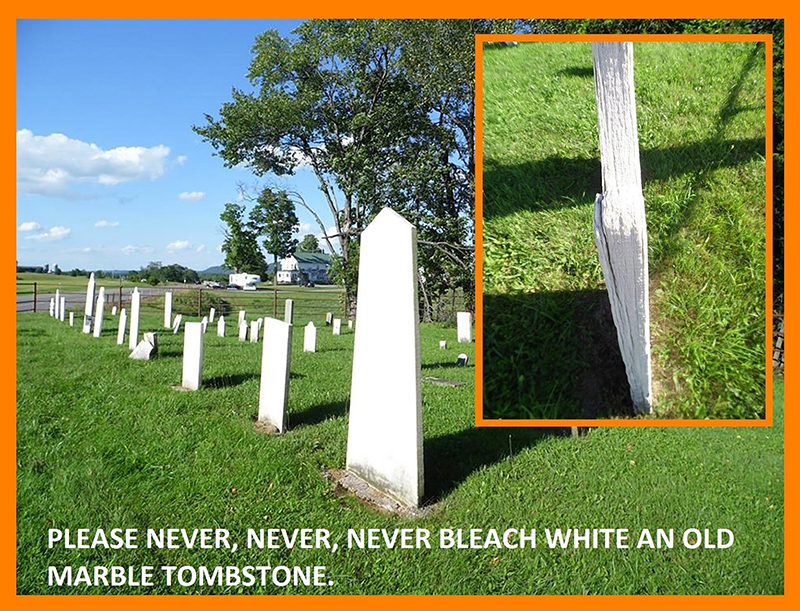
Bleach is at the top of the list as the number one harmful cleaner most used. Most who use it do because it’s cheap, kills germs and fungi, and it will bleach white a marble stone. Sounds good in theory, but very harmful. The makeup of bleach – The chemical compound formula for sodium hypochlorite is NaOCl. – reaction – Chlorine and sodium hydroxide will produce sodium hypochlorite Cl2 + 2NaOH = NaOCl + NaCl + H2O. Bleach is damaging do its sodium content. The damaging salt deposits left behind in the stone will break down the stones molecular structure from within.
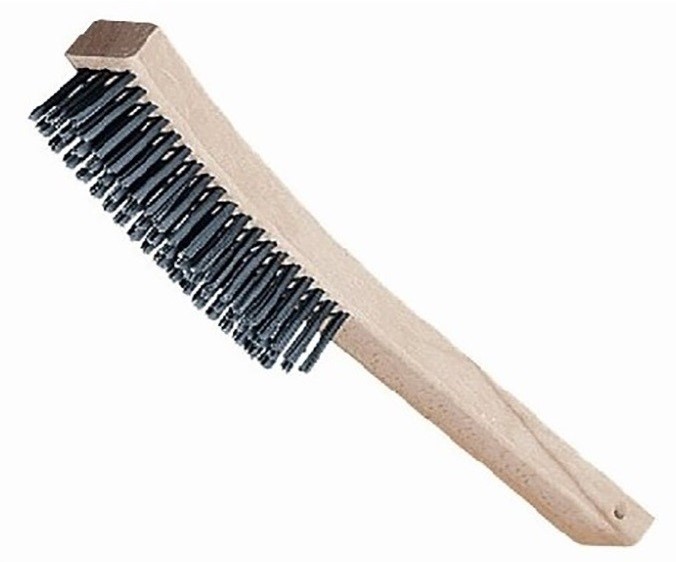
Bleach quite often has an accomplice with equally devastating effects, known as a wire brush.
A wire brush will do extreme damage by removing layers of stone. Sometimes removing entire inscriptions. It becomes compounded damage when used with bleach. Please save the wire brush for your next auto body restoration, not your next trip to the cemetery.
ALL typical household cleaners contain some amount of cleaning agent or byproduct such as sodium that will do some degree of damage. These products are best left under the kitchen sink or in the garage where they can be used around the home and on what they were intended for.

Cleaning with power washers is also not recommended. High pressure water has been known to take layers of skin off of a person. If you can strip paint off of a building, you can strip layers of stone off of a grave marker. Many historic stone structures have had their historic mortars and soft bricks damaged with this process. The two key factors here are, the amount of pressure and the softness of the stone. The real damage occurs when overzealous people turn the pressure up on soft stonework.
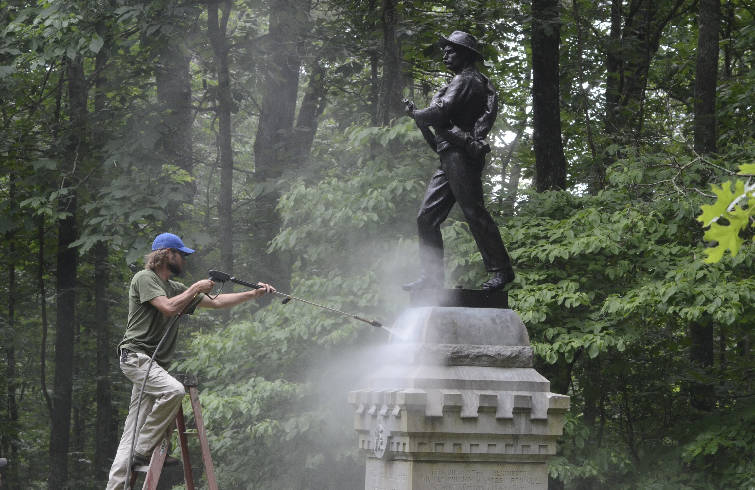
This process should only be managed by professionals who use it on a limited basis if at all. Many preservationists want nothing to do with it what so ever and others use it sparingly. But since some historical professionals and historical institutions use this technique, it would be disingenuous of us to not try and represent this subject equally. We caution against it because typically there are too many factors involved and too many things can go wrong very easily. This coupled with the factors of equipment and the large water supply needed, most find it not practical.
Sandblasting on the other hand should never be used as a method of cleaning. The main point of sandblasting is to remove unwanted material to produce a new prep surface. This means historic stone material will be removed to achieve this. Removing historic stone material from the surface will destroy a stones natural protective skin and cause the stone great harm over a short time.
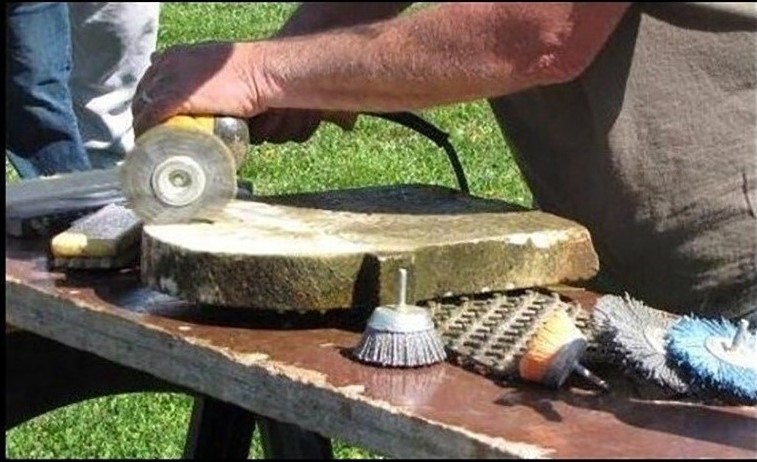
ANY cleaning of a tombstone or monument by mechanical means is devastating to the stone and not recommended. Stone cleaning is meant to be done with the least invasive methods. Mechanical cleaning is the opposite of that. It is very abrasive and extremely invasive.
As we have stated before, stones have a molecular structure and are complex miniature microcosm worlds of nature. And like most things in nature, they change and develop defense mechanisms. When a stone is below ground in a quarry, it has a different molecular quality than one from above ground. A virgin type quality if you will that has not been exposed to both natural and man-made elements. It’s busy being part of the ever changing waxing and waning processes that take place below the earth’s surface. When it is quarried and brought to the surface, it stands bare and naked to the torchers of the world’s atmosphere. And in response to this, it grows a protective skin in an effort to shield itself from these elements.
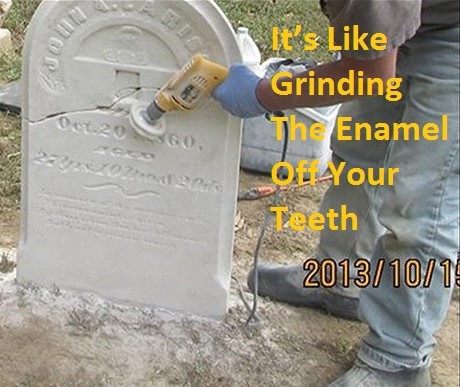
When you use an abrasive means to clean a stone, you strip away this cloak of protection and leave the stone totally defenseless. This is much like cleaning your teeth with a dremel and removing the protective enamel coating.
Ken Follett – founding member and first president of the Preservation Trades Network, experts in the field of historic preservation, was asked the following question.
What are some of the harmful effects that result from using high speed rotary nylon wheels on power tools on gravestones?
“I am a solid advocate of D/2 biological solution. That regardless, the technique of treatment of stone surfaces of cultural heritage value. Polishing with Nyalox brushes on a power drill is totally off the charts on an international basis in the world of stone and monument conservation. Likewise, the bad thinking that gravestones need to be, “returned to how they looked originally”. The very first questions needs to be, “Why do this at all? What is the necessity? Where in our culture does this need come from?”
A quote from Lynette Strangstad, Author of “A Graveyard Preservation Primer” The premier book on cemetery conservatorship.
“Briefly in my opinion, “polishing” an old gravestone is not appropriate. The entire stone is altered. Some of the surface is removed. And that fragile surface is the very reason most consider the stone valuable. (Though that is only part of the significance) In grinding the surface, that is polishing, one is removing part of the lettering. Three or four such abrasive cleanings over time, say 15 or 20 years, could easily equal the stone loss that would occur naturally in a 100 or more years. It’s good to remember that care for gravestones is not just to satisfy our aesthetic desire in the present; it is to preserve the stone for future generations. D/2 is an effective and responsible cleaning agent when needed”.
People who use this method attack a stone in a series using all three of these wheels. Note the claim to be far superior to wire brushes lasting 10 X as long. These are aggressive tools used in auto body prep work.
Ken Follett and Lynette Strangstad are two of the most knowledgeable and respected people in this field and have years of studies and experience on their side. They are a prime example of the experts CCUS members gain their knowledge from.

Why removing the outer layer of a grave marker is a very damaging thing
An article by Geologist Don Hilton
All rock begins to weather from the moment it is removed from the earth. It doesn’t matter what kind of rock it is, or how tough it is, it begins to weather.
It’s easy to find grave markers heavily damaged by the environment. Low-quality marble is regularly mentioned as a stone type that is quickly ruined by exposure to acid precipitation. Alternatives are just as easily found: Sandstone that spalls due to water infiltration or slate that splits because of uneven heating from the sun. But something else is going on beside the obvious damage that we can see with our eyes.
Imagine a loaf of freshly-baked bread. Why does it have a crunchy crust? Really… the whole loaf was in the oven. There was nothing special about the outside layers of the dough. Why is the outside of the bread so different than the inside?
You know the answer. The outside was exposed to the heat and dryness of the oven. As the crust formed, the inside was protected from the worst of the extreme environment. In a properly baked loaf, the hard crust and soft bread are easy to tell from one another. They are made up of the same stuff, but different due to environmental exposure. They are all part of one thing and, while attached, they can be pulled apart, one from the other.
The rock that makes up a grave marker is the same way. When it’s pulled out of the ground, it’s all the same thing. The face of a commercial stone is worked: honed, polished, and carved. Then, it’s stuck out in the open, just like kneaded bread dough is put in an oven.
Just like bread dough in a hot oven, being exposed to the environment changes the surface of the rock. Sometimes the change is rapid, like a dissolving marble. Sometimes the change is slow. Sometimes you can’t even tell if it’s taking place, but it is. In fact, you can bet on it.
What happens depends on the kind of stone. The surface may become soft and brittle, or it may develop a protective “skin” or patina. These changes are the result of the rock trying to come to a physical and chemical equilibrium with its environment. Like baking bread that forms a crust.
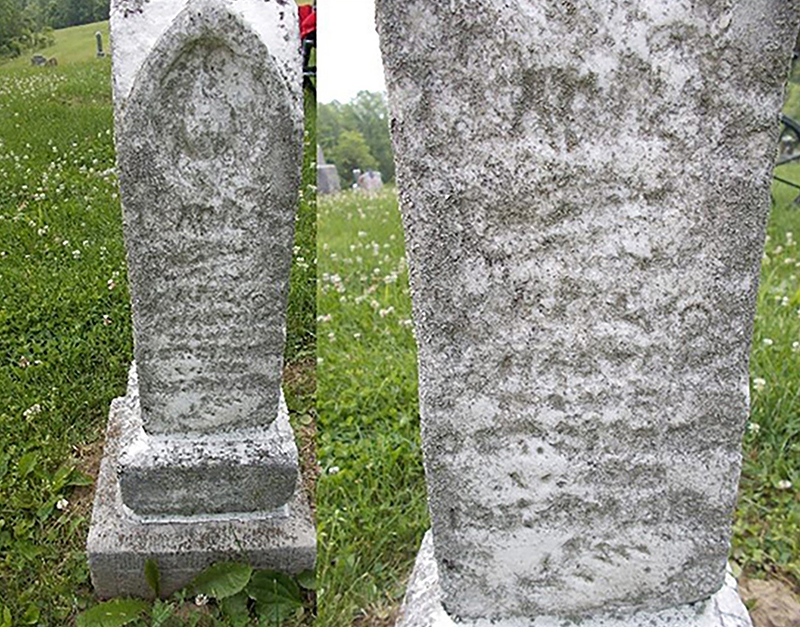
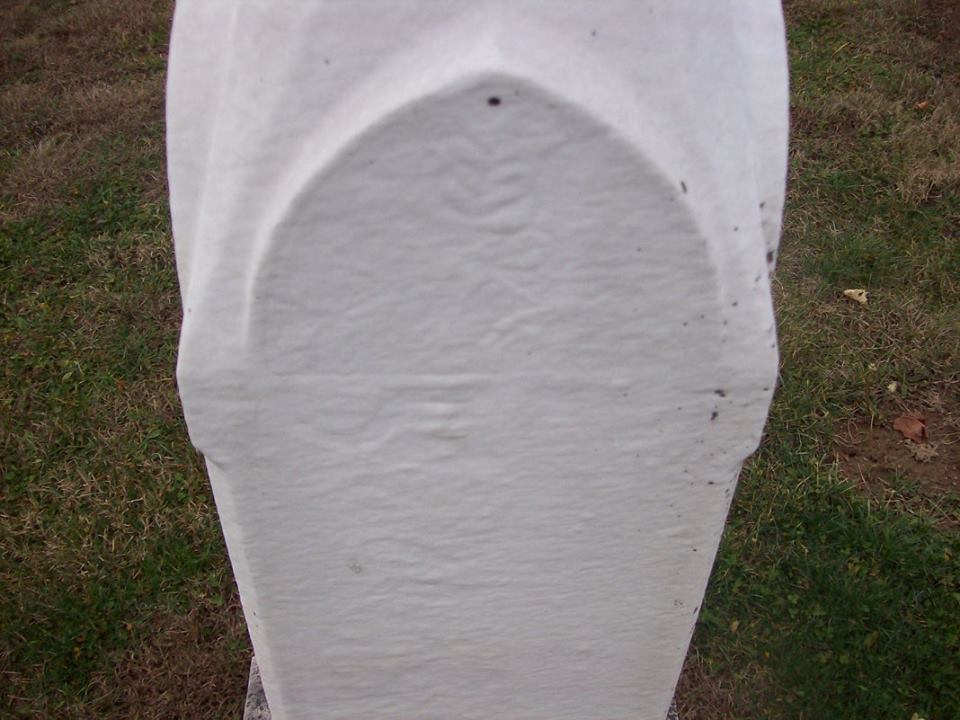
The white marble stone to the left carved in 1877, is showing some signs of dissolving with its natural exposure to the environment.
These altered, outer rock surfaces are easily damaged by abrasive mechanical or improper chemical cleaning. When created, grave markers are frequently “dressed” with tools to give them a specific texture that contributes to their historic character as much as any ornately carved stonework. Such detail is damaged by harsh cleaning techniques, either abrasive and/or chemical. The pattern of tooling or cutting is erased, and the crisp lines of carving are worn. Aggressive cleaning removes the polished or honed surface of marble or granite, almost like your “frosting” a clear glass.
The white marble stone above was mechanically cleaned with what is known as a “Nyalox” wheel used on the end of a drill. These wheels are advertised as “abrasive impregnated nylon brushes” with bits of metal that are supposed to last 10 times longer than a wire brush. This stone, once very legible before this mechanical cleaning, is an example of what happens when the protective skin/crust of a stone is removed by harsh or abrasive means, as stated below. This accelerated deterioration took under 4 years to happen.
A cleaning procedure that is too strong removes the protective “crust” or “skin” of the stone. This exposes a new and increased surface area to collect moisture, dirt, and bio-growth. This accelerates weathering. This speeds damage.
Think about it… If halfway through the baking process, what would happen if you pulled the bread from the oven and peeled away the crust? Would you end up with bread without a crust? Nope. You’d end up with a ruined loaf of bread.
And that’s why you don’t want to clean a grave marker too harshly and chance removing any of its surfaces. You’re not making it cleaner. You’re not making it better. You’re ruining it.
Ammonia…aggressive cleanings other half of the 1, 2, punch that damages grave markers
An article by Geologist Don Hilton and Cemetery Conservator Mark Morton
For years ammonia has been viewed as a safe and inexpensive cleaner for grave markers. And the golden rule has always been to use it at a ratio of 5 parts water to 1 part ammonia. And to never go above that ratio by increasing the amount of ammonia. Ammonia on its own is very alkaline on the pH scale, coming in at 11.6. To at least begin to understand the effects of ammonia that we are describing, we need to look at some basic chemistry and have a basic understanding of the importance of pH and pH neutral. The scale and description below should do just that.
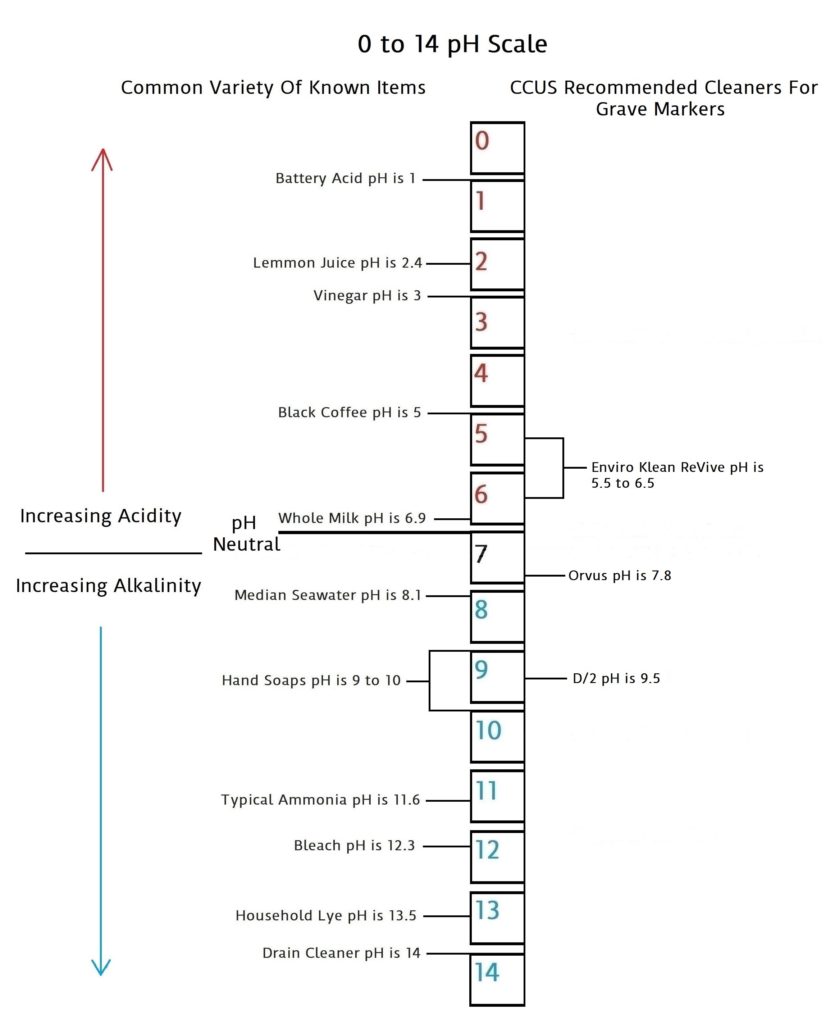
What Is pH And Why Is It Important?
pH is a scale of 0 to 14 that measures acidic quantities and qualities against alkaline quantities and qualities. A pH less than 7 is said to be acidic and solutions with a pH greater than 7 are basic or alkaline. pH neutral is 7. Human pH neutral is 7.30 to 7.45 slightly alkaline. Being as close to pH neutral is important because this is the least caustic area of the scale between the two extremes.
This scale will give you an idea of how pH is measured using common items you may be familiar with.
Acidic and basic are two extremes that describe a chemical property of chemicals. Mixing acids and bases can cancel out or neutralize their extreme effects. A substance that is neither acidic nor basic is neutral.
The pH scale measures how acidic or basic a substance is. The pH scale ranges from 0 to 14. A pH of 7 is neutral. A pH less than 7 is acidic. A pH greater than 7 is basic.
The pH scale is logarithmic and as a result, each whole pH value below 7 is ten times more acidic than the next higher value. For example, pH 4 is ten times more acidic than pH 5 and 100 times (10 times 10) more acidic than pH 6. The same holds true for pH values above 7, each of which is ten times more alkaline (another way to say basic) than the next lower whole value. For example, pH 10 is ten times more alkaline than pH 9 and 100 times (10 times 10) more alkaline than pH 8.
Pure water is neutral. But when chemicals are mixed with water, the mixture can become either acidic or basic. Examples of acidic substances are vinegar and lemon juice. Lye, milk of magnesia, and ammonia are examples of basic substances.
Ammonia as an industrial fertilizer
Ammonia (NH3) is the foundation for the nitrogen (N) fertilizer industry. It can be directly applied to soil as a plant nutrient or converted into a variety of common N fertilizers, but this requires special safety and management precautions. Ammonia has the highest N content of any commercial fertilizer, making it a popular source of N despite the potential hazard it poses and the safety practices required to use it. For example, when NH3 fertilizer is applied directly to soil, it’s in a pressurized liquid that will immediately become vapor if exposed to air after leaving the tank. To prevent such releases into the atmosphere, growers use various tractor-drawn knives and shanks to place it at least 10 to 20 cm (4 to 8 inches) below the soil surface. Ammonia will then rapidly react with soil water to form ammonium (NH4+), which is retained on the soil cation exchange sites.
Ammonia as a simple fertilizer by adding water
Ammonia is sometimes dissolved in water to produce aqua ammonia, a popular liquid N fertilizer. Aqua ammonia doesn’t need to be injected as deeply as NH3, which provides benefits during field application and has fewer safety considerations. Aqua ammonia is frequently added to irrigation water and used in flooded soil conditions.
Summation: When you take household ammonia and add water, you are making a form of “liquid N fertilizer”. And even though this type of fertilizer does not need to be “injected deeply”, the porosity of stones like marble, sandstone, limestones, etc. will in a way, self-inject this like a sponge due to the stones natural porosity. Most all cleaning that occurs on grave markers is to remove or kill biological growth such as lichens and moss. Many of these biological growths attach themselves deep into the stone, making them very difficult to dislodge. So when you apply your homemade liquid N fertilizer in an effort to get rid of biological growth, you are actually fertilizing it at its core where it resides below the stones surface. If the stone already has a “protective crust or skin” as described above, it at least has some natural protection to begin with. But when you mechanically remove that layer as you spray down the stone with your water and ammonia solution, you are laying the stone bare to everything and greatly aiding by injecting this into the stone. This is why we refer to this as a 1, 2, punch that damages a porous stone forever.

Above left to right, are 3 white marble stones that were cleaned with the Nyalox wheel and ammonia. The first stone was already showing signs of natural dissolving, or as many conservators call it, “the melted candle wax effect”. The middle stone represents the average amount of damage that occurs. The stone on the right is an example of how the Nyalox wheel has ground off most of the delicate detailed carving, and is beginning to show some biological regrowth. All 3 of these stones were completely white directly after the Nyalox method was completed. You never know for sure the severity of damage that will occur. Cloverdale Cemetery, Cloverdale Ind.
In addition to this, you have opened up the stone to a plethora of elements natural & manmade. Let’s start with the natural elements. We have all of the biological growths that occur naturally in nature as the natural process that breaks down everything on earth. This is further accelerated as wind and rain leave soil deposits as part of this cycle. So you roughly have soil and seeds and seasonal growth patterns. Manmade elements can range from a wide variety of atmospheric pollutants and acid rains, to any sort of carry over used in the farming industry, from fertilizers to pesticides. So the grave marker becomes very much like a petri dish.
Preserving anything is always a fight against natural occurrences in nature. And the best way to combat this when it comes to grave markers is with the least invasive methods possible. It’s a matter of not going too far in an effort to make something look brand new, but to make a “do no harm” improvement. And realizing where the tipping point is between the two. And also realizing when something is as good as it will get or to leave it alone altogether.
SOURCES:
https://www.britannica.com/science/desert-varnish
https://pubs.usgs.gov/pp/1210/report.pdf
https://www.thoughtco.com/chemical-weathering-p2-4122736
Photo Courtesy…Mark Morton and Lee Creed, Images by Cemetery Conservators For United Standards
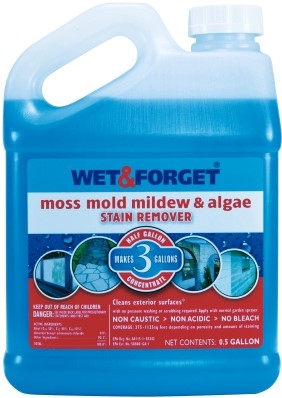
There has been much said, both negative and positive about this product for grave marker cleaning since it first came onto the scene a few years ago. This product has been quite popular among those looking for the quick, cheap, and easy to find solution for cleaning biological growth off of gravestones. Those in favor of this product site the previous reasons and back that up with the manufacturer’s claims.
Those not in favor of this product point out reasons not associated with easy button reasons of convenience and manufacturer’s claims. Their reasons are about being fact based due to rigorous testing and analysis in accordance with the “do no harm” practices for cemetery preservation and restoration. Their concerns are as follows.
Concern over this product having strong diverse chemical combinations that “may” damage old porous stones such as marble, sandstone, and other siltstones.
Concerns about an MSDS sheet with many warnings about safety precautions that have fluctuated over the past several years.
A complete lack of any official independent lab or field study showing the products chemical makeup or longer term effect on historic stone.
And some voice concerns about a product they fear may have some sort of sealant quality, in their eyes, because many find that water beads on the stone after this product is applied. And there for, they worry the product is interfering with wicking, water travel, and natural water displacement in and out of the stone.
The do no harm practice view is all about the use of products that have been tested and proven, as much as is possible, to best insure damage does not occur if used on historic stone. Wet & Forget has no such study at this time that we are aware of. On the positive side, this product does have several similar qualities in its chemical makeup that other “approved” biocide products have. But, without proper analyzation, it is hard to tell just how these chemical combinations actually interact with one another. This product should be analyzed and rigorously tested in much the same manner as D/2 Biological Solution was tested, to best insure it does not do harm. And so, we can neither condemn nor condone this product until such testing has been done. As always…we caution you not to use untested products, and to please use proven do no harm products. Why take chances?
The information about Wet & Forget can also be found HERE.
Other areas of interest that pertain to cleaning

For a much more in-depth explanation and discussion about cleaning products and methods, mouse over PRO VS CON and choose Cleaning Issues. You may also find the other categories under PRO VS CON helpful as well.
This section is here to weigh out the many “Pros VS Cons” that seem to exist in this relatively young field known as the cemetery preservation and restoration. A young field born out of the need and want to maintain the memorials left us in cemeteries. Maintaining things from the past has been around almost as long as the past itself. Art, documents, books, buildings, and now cemeteries. After the desire to save these things is met, then begins the how to save them, through what means and with which forms of maintenance. This quickly becomes a much clouded issue for many. We hope to lift this fog with some simple fact based thoughts and principals. Our cornerstone or main pillar for doing this will be a thing called, “Do No Harm”.
This section has two main goals. One is to lay out and examine the field itself and all of its controversial issues, problems, and divisions. The second main goal of this section is to lay out the said issues involving methods, techniques, and products, and run them through the list of 6 or more questions below. This is where you find the meat of the discussion before it is weighed out with these questions.
We are addressing as many of these issues as we can at this time with the following subcategories in this section. “The Field In General” subcategory addresses the overall methodology of the field itself. Other subcategories such as Cleaning and Bonding Agents, and others to be added, will address more specific methods and products.
These are the 6 standard questions we will ask of all methods, techniques, and products suggested or discussed on The Cemetery Conservators For United Standards website. Additional questions may be asked pertaining to a given subject depending on the need to ask them based on the subject. You will find the completed version per product and/or method under SOURCES…Pro VS Con Results.
1…MSDS… based on the MSDS recommendations. (Scale of 1 to 10) 1 being the most invasive or highest risk to a person’s health & safety. And 10 being the least invasive or lowest risk to a person’s health & safety.
2…Testing…has it been tested? (Scale of 1 to 10) 1 being the lowest # of testing done. And 10 being highest # of testing performed.
3…Longevity & Performance… based on reliable reports concerning how long & well the product holds up. (Scale of 1 to 10) 1 being the shortest longevity & lowest performance. And 10 being the most longevity & best performance.
4…Track Record & Wide Spread Use…How well has this substance or product in this technique held up over the years & how many places has it been used? (Scale of 1 to 10) 1 being the worst track record, least widely used, & least places used. And 10 being best track record, most wide spread use, & most places used.
5…Permanence…is the substance or product in this technique, reversible or nonreversible? (Scale of 1 to 10) 1 being the lowest possibility of reversal. And10 being the highest possibility of reversal.
6…Cost & Training…how expensive is the product & is there specified training required & what is its cost? (Scale of 1 to 10) 1 being highest cost & most training. And 10 being lowest cost & least training.

TOOLS & SUPPLIES…things we suggest to better aid in your cemetery preservation work can be found here.

TECHNICAL…is the place where we house all information for products used and has Product Explanations, Product Information Sheets, and MSDS

SAFETY…is always an important place you should visit at every step along the way
SAFETY – a place for all safety related issues found in cemeteries and in the preservation of cemeteries. Every year people are killed due to unstable stonework in our cemeteries. Over time many of these monuments begin to lean and teeter. And unsuspecting visitors are crushed because they disturbed one of these loose monuments. We wish to remind people of this situation and caution them from such tragedies. Safety is also equally important for those who choose to do some sort of restoration work. The hazards can range from a pinched finger to being killed by a large stone. I can say all of our members take safety very seriously and make it our constant number one priority in everything we do. We please ask that you do the same. This section will try to address this issue as much as possible. Let’s all be safe out there in all that we do.

This is where you will find the latest video links to cemetery preservation and restoration. There are many great videos from both professional organization and CCUS members. We will constantly add new media as it becomes available. Mouse over VIDEO and choose an area of interest. You will find one of the six areas below to view.
Cleaning – the best ways to clean with no harm.
Hoist Work – lifting stones with a hoist type system.
Repair Work – putting the broken pieces back together again.
General Field Work – a collection of misc. preservation work.
Good Preservation – what good preservation looks like.
Bad Preservation – what bad preservation looks like.

ARCHIVES…is where we house downloadable pdf’s and FREE cemetery preservation related images for you to use. We have jam packed this ever expanding library with pdf’s on important cemetery related issues. We wanted you to have a place where you could easily view, print, or download important information. We encourage you to share it with other individuals or groups you may know that are interested. There is no such thing as too much cemetery awareness.
BEYOND BASICS…We are beginning to slowly delve into such cleaning areas like graffiti cautiously. There is a great deal more here than what meets the eye and to begin addressing these difficult issues, we have begun putting together the section BEYOND BASICS. Mouse over this section to find graffiti.
This section will address preservation in 2 ways. First…it addresses methods that touch on, or are an extension of things you will run across through the 6 Basic Standards. Secondly…this section will also address things you won’t necessarily find by utilizing the basic preservation procedures. With this we are attempting to do what we can to discuss the more complicated issues many of us run across in cemeteries. These more complicated issues won’t always be things that we can give step by step instruction on. But, we will do all we can to give guidance and explanation to them. We‘ve placed them here so they may be more clearly defined and understood. And also because we are a growing informational website, we felt the need for this room to expound overall. You will also find links and buttons that will connect you to other related things on our site as it applies.