
Multi-Piece Monument Basics

Multi–piece monuments are basically stacked stone pieces of different types and sizes placed together. They quite often totally rely on level ground and gravity to keep them standing and in place. Often they have metal pins, mortar, or some type of seal between their layers. And many times nothing at all. Multi-piece monuments are a lot like the proverbial box of chocolates. You never know for sure what they are until you bite into one. This basic standard for this process of, taking apart and reassembly is straight forward in manner, but somewhat complicated where physics and safety are concerned. It’s simple if you think about in terms like a child’s building blocks. But complicated and somewhat dangerous when you begin talking about lifting and moving 800 lb. solid blocks of stone. Having a very good grasp of leverage and fulcrum points is imperative and becomes more so as the block sizes and weights increase. The procedure this standard addresses is the most dangerous out of the 6 standards we have written about. And we will stress that several times in the standard. This procedure will also require its own set of equipment. Proper chain hoists, tripods, gantry systems, and safe nylon strapping constitutes the bulk of expense to a conservators war chest of tools.

We suggest you read this section carefully and take a class with a good qualified preservation instructor before attempting any of this on your own. This procedure more than others is an absolute hands-on learning experience. After that has been accomplished, we highly suggest you start with 5 ft., or shorter, monuments that have much more manageable block sizes weighing in the neighborhood of 200 to 500 lbs. per piece. This will allow you to gain the experience you need to stay safe in the most manageable way. I have personally found that I needed to make a balance between being confident and over confident in this area. Not enough confidence will get you hurt as easily as being over confident. These stones are unforgiving and go where gravity takes them.

Because this section touches on what we are terming as “Bonding Agents”, meaning any product or material used to join grave markers together. These will also be addressed in other sections of the website under PRO VS CON and under SOURCES…Pro VS Con Results. Please go to these sections for a more in-depth look and understanding before attempting any of these procedures.

DISASSEMBLY, REPAIR, REASSEMBLY, AND RESETTING OF MULTI-PIECE MONUMENTS

By CCUS members Lloyd Collins of Polk Cemetery Savers and Mark Morton of Gravestone Guardians of Ohio

Most old multi-piece monuments have a combination of problems. Over time, due to weather, rodents, and/or compacting soil, they tilt or have fallen. Some have been vandalized. The setting compound, no matter what was used over a hundred years ago has deteriorated and the joints between pieces are no longer adhered to each other. These problems present a grave danger. Most multi-piece monuments are large and therefore very heavy. Someone leaning on them can topple them easily. If a person is on the down-tilt side they can be crushed by the falling monument.

The repair, for lack of a better word, of these loose multi-piece monuments is a task that should not be taken lightly. This task takes patience, skill, time, and the use of the proper equipment and materials. Few monuments can be repaired in a day. Most will take days before the monument can be repaired and reset to safely stand upright in the cemetery. Every monument is different and although the repair methods may be the same, the series of tasks will be different. This standard will attempt to provide basic methods and define a series of tasks that will be needed to repair multi-piece monuments.

Monuments in the condition like the one to the left are common place in most cemeteries. They are quite often white and gray marble upper pieces placed on sandstone or other local quarried stone base. Many of these base stones are very decorative in nature like the one in the picture.

We will start with some smaller easier to manage 3 piece monuments that consist of an obelisk type top piece, followed by a small sub-base, followed by the larger base piece. Many of these procedures and techniques will repeat themselves as we address them in this section and we work up through larger monuments and different situations.

PRECAUTIONS AND OBSERVATIONS

This task should use a minimum of two persons well versed in the disassembly and reassembly of stone monuments. As with any work done on grave markers, small and large monuments must be carefully inspected before any work is started. Monuments, even though they are made of stone, are fragile. Over the years they may have developed damage from the environment. This damage could include delamination, stress cracks, and areas where water has infiltrated the stone and frozen causing larger cracks or other broken areas. Most monuments have fared better than their companion “tablet’ grave markers.

Inspect the monument. Determine which sections are loose. Measure the monument to determine the cubic volume of each piece. Make a plan for disassembly. Ensure you have enough wood to place under the sections. Keep them off of the ground. This step alone will make cleaning the joints easier as well as the individual pieces themselves.

For safety, you should always use at least two straps. Depending on the section you are lifting you will have to decide what type of lift to use. When you are lifting a section, stop when it is about 1/2 inch above the lower section. Ensure the piece is secure in its lift before proceeding. If the lift is uneven, reset the piece and adjust the straps until the piece is lifted straight up and balanced.

The monument first pictured, did not need its top obelisk piece removed, but like most all monuments, it needed its base readjusted and leveled. These gentlemen at a cemetery preservation class are doing just that. They have used the spud bar and wooden blocks to level the base with crushed rock/gravel, and are now tamping that and dirt into place. Notice they are keeping the level on the block as they work to keep themselves in check.

Working the bar to level the stone

This is a 2 person procedure for the most part. Experienced conservators can learn to work these smaller stones by themselves, but even they must take on an additional person as stones increase in size. In some situations 3 or 4 people are ideal. But having 2 people is always the safest way to go.

Once the base stone has been leveled, you can begin prepping its surface to accept the sub-base block. Clean all of the joints of the monument. Use a chisel if necessary, and use a wire brush to remove scale that the chisel leaves behind.The joints should be free of old material ,scale, and dust.  Use the compressed air canister to blow the residue off of the joints.

Do not allow the wire brush to contact the exposed stone. It will scratch the exterior finish

After this step is completed, you are ready for the lime mortar so you can begin the reassembly process. This is done by reassembling the pieces with a thin layer of lime mortar sometimes known as “stack mix” in between the layers of stone. This layer should be plenty moist, but not an overly wet slurry. Something between ¼ to ½ inch maximum. You’re trying to create a bond that is fairly airtight that goes out to the edges of the stone all the way around like a mortar joint.

There are several types and mixes of lime mortar you can choose from. These mortar mixes will vary somewhat depending on whether you buy them premixed and ready to add water, or you mix your own mortar recipe. A few states like Oregon have specific doctrines and guidelines that need to be followed, as you will see further down. The important thing is that it be a lime mortar. Other areas of the country such as the Midwest generally use 1 of 2 lime mortar mixes.


The first is a premixed 3.5 lime mortar and considered by most, the easiest and best quality for several reasons. It already has the appropriate ratio mixture, it has the correct sand type in this mix, it uses a high-grade lime meant for lime mortar, it can be ordered in a multitude of colors, “if desired”, it is easy to mix, “just add water”, and its makers are expert historic masons. This mortar comes from Lime Works.us and is called “Ecologic Mortar”. A link to Lime Works can be found at the bottom of our home page.

The second lime mortar mix is one you put together with lime and sand. This will require a high-grade lime and a good quality masonry sand. The lime can also be acquired through Lime Works and is called Saint Astier. Finding a good quality masonry sand is not always easy and may require some researching local masonry companies and mixing facilities. DIY sources for sand can be a bit substandard and be more work than its worth. Thus, why so many choose the no fuss, no muss option above.

There are a few other ‘do no harm” acceptable home mortar mixes out there, but they don’t always hold up as well, can be more complicated to mix, and as always, need high-grade ingredients.

Final clean-up work being done to the mortar joints with a damp sponge will sharpen the lines and remove access mortar

 You will need lead spacers commonly known as “lead wedge”. Cut and place lead spacers, no more than 1/4 inch thick under each corner about 1 inch from the edge. These serve three purposes. First they keep the section from slipping and, second, they allow for adjustment of the section to level it. Third, the spacers allow a gap between the sections so the setting material can adhere to both sides of the joint. Cheaper plastic wedge/spacers are cheap and inferior and should not be used  

After you have determined your path of reassembly with mortar and lead wedges in place, it is time to put this small 3 piece back together starting with the sub-base then the top obelisk piece. Note: in both pictures above you will see 2 pieces of flattened firehose leaned against the base & sub-base. These are there to cushion for stone to stone contact and guard against damage. You will find this item listed below under RECOMMENDED TOOLS AND MATERIALS

Setting the top piece square and level on the mortar

Taking those last measurements on all 4 sides of the blocks to ensure the pieces are square in relation to each other. Quite often you will find these stone blocks themselves are not entirely square. Keep this in mind as you reassemble them and adjust accordingly. At this point the main goal has been achieved concerning all things being level and with no lean. These last adjustments in relation to being square are more for aesthetics.

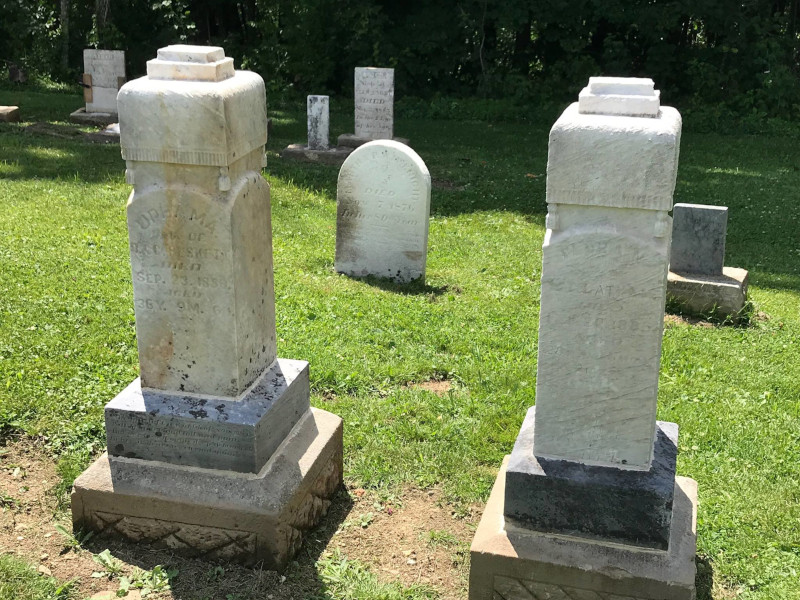
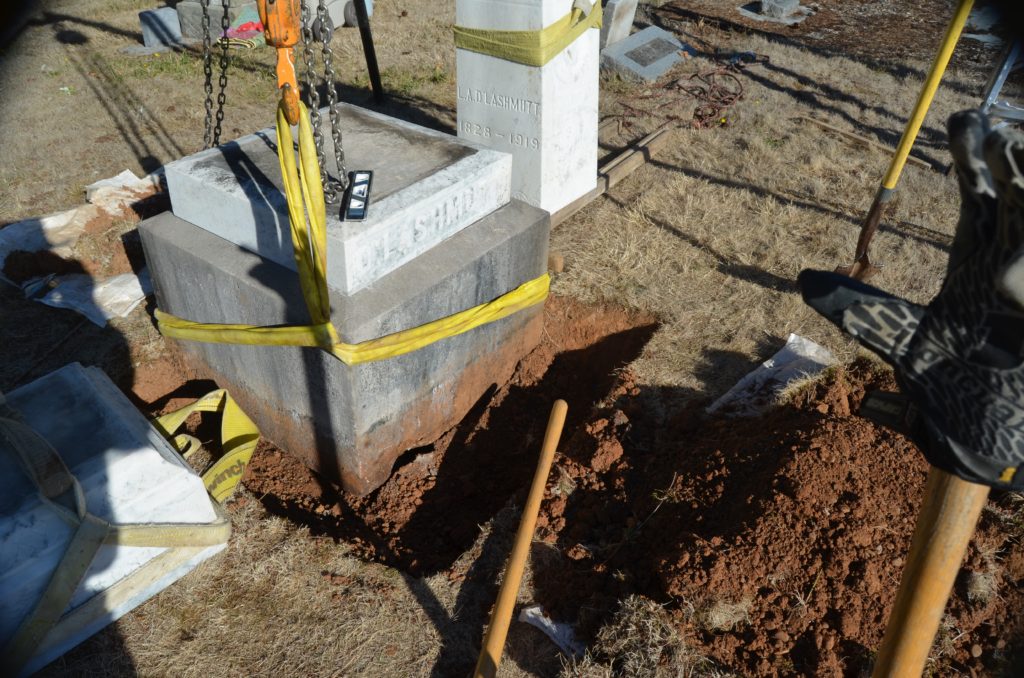
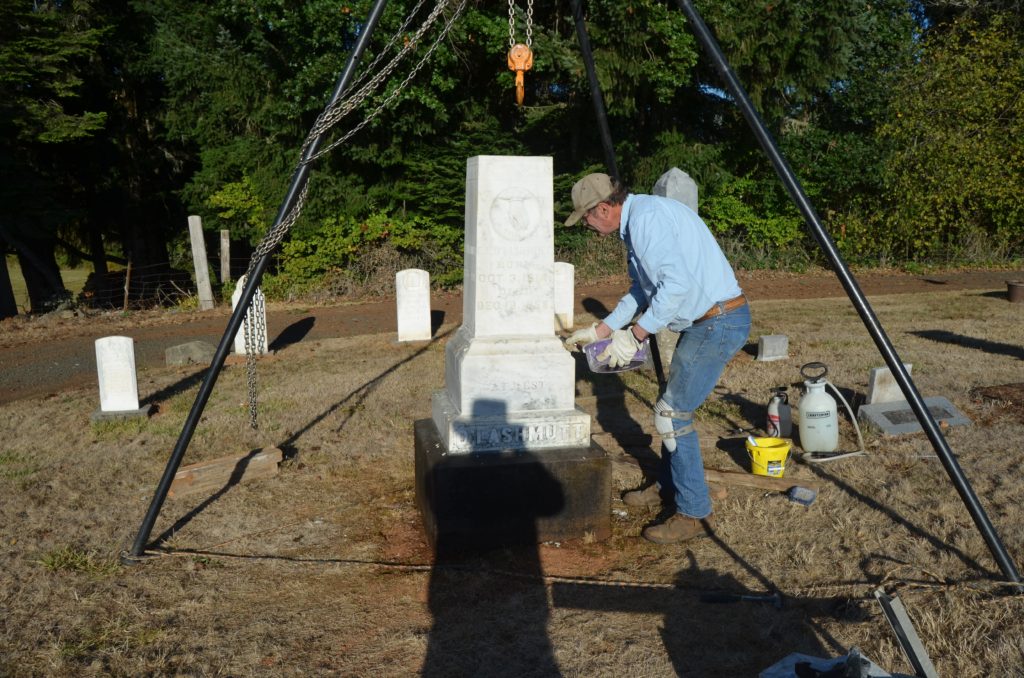
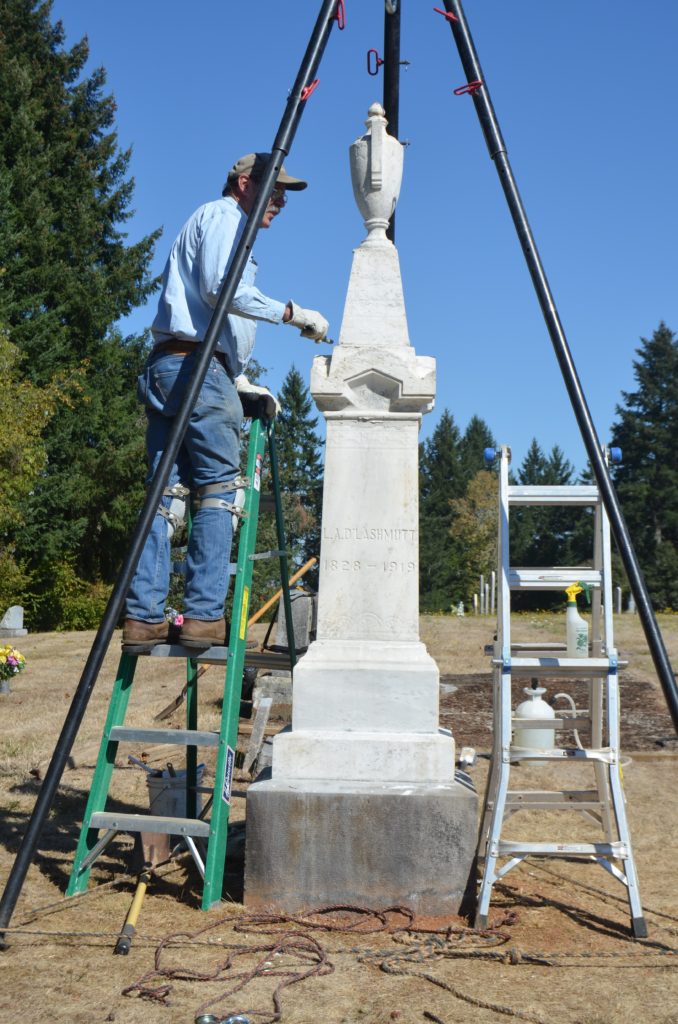
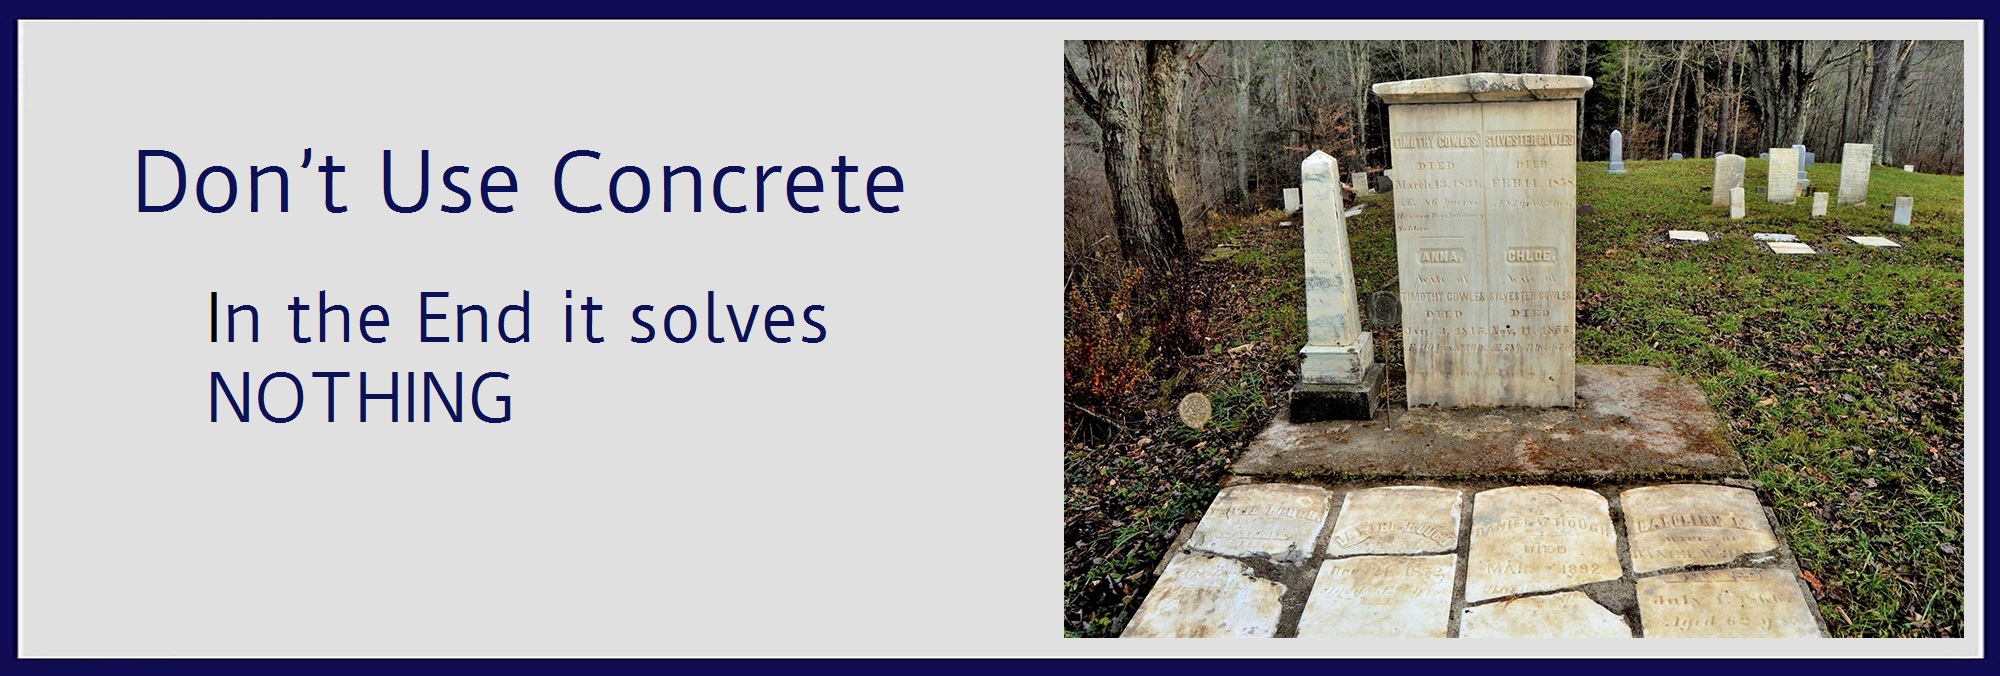
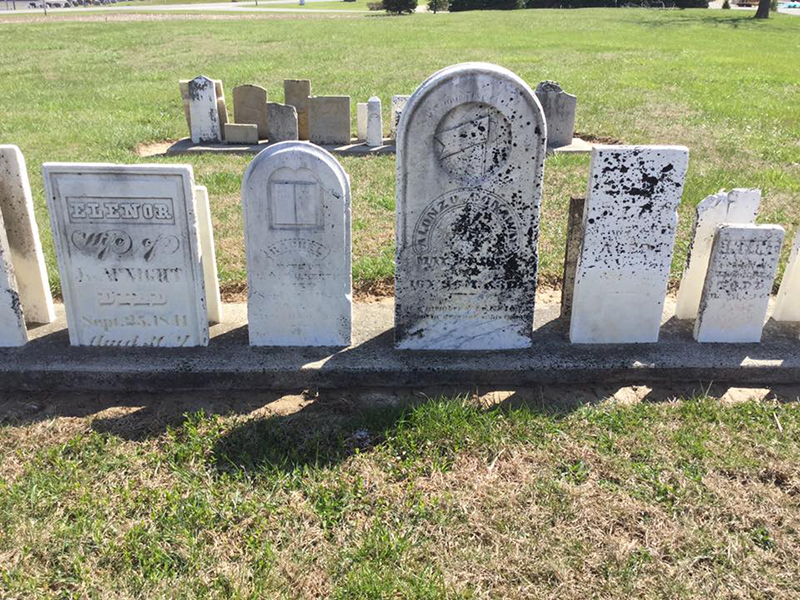
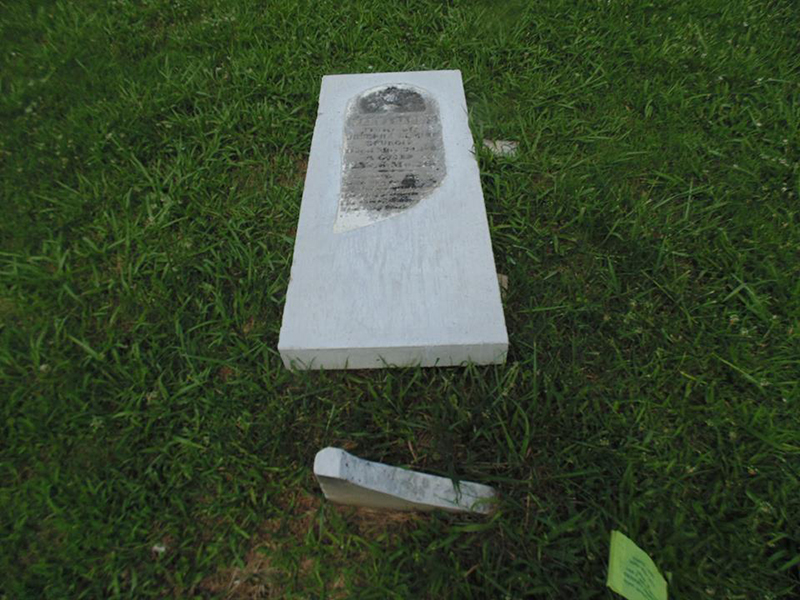
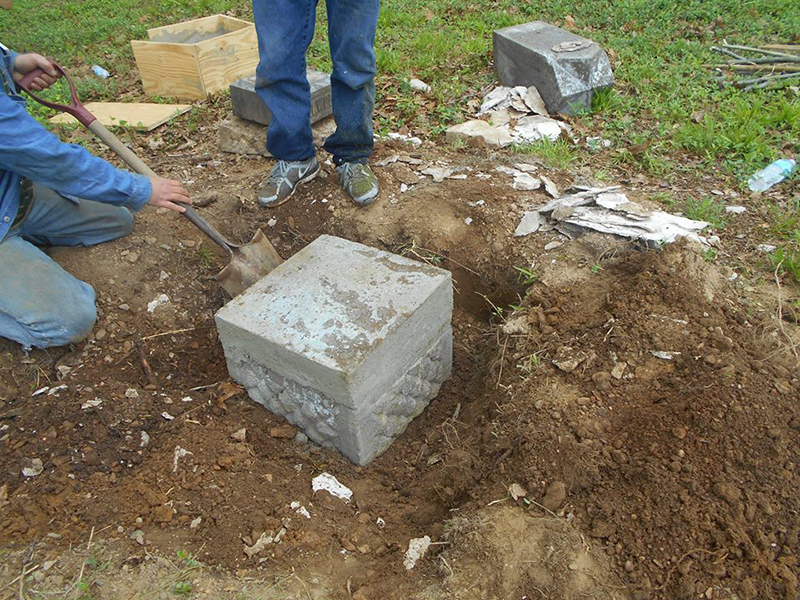
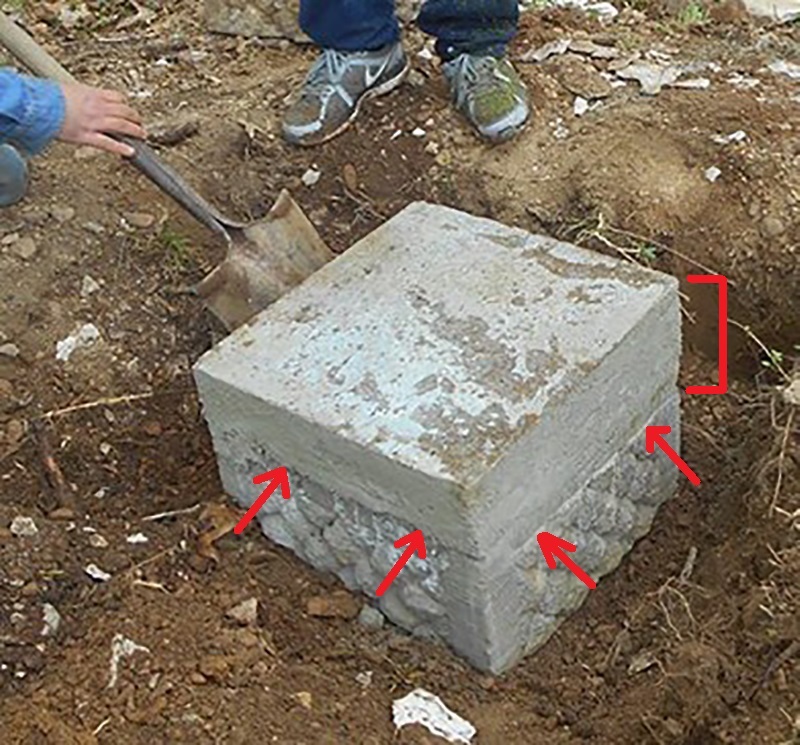
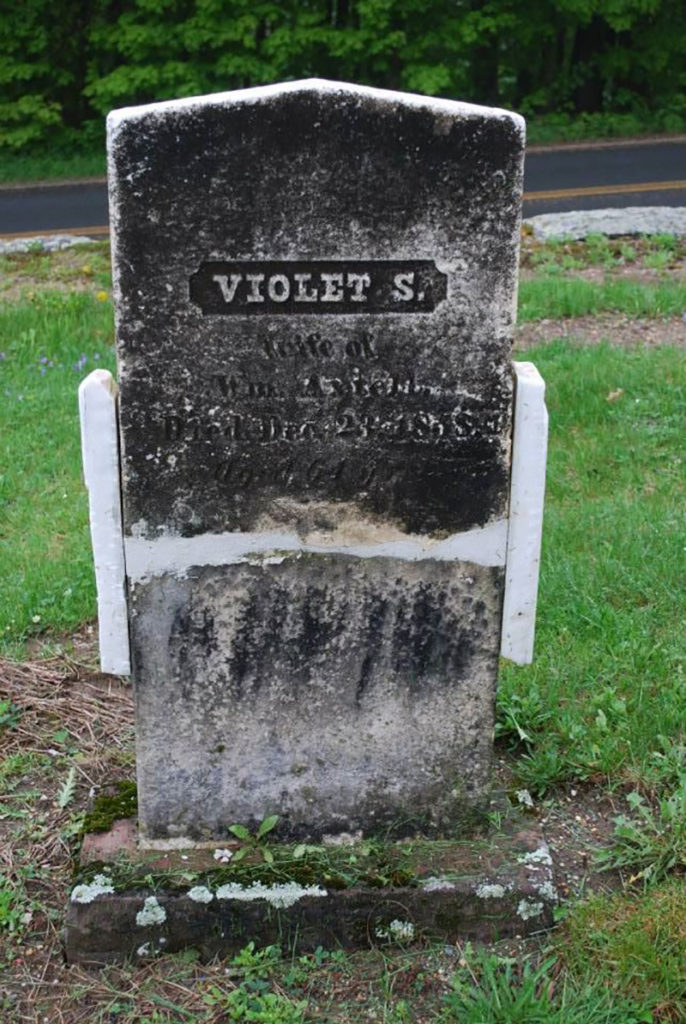
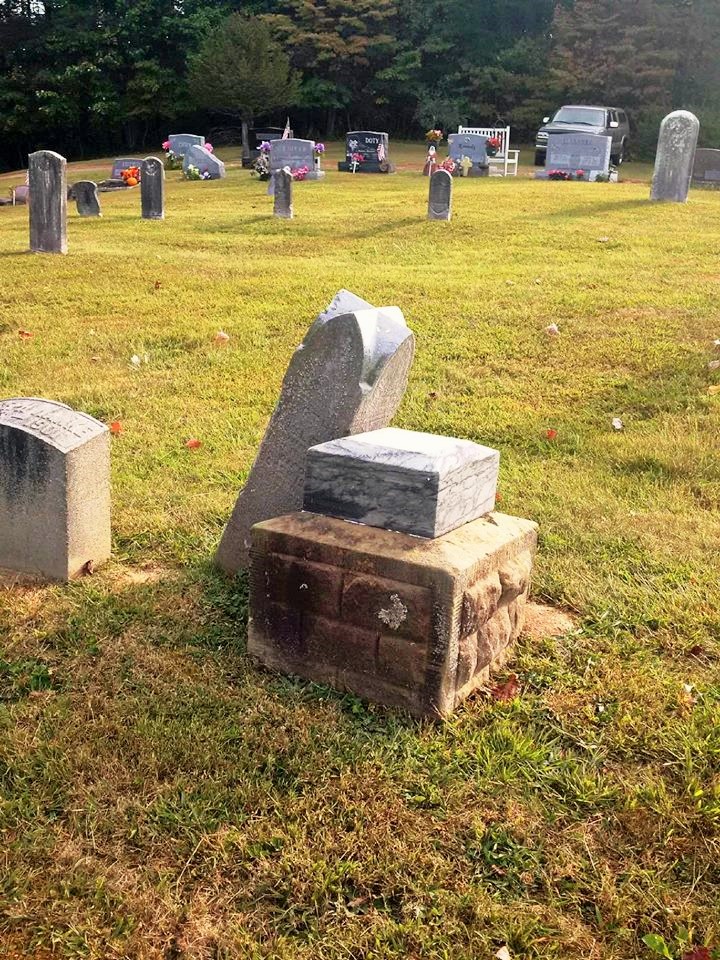
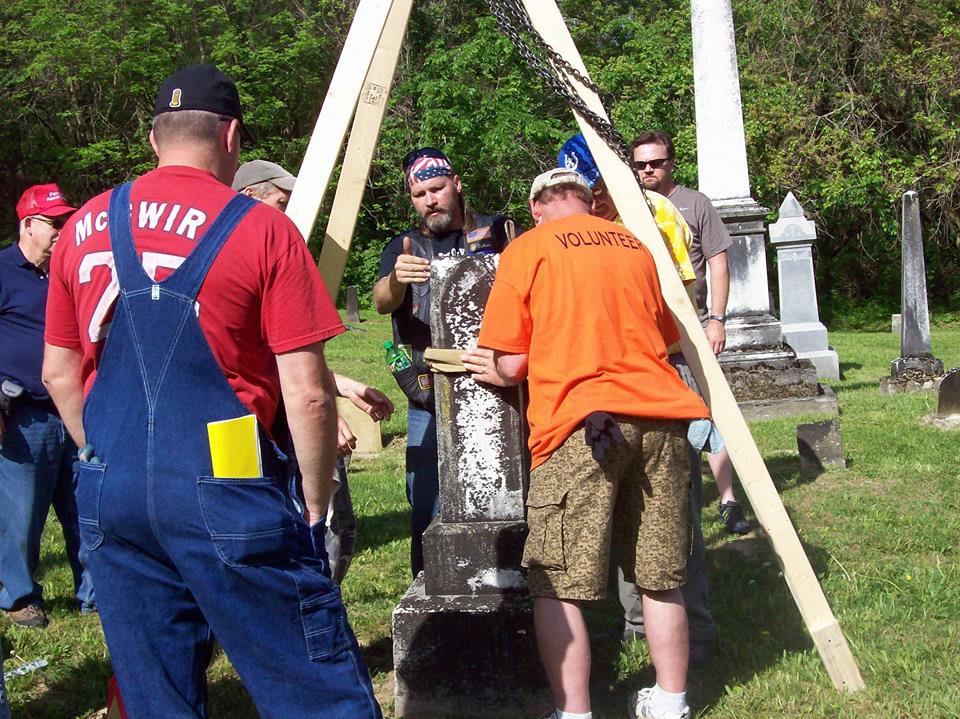
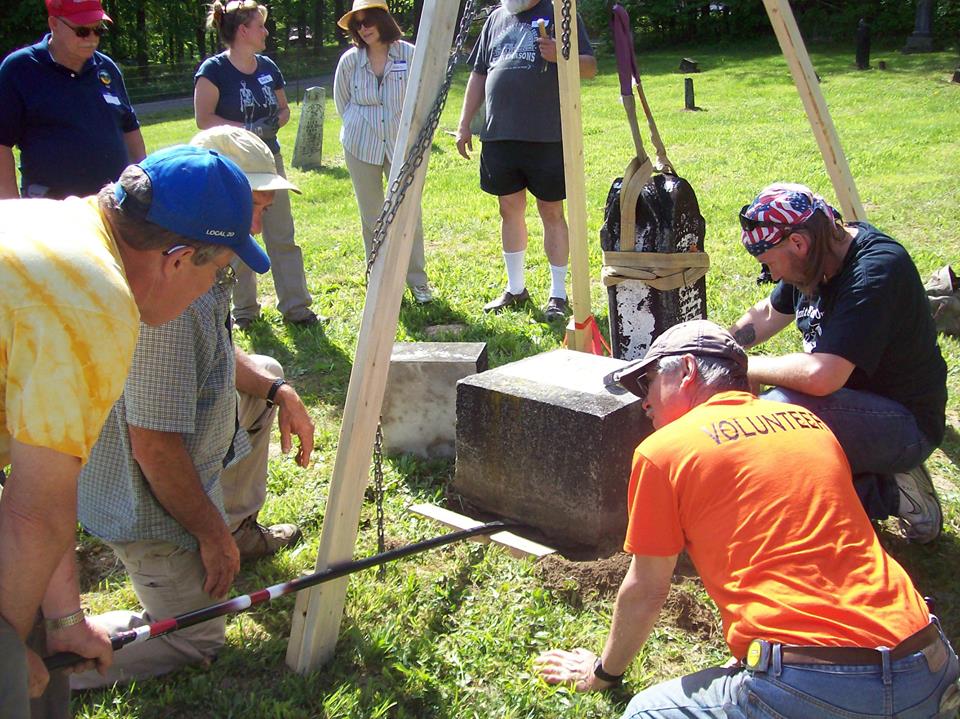
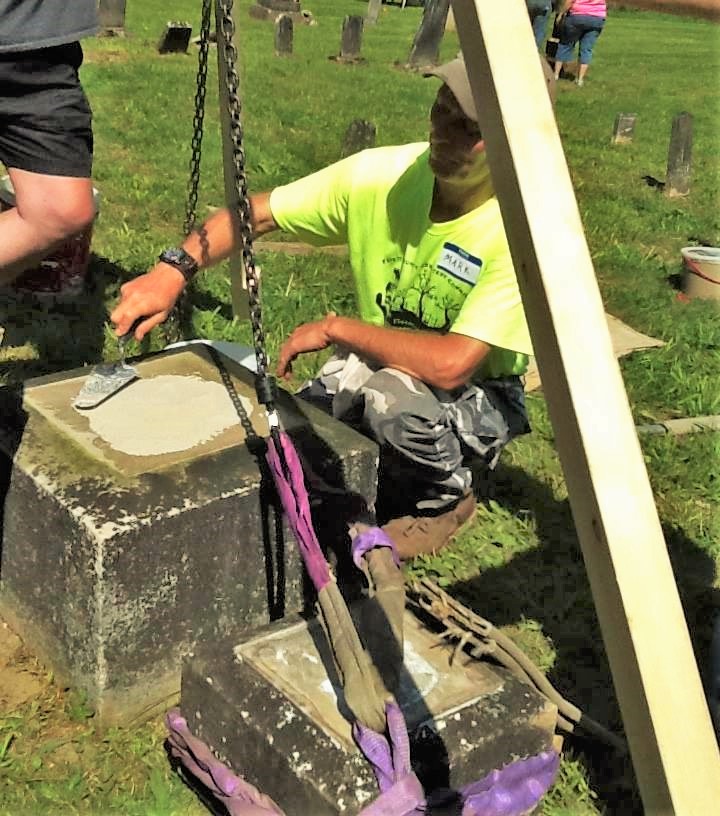
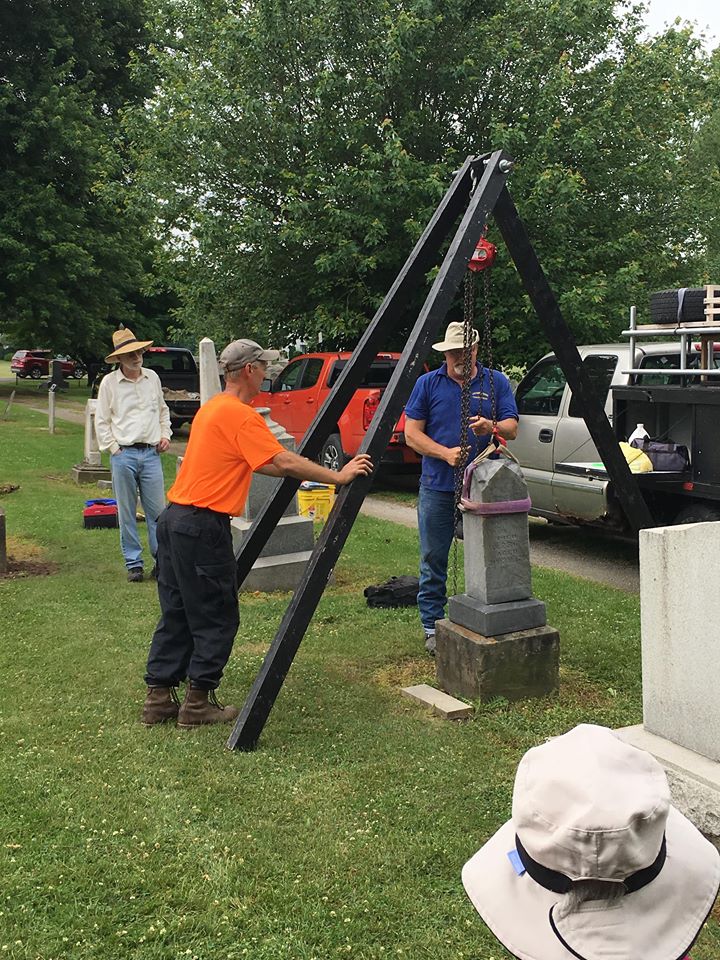
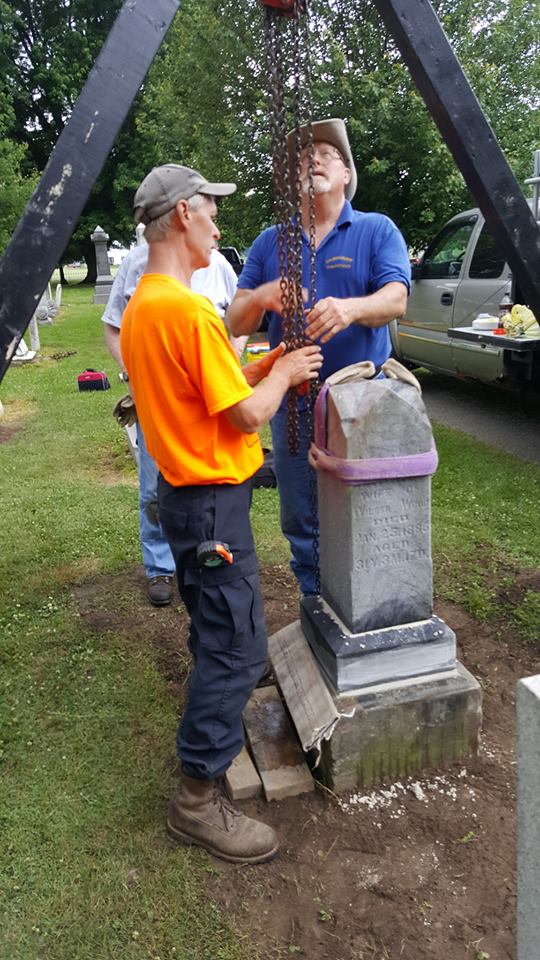
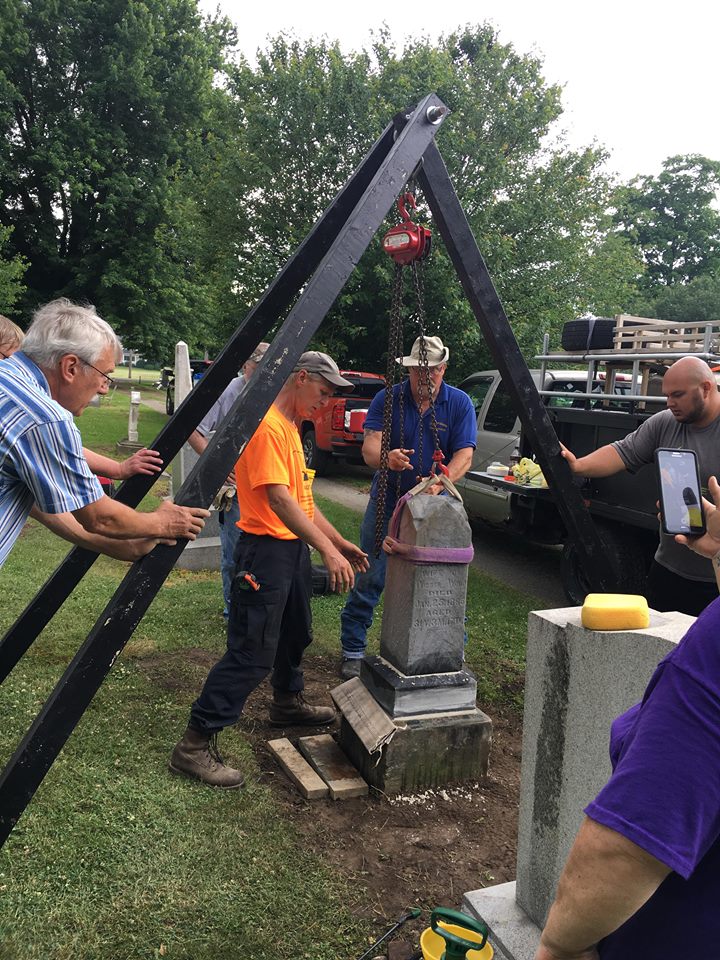
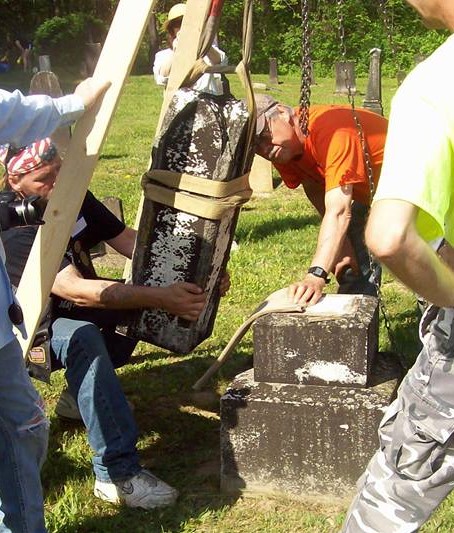
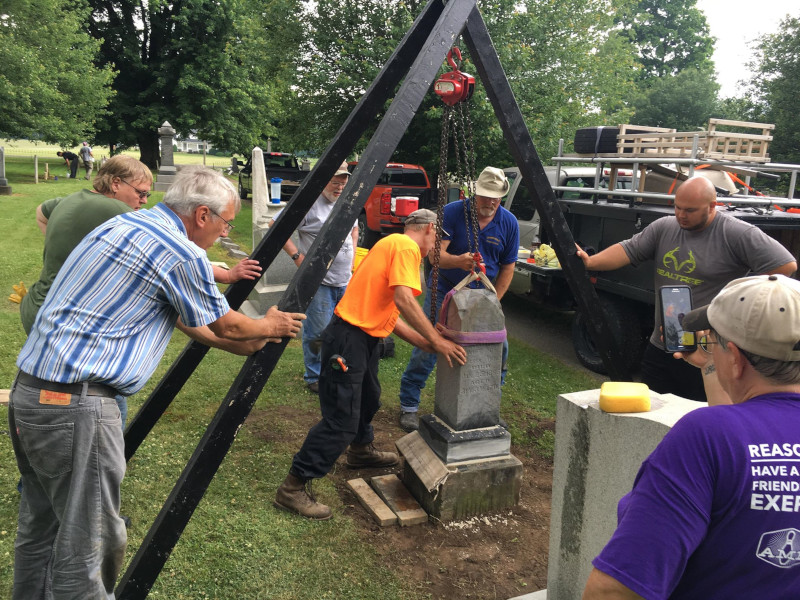
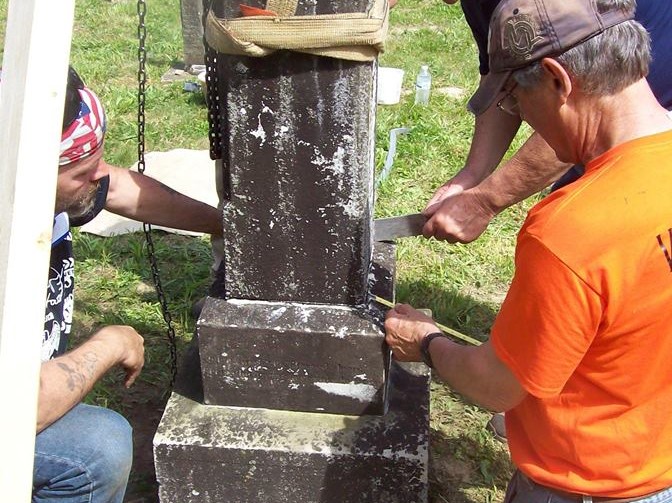
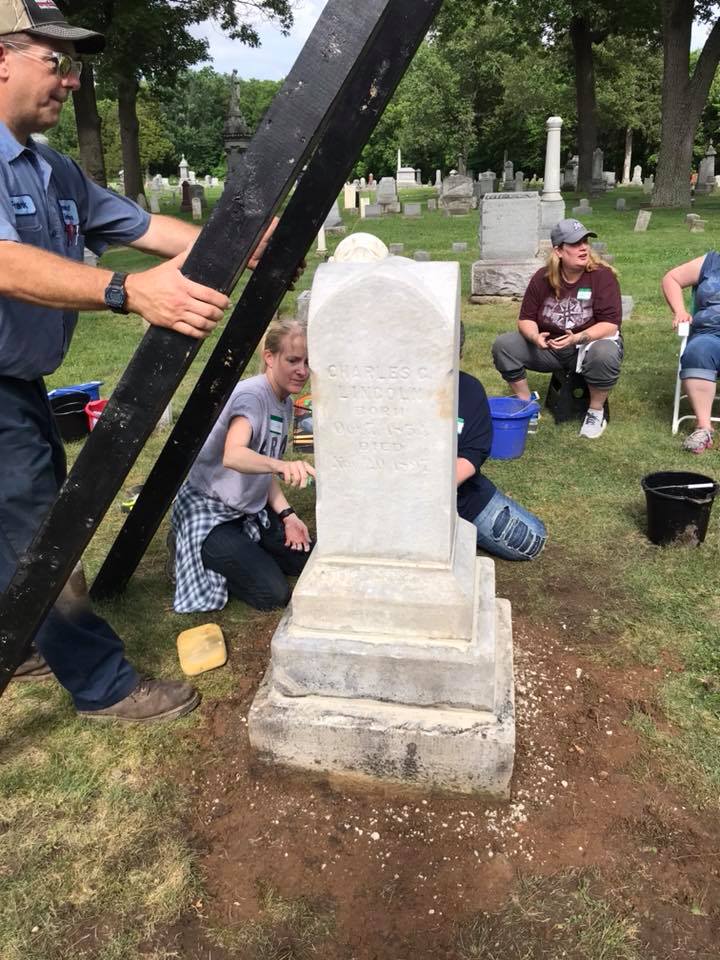
These small 3 piece monuments in the examples did not contain any metal pins and all of the pieces were loose. If metal pins were discovered they would have been removed. This removal process is discussed further down in this section on the large 7 piece monument from Oregon. Old cast iron pins rust and cause swelling that can crack the stone or force it apart over time. There are two schools of thought when it comes to replacing them. Some replace them as you will find in the next section. Others mortar over the holes after the pins are removed. Either method is generally acceptable, but again will pertain to doctrines and/or guidelines set by a given organization or state.

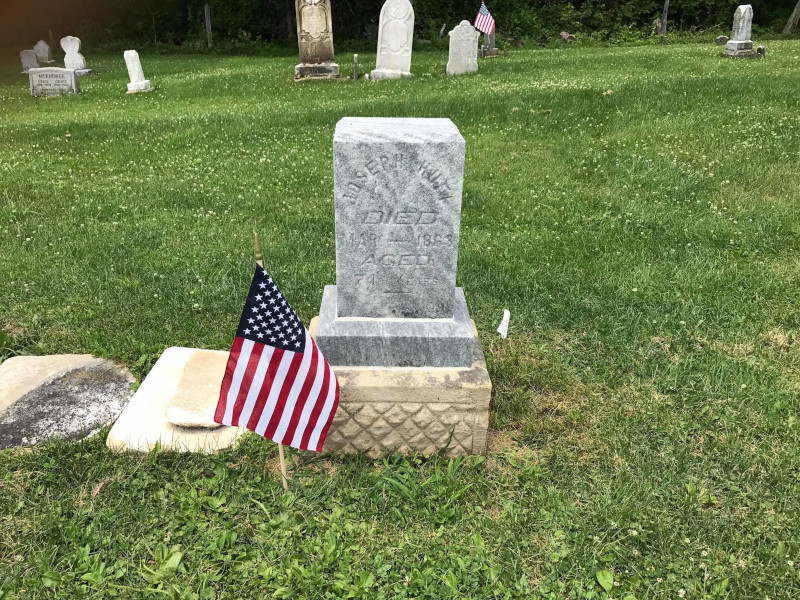
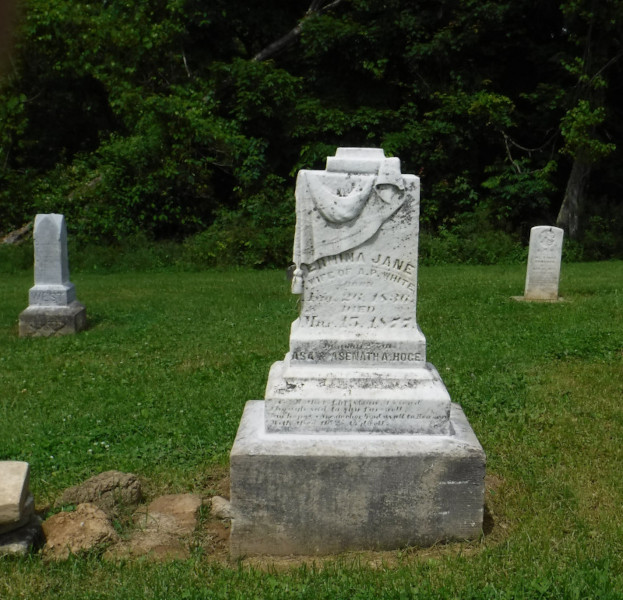
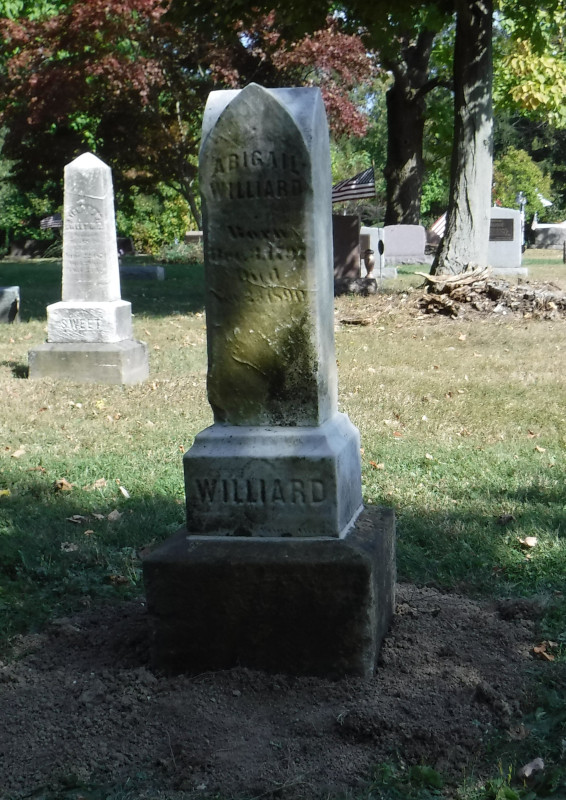
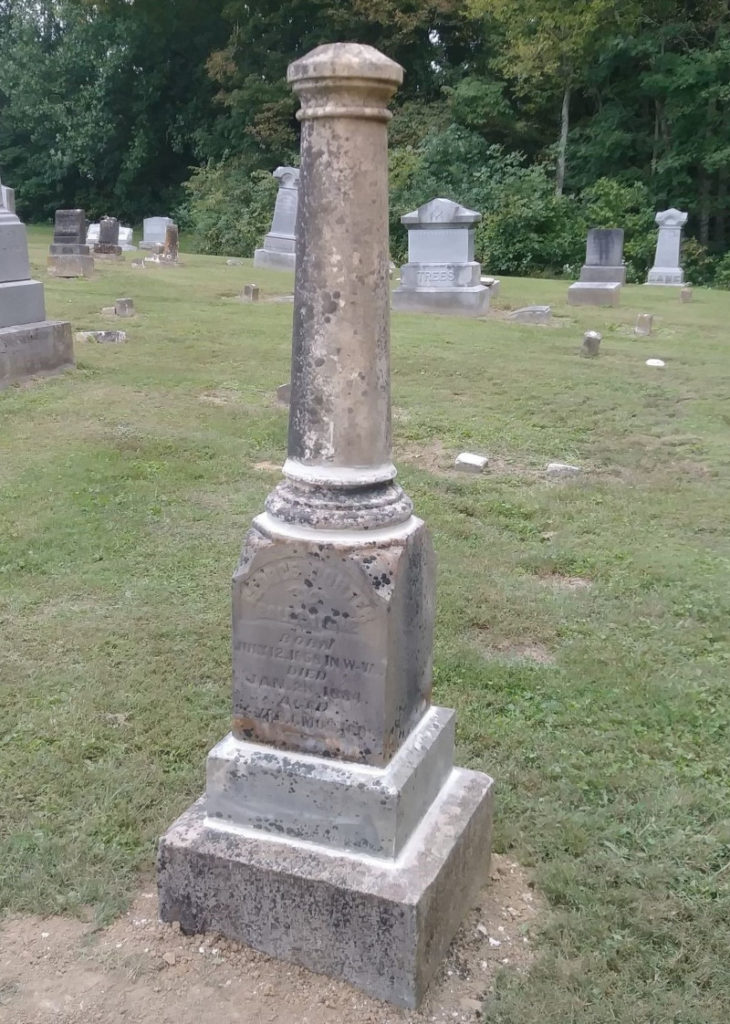
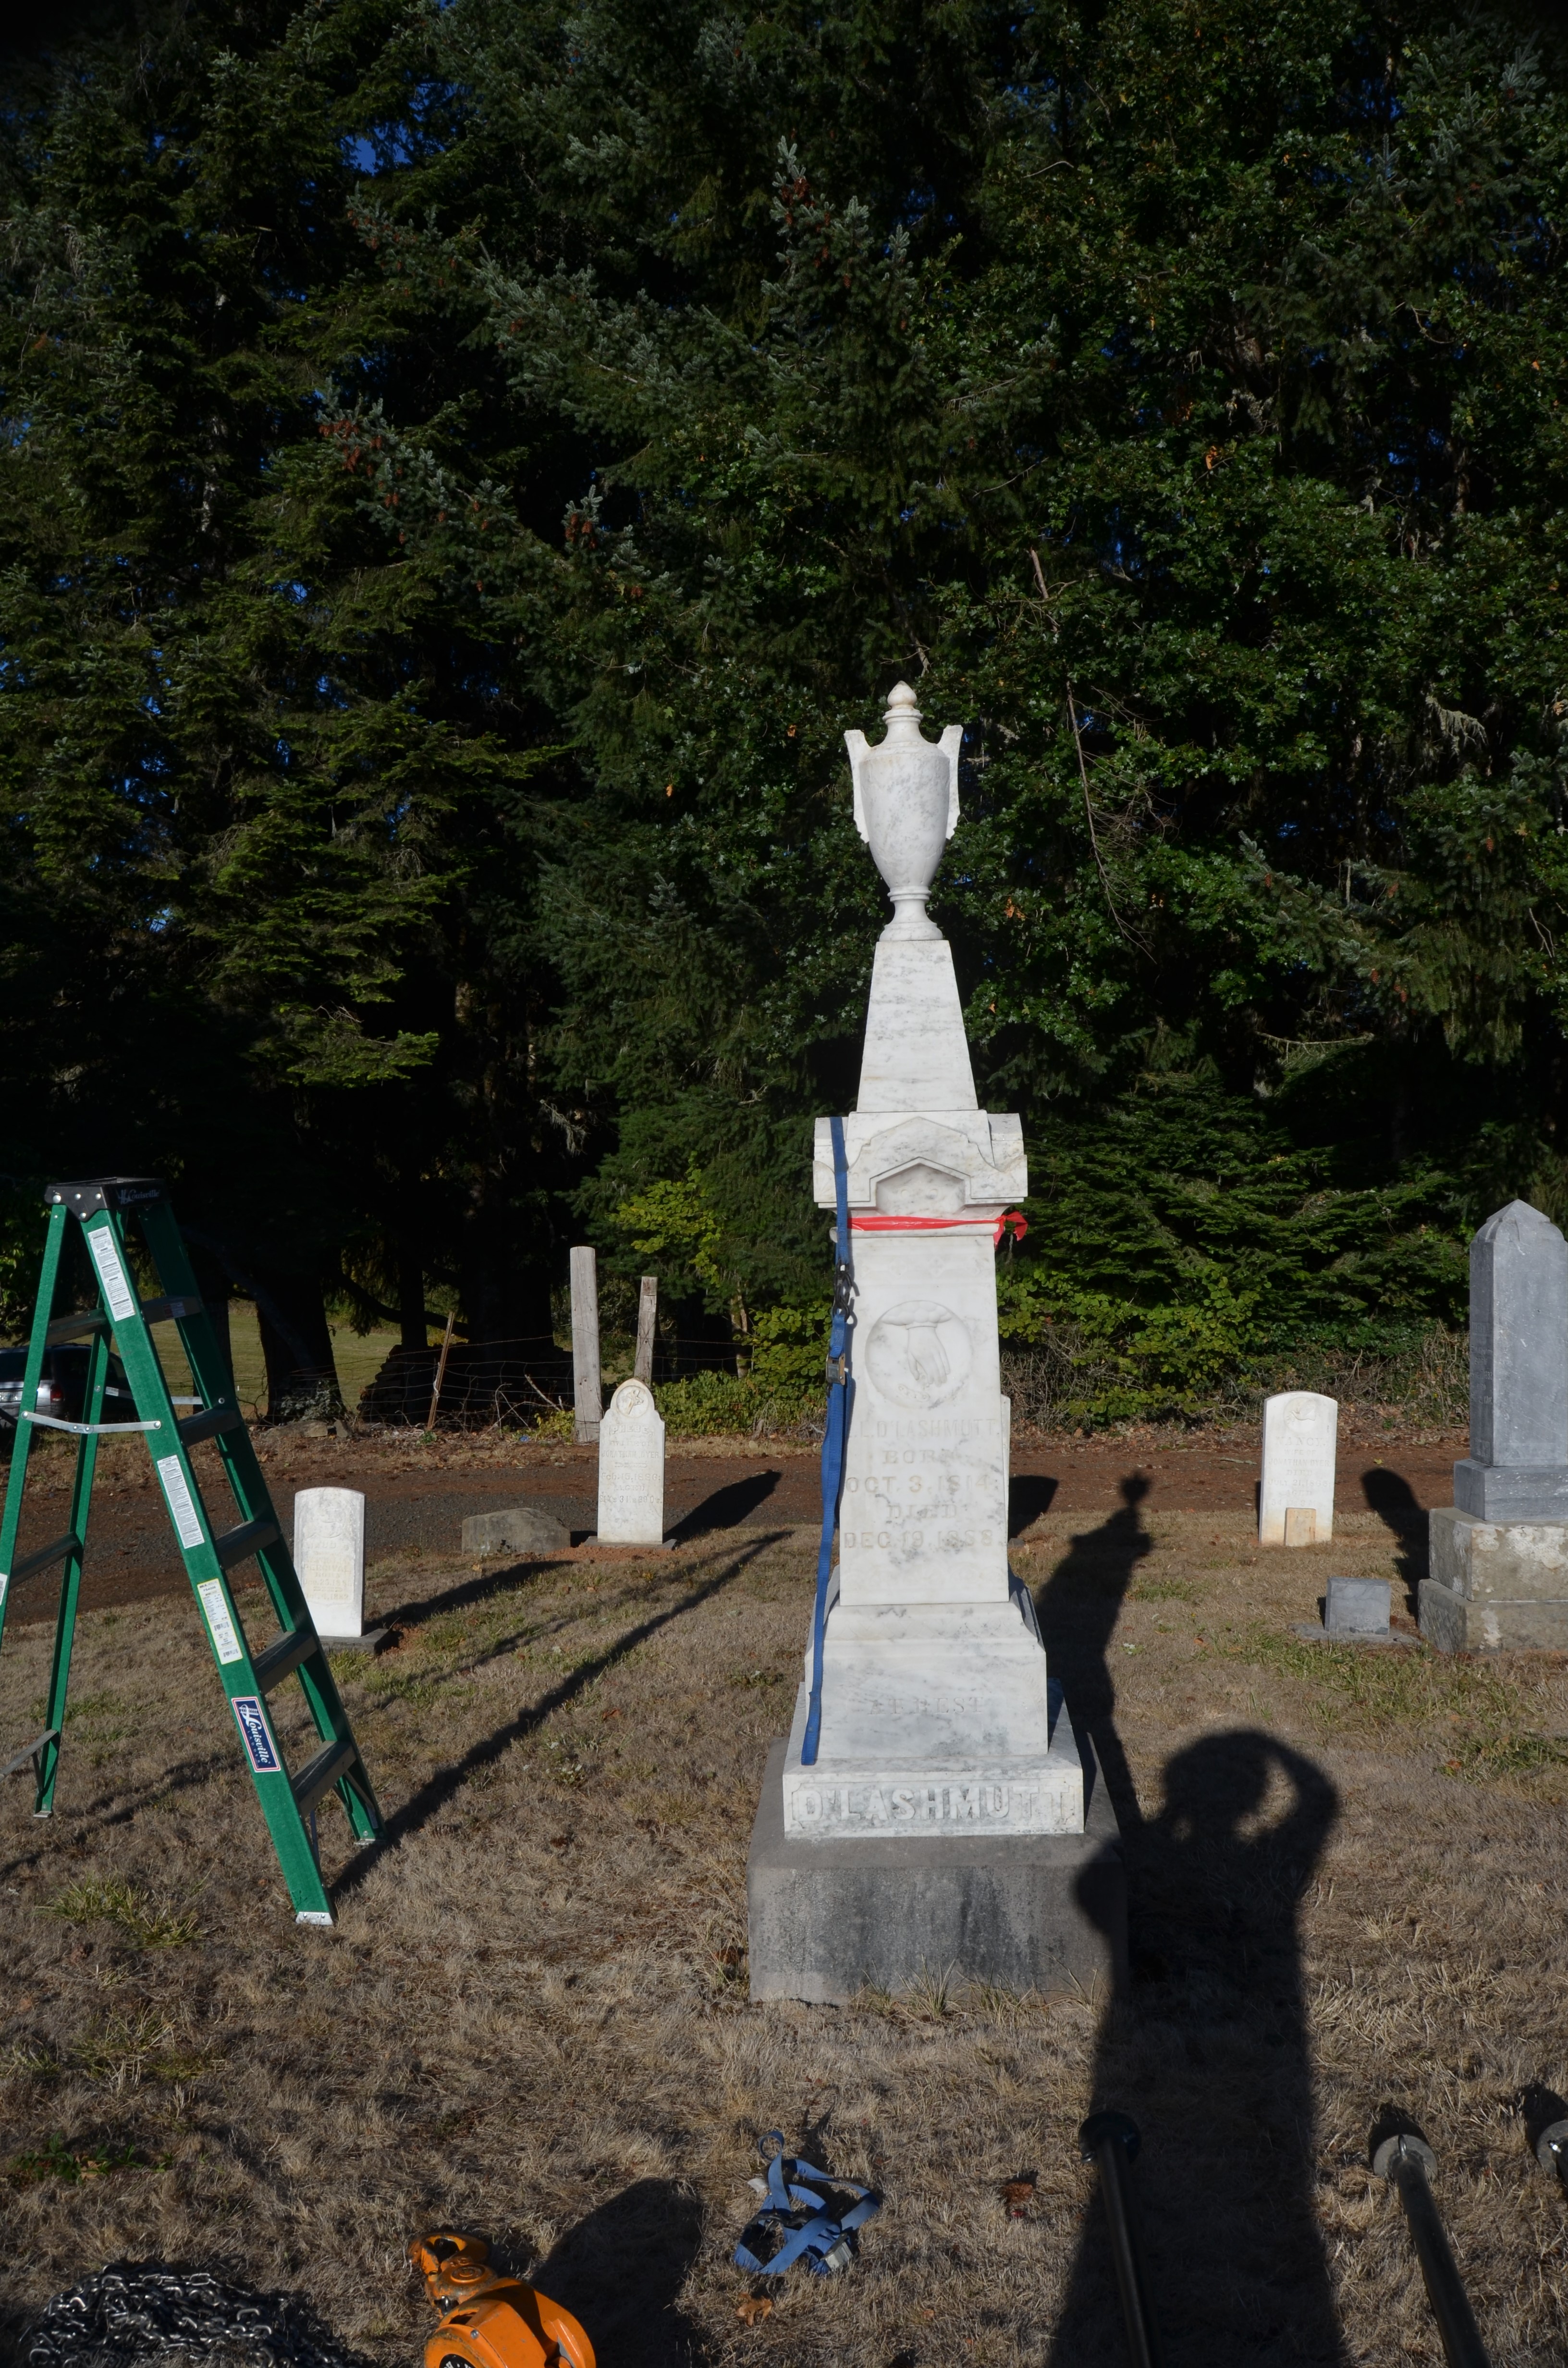
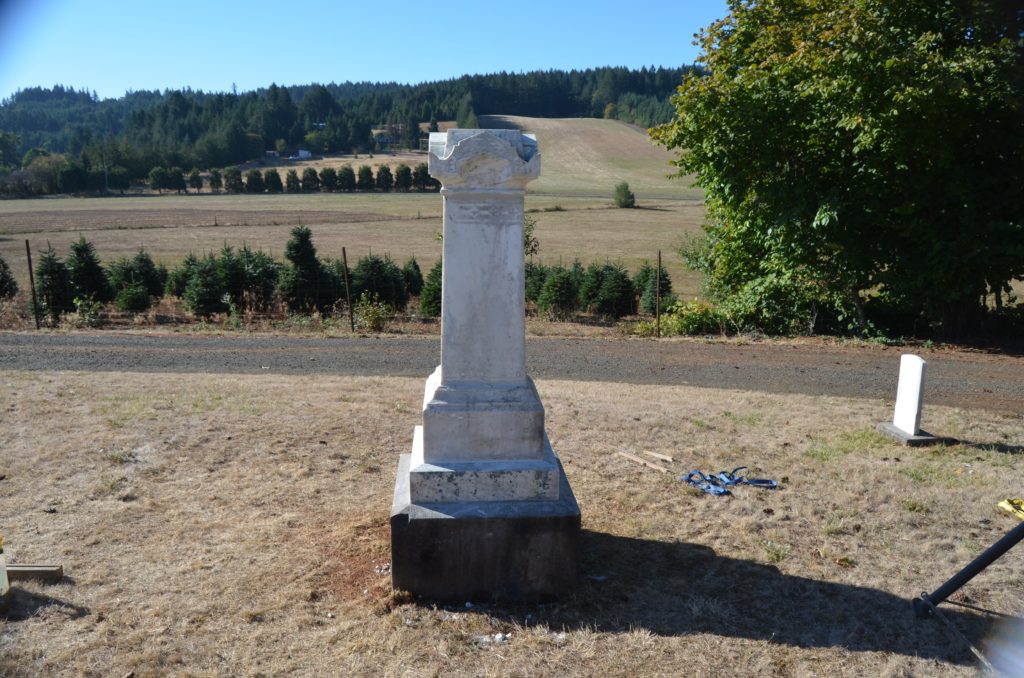
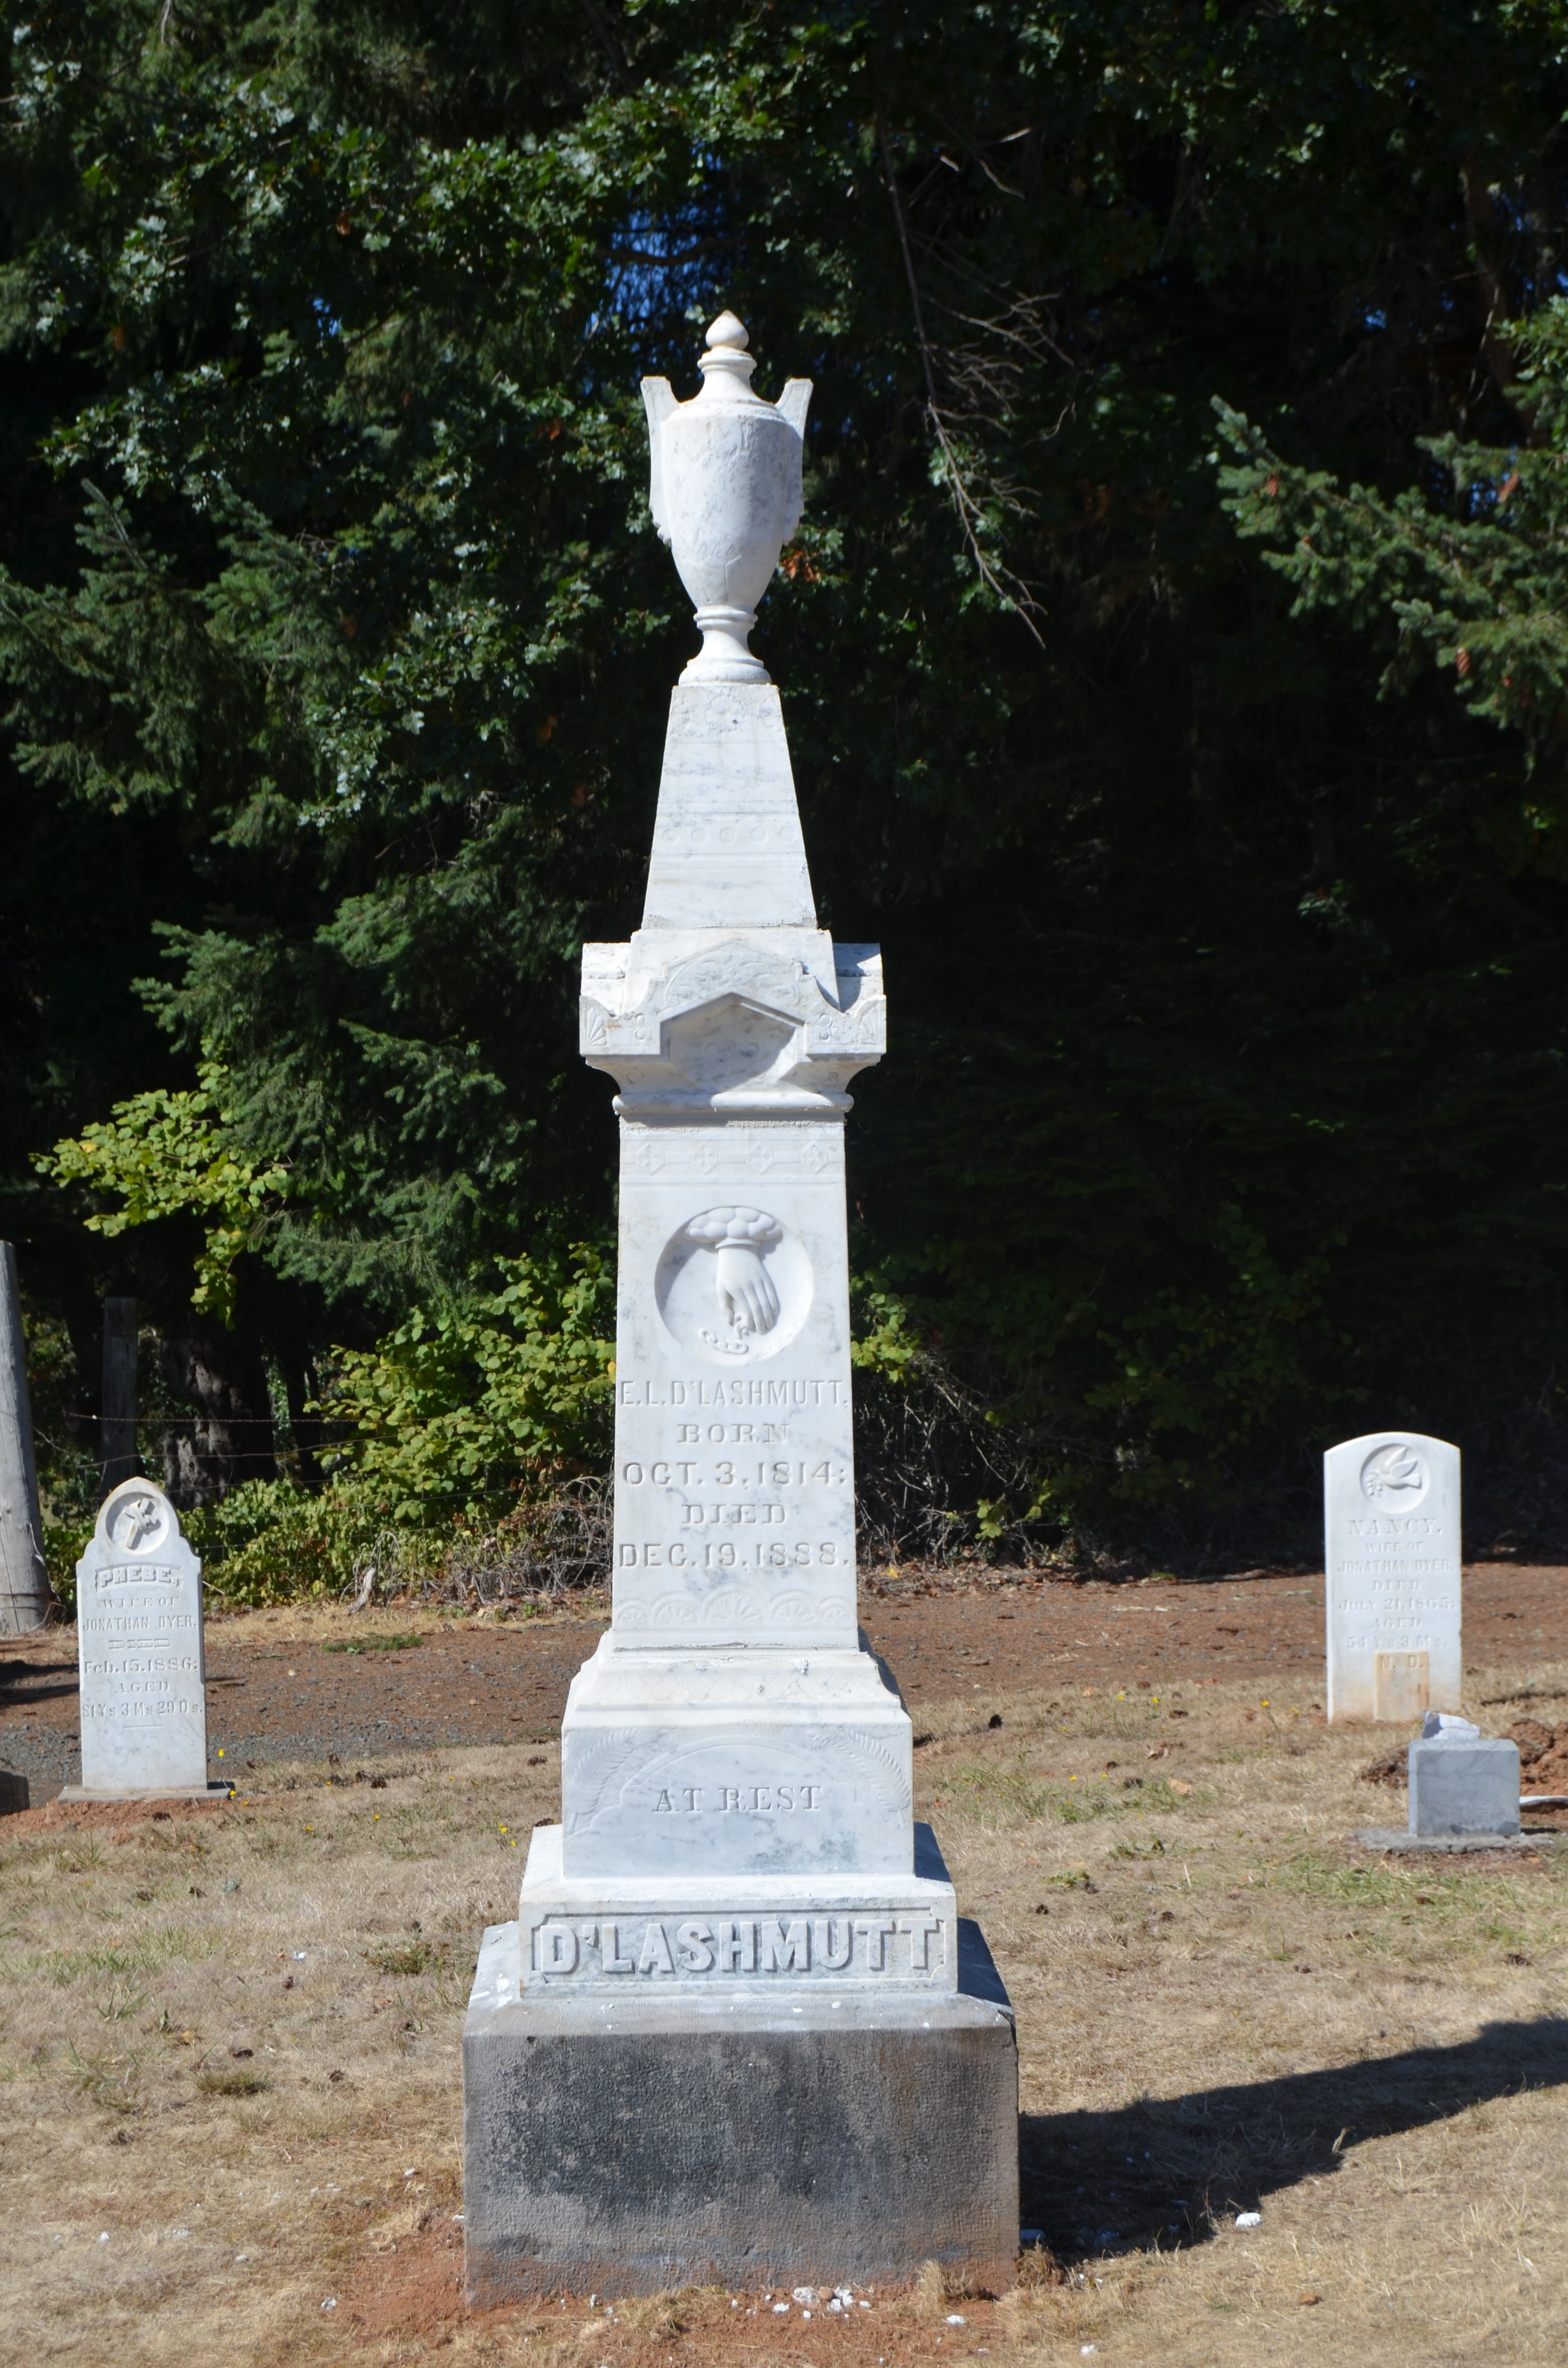
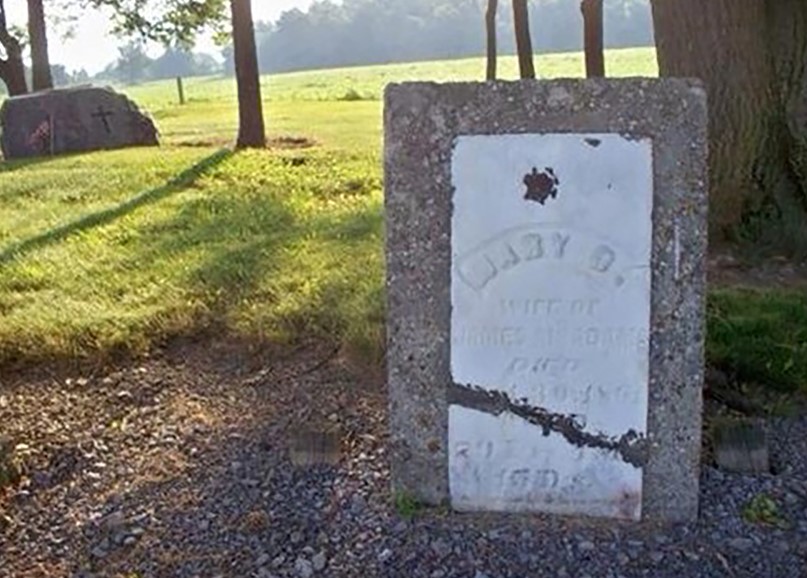
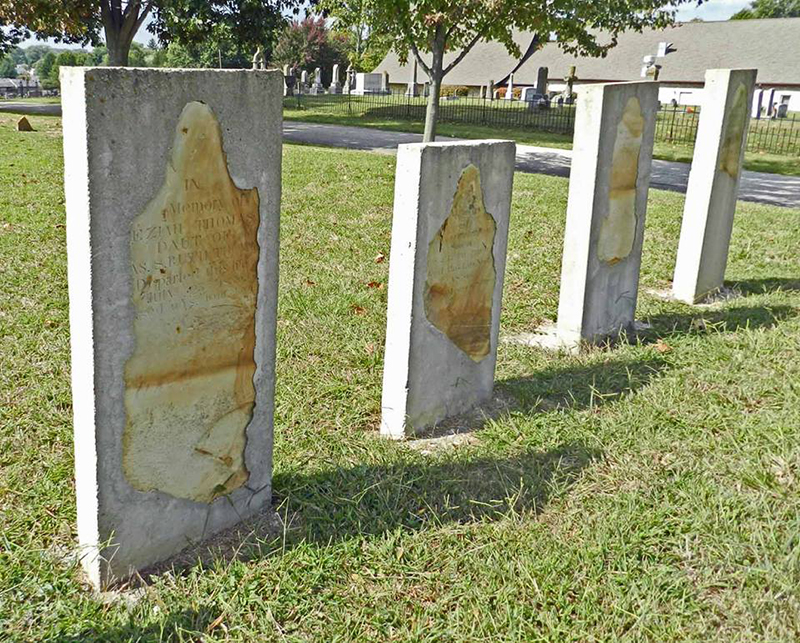
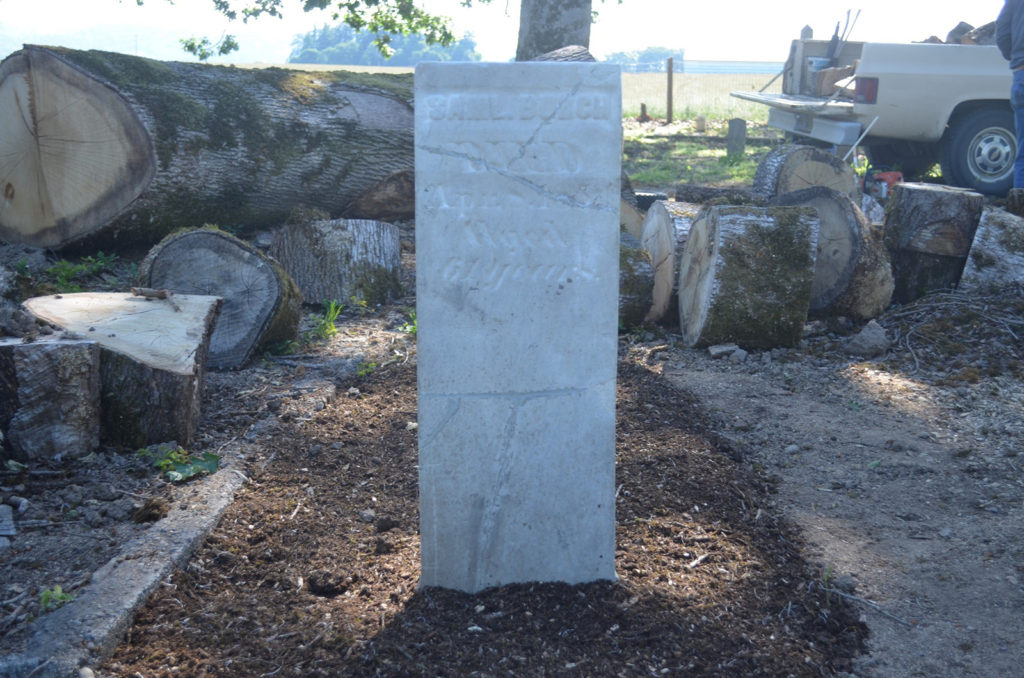
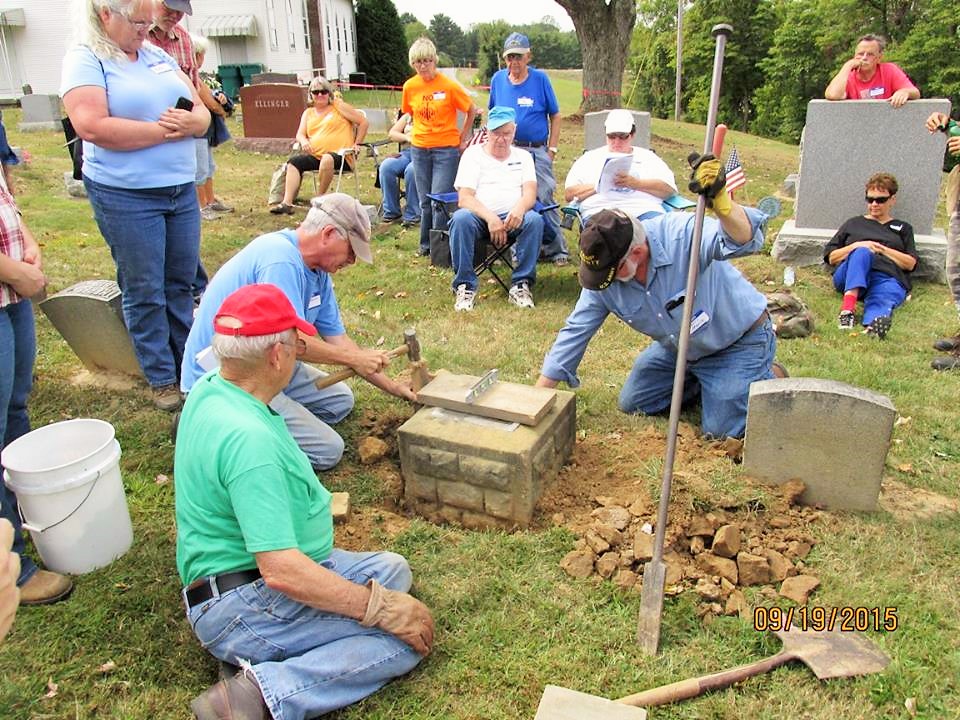
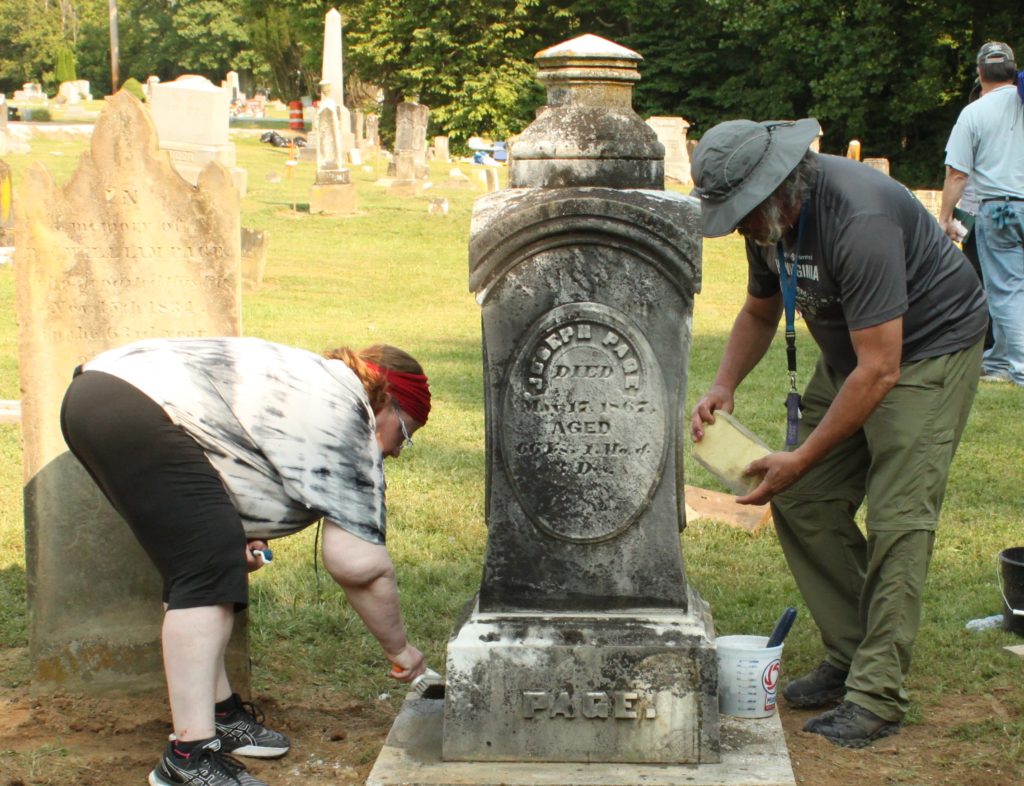
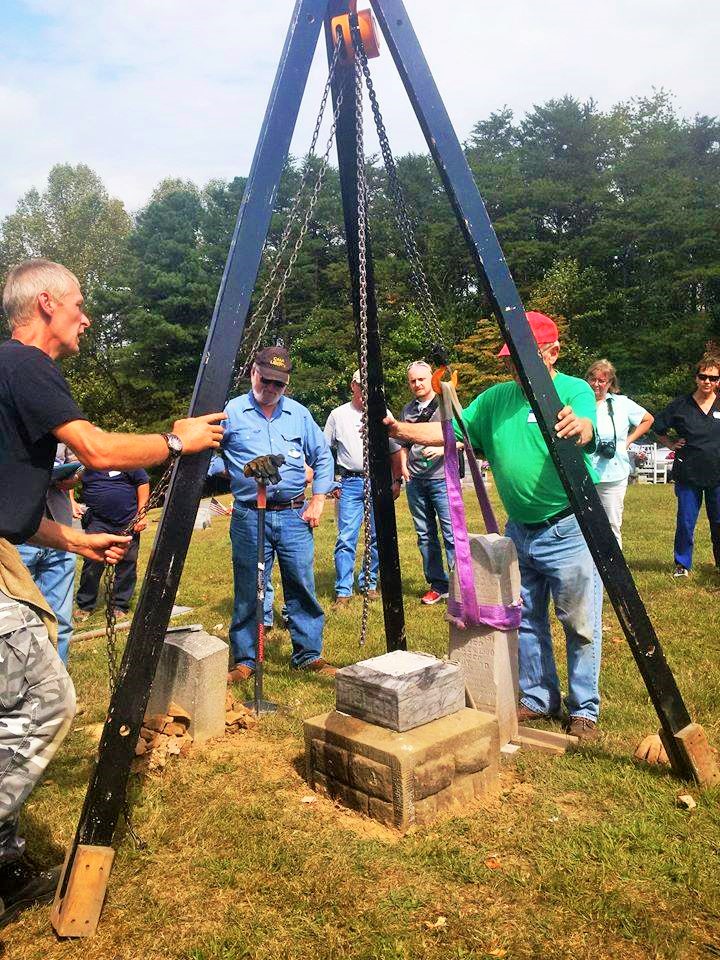
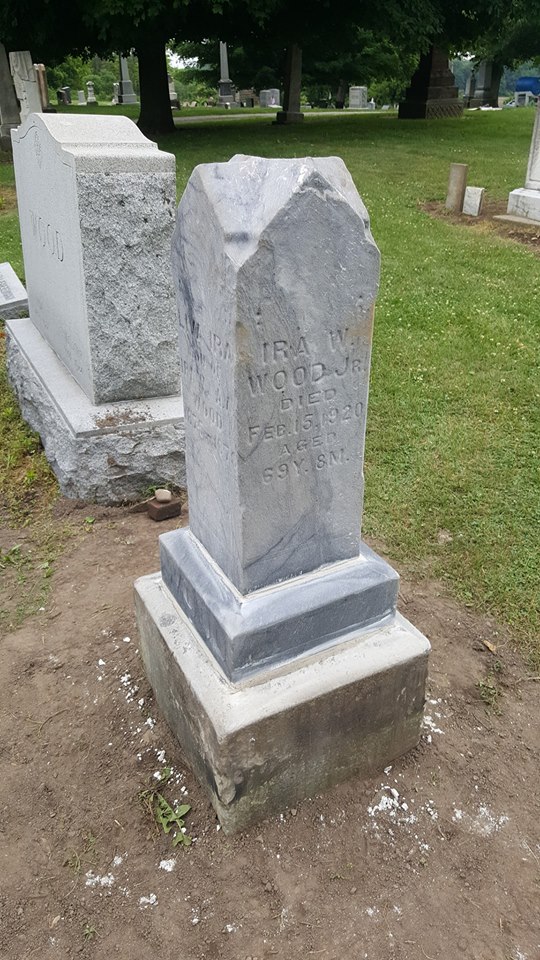
Your finished product


Some Other Products And Methods That Are Not So Good  

At this juncture we’d like to try to briefly address some other products that have been used in the past and present to adhere multi-piece monuments, including one product we have had on here previously. We’ll start with the product we did include before in this section.

That product is Set-Rite. This product is meant to make an adhesive like bond/seal between modern monument stone pieces such as granite. It is NOT a product for softer porous historic stones like marble, sandstone, shist stones and the like. This product is very oily by nature because it contains linseed oil polymer and soybean oil in order to make it pliable for use and flexible over its life. These oils are organic and can attract biological grown due to that factor and are subject to freeze at -4. And when this product is applied to a soft porous stone like marble, the oils can mobilize enough to ooze into the pores.

Most oils shrink when they freeze, but do form crystals, that may/could cause damage during freeze/thaw cycles. This action also dries out the putty like seal and there for makes its use irrelevant. This product is also not meant to be any sort of bonding agent and cannot take the place of a lime mortar binder. If at all possible, you should never unnecessarily apply things to a stone that will work into the pores or between the crystals inside. More specific detailed information on this can be found at this link. https://cemeteryconservatorsunitedstandards.org/pro-vs-con/bonding-agents/

Other Questionable Methods To Stay Away From

Another method that is being used, and quite often in conjunction with Set-Rite, is the use of epoxy between the layers of multi-piece monument stone, as a way to adhere and bond. This method applies epoxy in the center of the stone pieces and a seal of Set-Rite is applied around the edges. Epoxy is a nonpermeable product, which means it will NOT allow water to transfer naturally through a stone. There for the natural “wicking” process is disturbed needlessly and additional vapor barriers are created. Epoxy should only be used when necessary, in cases where a stone needs to be mended, and that should be done sparingly when possible for the same reasons. If a good lime mortar is applied, then this epoxy process can be avoided all together.  

Another method uses just dabs of epoxy in the center and nothing else. This is probably the worst method of the 2 just described. This means you have the issues of the epoxy just described, and now you have gaps all around your pieces that will trap water and dirt, which will allow biological growth and plant life to take hold and allow water in to adversely affect it in a freeze/thaw cycle. A good thin lime mortar application between the pieces is historic, much easier to do, and much less harmful to the stone.

The Latest Quick Fix That May Cause Irreversible Damage

As with so many of the procedures found in cemetery preservation, this particular operation has its share of quick fix solutions with harmful products and methods. We’ll continue to stick to describing the most prevalent of these by addressing 1 more, and that is the use of a product called Pratley Putty.

 There are those who are trying to make this product the next new super glue wonder to adhere anything you find in the cemetery. This products effects are very unknown concerning its short or long term effects on stone, yet its conservator proponents continue to unabashedly push its use. No one knows the true chemical reaction taking place in the pore spaces and between the crystals within the rocks it is applied to.

This product has NO specific written directions or guidelines for stone monument use and is left entirely up to the individual to apply ad hock. It is a product advertised as 1 that could seal a hole in a boat, so it is obviously completely nonpermeable. The product is advertised as having an incredibly strong permanent bond and touts being at a 14,503 psi. That is off the charts for psi compared to Portland cement at 3,200 psi.

Conservators have been telling people for years NOT to use things like concrete and Portland cement because they are too hard for the older softer stones and citing it will be the monument that breaks before the concrete does because there is no give. So why would anyone want to use things that are 4 ½ times stronger than Portland cement?

New found and unsuspecting users are being taught and encouraged to apply this product between the layers of multi-piece monuments as a way to permanently adhere them together. Some believe the proponents of its use in this manner is their contribution to somehow make monuments vandalism proof. This view may look good and sound good on its surface, but deeper thought shows it to be prone to folly. There are no permanent solutions or short cuts to preservation maintenance such as trying to permanently adhere together what was not meant to be permanently adhered together. It is certainly not historic by any means as well and goes against intended design. Not everything can be improved with a modern twist of technology and quite often it is only made worse.

Multi-piece monuments range from the very small knee and waist high 2 and 3 piece at just a couple hundred pounds, to 8 or more pieces over 15 feet high at well over a ton in weight. If one of any of these falls naturally or intentionally, they become like building blocks scattered on the ground waiting to be reassembled, and the process is elementary. If these monuments are permanently adhered together, then instead of lifting individual pieces at much less weights, now you are trying to lift and maneuver large heavy unwieldy objects. This could easily become impossible to do without a crane, due to both weight and height, when it could have been managed with much smaller equipment and cost. Some individual pieces easily weigh 800 to a 1,000 lbs. per piece, so you can quickly see the problems involved when you begin to double and triple weights and sizes. More specific detailed information on this can be found at this link https://cemeteryconservatorsunitedstandards.org/pro-vs-con/bonding-agents/

Some Range, Size, And Variety Of Multi-Piece Monuments

Working with Larger Multi-Piece Monuments

The disassembly, repair, reassembly, resetting, and plumbing of a large multi-piece monument is very dangerous.  It should only be done by experienced conservators with proper equipment and training.

A novice should not attempt any of the procedures contained in this standard.

This section of the document will define the procedures and methods used to repair the seven piece monument pictured below.

These procedures and methods have been previously detailed. They will be mentioned again in this section for further clarity, and as a reminder.

This monument is made of white marble. It is almost nine feet high. It is estimated to weigh over 2600 pounds not including the base. The base is a block of grey sandstone, slightly less than nine cubic feet. The joints between all seven pieces are loose. It is slightly off plumb.

PRECAUTIONS AND OBSERVATIONS

As previously mentioned this task should use a minimum of two persons well versed in the disassembly and reassembly of stone monuments. As with any work done on grave markers, the large monument must be carefully inspected before any work is started. Monuments, even though they are made of stone, are fragile. Over the years they may have developed damage from the environment. This damage could include delamination, stress cracks, and areas where water has infiltrated the stone and frozen causing larger cracks or other broken areas. Most monuments have fared better than their companion “tablet’ grave markers.

Inspect the monument. Determine which sections are loose. Measure the monument to determine the cubic volume of each piece. Sandstone weighs about 170 pounds per cubic foot. Make a plan for disassembly. Ensure you have enough wood to place under the sections. Keep them off of the ground. This step alone will make cleaning the joints easier.

RECOMMENDED TOOLS AND MATERIAL

TOOLS

Before we start the disassembly we will cover the materials and tools needed for this task. Below is a list of possible tools you may need when repairing multi-piece monuments.

  • tarp
  • chain hoist
  • gloves
  • mixing pan
  • wooden wedges with rubber backing
  • chisels
  • Orvus soap
  • pointing tool
  • hard hats
  • tripod or lifting apparatus
  • eight or ten 2″ x 4″x 6′ sections of wood
  • shovels
  • trowels
  • clean water
  • wooden mallet
  • pump sprayer w/water
  • lifting straps
  • ladders
  • crushed rock
  • 24-inch level
  • buckets
  • eye protection
  • plastic scrapers
  • steel toe boots
  • steel bar (1/8″ x 1″ x 24″)
  • lead wedge
  • fire hose
  • setting mix
  • wire brush
  • cleaning brushes
  • sponge
  • compressed air
  • 12-inch strap
  • rebar (24 in)

You should have several sets of different length lifting straps as well as adjustable tie-down straps.

SETTING MATERIAL

Natural Hydraulic Lime, 3.5 or 5, manufactured by Saint Astier®, “with added color and fine aggregate if you so choose”. Using NHL 3.5 or 5 is often the preferred choice for convenience of being ready made and for quality of ingredients. Natural Hydraulic Lime is considered a historic mortar.

Monument setting compound such as set SET-RITE. This putty like material creates a seal between the monument pieces to keep out water and to aid in adhesion between the stones.

However, recommended material used to infill headstones varies by State and National Organizations. Check your State and/or local requirements for their list of setting materials.

For instance, the material shown below is specified for use in Oregon.

Oregon “STACK MIX” Mortar for Resetting Stacked Markers with Multiple Components 1 part white Portland Cement (recommended: ASTM C-150. Type 1) 3 parts Hydrated Lime (recommended ASTM C-207, Type S) Clean water, use sparingly, mixture should be very stiff.

There is a commercial product available special ordered from Home Depot, that with added lime, closely matches Oregons’ recommendation. We have received permission to use this.

Quikrete White Glass Block Mortar Mix with 5 parts added hydrated lime. This type “S” mortar mixture consists of 2 parts White Portland Cement, 1 part lime and 9 parts fine white sand. (12 parts) By adding the extra lime, three extra parts, the mixture is very similar to the state recommended mix. The added aggregate weakens the mix slightly.

Mix ratio… add slightly less than 1 cup of hydrated lime to two cups of the Quikrete mortar mix.

DISASSEMBLY

For safety, you should always use at least two straps. Depending on the section you are lifting you will have to decide what type of lift to use. When you are lifting a section, stop when it is about 1/2 inch above the lower section. Ensure the piece is secure in its’ lift before proceeding. If the lift is uneven, reset the piece and adjust the straps until the piece is lifted straight up and balanced.

For the top section you need a safe lift to protect the top heavy urn. For the top hat section under the tapered base of the urn, a cradle lift is a safe type of lift. Cross the straps if possible to prevent one from slipping off. For the tall center section a dual choke lift can be used providing the straps do not slip on the stone. If the straps slip, use the wooden wedges between the straps and the stone. The rubber backing will grip the stone and the straps will tighten up around the wedges. If the straps still slip you will need to place a third strap under the piece and fasten it to the choker straps. You can do this carefully by placing wood spacers under the piece as you lift it and slipping a strap under the section. Most smooth tapered monuments made of marble and granite will require the third strap to prevent slippage. Place wood between the section being removed and the rest of the monument. Allow the piece to slide down on the wood to prevent any contact between the section being removed and the remaining pieces of the monument. This will prevent any damage from the two pieces scraping against each other.

Always check a lift to ensure there is no strap slippage and that the piece being lifted is balanced before proceeding.

During inspection, it was discovered that the urn was loose but pinned to the tapered section. To remove both sections together required a special set of lifting straps. Since the urn made the two pieces top heavy, we had to place two straps at right angles under the tapered section. A third strap was placed around the top of the urn, outside of the two lifting straps, to prevent the urn from toppling.

When the pieces were on the ground the urn was removed from its’ tapered base. The pin was made of lead. You will find most pins in the old monuments are made of iron and are rusted. They should be removed and replaced with stainless steel or fiberglass. While these pieces are on the ground, they can be cleaned. The old setting material must be removed from the joints. You may have to carefully chisel the old material off. If you use a chisel always start from the edge and work toward the center. Use a small chisel and a wooden mallet. This will help protect the edges of the pieces from chipping. The joint should be clean, flat, with no old material left in the joint. You may need to use a wire brush to remove some joint material.

The top hat section was lifted off using a cradle lift and then carried away from the work area. The piece can be cleaned and the old setting material in the joints removed. Ensure you document which way the top hat sat on the main section. It must be reassembled correctly.

The center section of the monument can now be removed. Since this is rough sandstone, the lift used is two choker straps. Place the tripod over the center of the monument with two legs facing the area where you are going to temporarily place the section. In case the section is unbalanced or it decides to fall over, the two legs will provide stability in the tripod. While lifting the center section, check the bottom of the section to see if there is old material to be removed. If so, you will have to move the tripod so you can lay the section on its’ side for cleaning. Always attempt to center the tripod over the lift. For this monument it appears as though the installers just placed this section on the lower piece with no mortar. It has stood that way for over 120 years. All the joints needed was a good cleaning. The bottom of the center section was cleaned before placing it on the wooden platform. When lowering the section onto the wooden platform, use pieces wood to act as protection and allow the section to slide down to its’ temporary storage place. Make sure it is plumbed so it doesn’t fall over.

The next task is to level the base and the second section. If the second section is not very heavy, it can be left on the base while leveling. The second section and the base will still have to be separated to clean the old mortar, if any, from the joints. This can be done after leveling is completed.

Determine how much tilt is in the base and which side/corner is low. Center the tripod over this spot so you can lift straight up from the low spot. Excavate the area around the base deep enough to determine if the base is attached to the footing. If it is attached, you must excavate the entire area around the footing. Place the dirt on a tarp. This base was not attached to the footing. The footing appeared to be compressed dirt and gravel. It was very stable.

Place a long strap around the base so the choke is at the low portion of the tilt. Lift slowly to ensure the strap will hold and that the lift is stable. See the next two pictures. As you lift the base, use the level to determine how much lift is needed. Lift the base so it is just slightly more than needed. Using a small board, (1/2 X 1 X 2 ft) to push crushed rock between the base and the footing. Another tool you can use for this purpose in a piece if 1/2 inch rebar about 2 feet long. After you have packed the crushed rock under the base. Use a small flat piece of metal or the rebar to smooth out the rock. Lower to base onto the footing and use the level to determine if any more adjustment is necessary. If so, repeat the previous process until the base is level. Sometimes you may have to remove some of the crushed rock.

If the base is attached to the footing the task just got more difficult. Old footings were rarely flat on the bottom so the base will be much harder to level. You may have to excavate deeper to be able to place crushed rock under the footing. The process is the same but is much more difficult and may take several tries to level the base.

Backfill the excavated portion around the leveled base. Place about 3 inches of dirt in the hole and tamp it with the edge of one of the pieces of wood. Do this as many times as needed to completely backfill the excavated portion.

REASSEMBLY

The second section now can be removed and the joints cleaned in preparation for resetting. Lift the second section off of the base. Use an appropriate lift so the straps do not slip. We used a cradle lift. The section was lifted slightly so wood could be placed under it. Then we slipped thin lifting straps under the section. Set the section on wood for cleaning.

Clean all of the joints of the monument. Use a chisel if necessary, and use a wire brush to remove scale that the chisel leaves behind. The joints should be free of old material ,scale, and dust. Use the compressed air canister to blow the residue off of the joints.

Do not allow the wire brush to contact the exposed stone.  It will scratch the exterior finish

After the joints are cleaned, prepare to reset the sections, one at a time. This task takes extra time because the mortar from resetting the lower joint must set before placing another section on top. It is best to wait at least 12 hours unless the next section is very light.

Place the next section on the base. Ensure it is in the right orientation. Determine if it is level. Place lead spacers, no more than 1/4 inch thick under each corner about 1 inch from the edge. These serve three purposes. First they keep the section from slipping and, second, they allow for adjustment of the section to level it. We have found that oval fishing sinkers about 3/8 thick work well for this task. They can be flattened so they don’t roll and can be adjusted easily to level the section. You may use whatever spacers that are readily available as long as they are not iron. Third, the spacers allow a gap between the sections so the setting material can adhere to both sides of the joint.

When the section is leveled, lift it off of the base about 6 inches. Make sure the spacers are on the bottom section. Prepare the setting mixture. Before troweling the mixture in the joint, wet both sides of the joint with clean water. Use a sponge to soak up excess pooled water. Trowel the mixture onto the top of the base. Make sure the leveling shims do not move. Ensure there is enough mixture to allow some of it to be pushed out when the upper section is lowered in place. The tricky part of this process is removing the straps without disturbing the setting mixture. Lower the section onto two pieces of wood placed very close to the edge of the section. Remove the straps. Place narrower pieces of wood near the edges and remove the thicker wooden pieces. Remove one piece of the narrow wood so that one side of the section is resting on the mixture. Remove the other piece of wood. The entire section should now be resting on the setting mixture. Carefully align it to the base and press on the top until it is setting on the lead spacers. Make sure the lead spacers were not pushed out by the setting material. If you have placed too much material on the joint this is a real possibility. Check the level of the section. If all has been done carefully, the section should be level. If not, you may have to lift it off and try again. In some cases you may be able to push a spacer back under the section.

This picture shows two sections of the monument leveled and mortared in place.

After resetting each section, remove the excess mortar that has been pushed out, clean the top edges of the bottom section where the mortar has been pushed out and point the mortar in the gap to prevent any water from getting into the joint. Let the mortar set for at least 12 hours, Clean any excess mortar from the pieces before it cures.

As you reassemble the monument, use spacers and the same methods as described previously to place section on top of section. Test for level, place spacers, test for level again, wet the joints, mortar together, align it to the lower section, and clean off the excess mortar. Don’t forget to clean the gap and point it. Let set for 12 hours before proceeding to the next section.

If the section is tapered like the center section of this monument, you will not be able to accurately plumb it by placing the level on the sides. You will have to use a smaller level on the top to level the section. If you want to use a level on the sides to check for plumb, set the upper bubble to level and measure the distance from the edge of the level to the stone. This will take two people. Check all four sides. If the distance from the level to the stone is the same, the section is plumbed.

Pointing the mortar in the joints

Place the top hat section on top of the center section using the same methods , We used a cradle lift to both remove and reassemble the top hat. The top hat sides are square so a level can be used to check the plumb of the monument. A small level can also be used on the top to level the section. You have to be careful using a level to check the plumb of the monument. The South and West side of this top hat section had a stone “growth” that was caused by the hot sun over the years. We have seen it on other tablets and monuments. It appears as a ripple growth along the grain of the stone.

This picture shows the top hat reassembled on the monument.

Now that the setting material has set sufficiently, we can reassemble the last two sections of the monument. The urn and tapered base have been test fitted off of the monument. It is sometimes easier with tall monuments to do some of the fit work on the ground rather than standing on ladders. The cemetery ground is hardly ever level so ladders are not a stable platform for working. The lead pin was replaced with a 1/2 inch diameter fiberglass rod.

Pointing the mortar in the joints

The two top sections, being fairly light, were assembled and mortared the same day, just hours apart. The mortar at the joints is shown being cleaned and pointed. Since the sections were cleaned previously, there was very little additional cleaning necessary.

The procedures and methods described in this document are basic descriptions of how to repair a multi-piece monument. As has been said before, all monuments are different. You will have to decide on a plan to repair this type of monument. This monument was not damaged or broken. Some monuments will be. You will have to repair the damage before attempting to reassemble the monument. If you think you are not ready to do this type of work, by all means work with an experienced conservator until you are confident you can do this without doing any harm. And please, be very careful. Any one of these pieces, if not handled correctly can do damage not only to itself or the rest of the monument, but to those attempting to repair the monument. BE SAFE.

Reassembled, mortared together, cleaned, and hopefully standing tall for another 120+ years.

Don't Use Concrete

Now that we have walked you through the “do no harm” methods for multi-piece monuments, we will explain the harmful methods some have used in their stead.

Don’t Use Concrete – why concrete is a bad thing. I’ve often said that concrete in a cemetery should only have two purposes. One…to form pads for grave markers and monuments that have some type of base. And two…for recasting new slotted bases to replace originals that can’t be repaired. I exclude grave markers originally made from concrete. They are another issue entirely. I stand by this firmly because I’ve seen the damage done by countless tons of concrete poured and unwittingly placed in almost every cemetery I’ve been in. Concrete as a fix SOLVES NOTHING. Quite simply…if the original marker did not require concrete to begin with, don’t make concrete part of its restoration. But sadly this is often the first item so many people reach for in the hopes of making something permanent or more long-lasting. The results are always the same. The softer grave marker is now permanently encased in a harder substance. It is generally face up to all the elements and wears much faster. Freeze and thaw cycles will crack and break the stone. And it is still going to sink into the ground. So really nothing has been solved with this method.

This destructive practice has been going on for the better part of the 20th century to the present. It seems to have been very prevalent in the 1950’s and 60’s as some sort of cemetery cleanup method. As a result many tombstones and monuments have paid the price. We can’t undo what has happened in the past before better preservation techniques came along. But we can learn from this and discontinue it today.

This white marble govt. issue military marker is a prime example for not using concrete. Judging from the greenish/brown line that runs through, “CO.E” on the stone. I would say it sank to within a few inches from its top. This happens quite often and is usually caused by the settling of the grave. Or it could be due to things specific to the typography of the cemetery grounds. The natural fact of things is, that the earth is ever changing and will always move and change the grounds surface. So placing this marker in concrete won’t change that at all. What it has served to do, is to put a soft marble stone in direct contact with a much harder material by placing it into wet concrete.

People seem to think this sort of concrete collar will steady the stone and prevent wobble and lean. Not so at all. It will now just act like a fence post with a weight around its neck.

These are govt. issue military markers at a national military cemetery. Some are being reset and others are being replaced. Notice all the different sizes in width and height? They range from just over 3 ft. to over 4 ft. in height. These are also known as a, “tablet set” type of marker or tombstone. They are set directly into the ground like a fence post. You can see a great video on this under BASIC STANDARDS…Tablet Set. I can assure you, they are not using any concrete here.

Here is another bad use of concrete. The long sidewalk pad approach. This is generally done through the quick easy clean up to mow faster method. When this occurs, most likely no real effort was made to probe for, locate, repair, or reconstruct the cemetery. This is always a sad fate for these artifacts and their now lost priceless information.

This is another sad concrete display. Although the stones are on an angle and not totally flat, they will still weather badly. Sadder still is that 5 of the 6 stones look to be intact with legible writing. Wouldn’t it have been a lot easier and less costly to have simply reset them? One can only imagine the time, effort, and money it took to build such a megalithic sort of monument like this. And it’s all damaging to the thing it was intended for.

Concrete encasement seems to be another popular method to fix simple breaks. This is using an elephant gun to shoot a mouse. And sadly both tombstones appear to be simple single tablet breaks. The stone on the right even has its bottom piece intact and still protruding out of the ground. Now it can’t be mated to that piece, making that part no longer relevant to this situation. And judging from the rather short length of the rectangular encasement, I doubt it is tall enough to set properly. So on this one, your guess is as good as mine as to the final disposition of this repair.

When I inquired of these two gentlemen the reason for this wet molded concrete block addition. They said it was added because the stone wasn’t level. I told them that I understand this and deal with this sort of thing all the time. I then explained this is simply a matter of raising and leveling the stone. And added because of the carved design clearly visible on the sides, this base block was meant to be seen and not buried. They quickly barked back exclaiming, “we just don’t have the time to do it right.” No time to do it right? I wonder how much time, money, and effort was put into hauling concrete and water to this remote site and then mixing and forming this unneeded piece of damage?

Here is an example of why tombstones, and in this case, their pieces should not be permanently fixed. CCUS member Scott Andersen has been restoring a cemetery in his hometown for the last 3 years. He and his dedicated group have worked with many jigsaw puzzles and tombstone pieces so far. But sadly some years back, before they started their work. A stone wall was created and many of the tombstone pieces were forever locked into this wall. In the picture you can see they found the mate to one of the pieces in the wall. Again, this happened some years back and the damage is done. The point here is to not repeat these same damaging mistakes.

There are no easy button solutions to cemetery preservation through the means of concrete.

We would also like to add to this by saying, all hope is not lost. The situation just becomes much more precarious and involved, and will require the intervention of a more skilled professional. It literally takes hours to remove the concrete encasement. Often requiring a diamond blade to remove the concrete to within a ¼ inch of the tablet. Chisels & special dremel tools are also employed. And it still takes hours of painstaking careful work. Time must be taken so as not to not damage the edges of the tablet. And with some luck, maybe those who used the concrete mixed it poorly and applied it to a dirty surface, in turn making for a poor bond. This sort of restoration should always be handled by a professional or an individual who has first take a class in the basics and moved on to more advanced training.

For further information please read our document in ARCHIVES…CONCRETE – A Bad Solution. And watch the video below on this subject. This video completely explains this subject.

Other areas of interest that pertain to multi-piece monuments

For more discussions that may have a bearing on multi-piece monument methods, mouse over PRO VS CON and choose The Field In General and Method Issues. You may also find the other categories under PRO VS CON helpful as well.

This section is here to weigh out the many “Pros VS Cons” that seem to exist in this relatively young field known as the cemetery preservation and restoration. A young field born out of the need and want to maintain the memorials left us in cemeteries. Maintaining things from the past has been around almost as long as the past itself. Art, documents, books, buildings, and now cemeteries. After the desire to save these things is met, then begins the how to save them, through what means and with which forms of maintenance. This quickly becomes a much clouded issue for many. We hope to lift this fog with some simple fact based thoughts and principals. Our cornerstone or main pillar for doing this will be a thing called, “Do No Harm”.

This section has two main goals. One is to lay out and examine the field itself and all of its controversial issues, problems, and divisions. The second main goal of this section is to lay out the said issues involving methods, techniques, and products, and run them through the list of 6 or more questions below. This is where you find the meat of the discussion before it is weighed out with these questions. 

We are addressing as many of these issues as we can at this time with the following subcategories in this section. “The Field In General” subcategory addresses the overall methodology of the field itself. Other subcategories such as Cleaning and Bonding Agents, and others to be added, will address more specific methods and products.   

These are the 6 standard questions we will ask of all methods, techniques, and products suggested or discussed on The Cemetery Conservators For United Standards website. Additional questions may be asked pertaining to a given subject depending on the need to ask them based on the subject. You will find the completed version per product and/or method under SOURCES…Pro VS Con Results.

1…MSDS… based on the MSDS recommendations. (Scale of 1 to 10) 1 being the most invasive or highest risk to a person’s health & safety. And 10 being the least invasive or lowest risk to a person’s health & safety.

2…Testing…has it been tested? (Scale of 1 to 10) 1 being the lowest # of testing done. And 10 being highest # of testing performed.

3…Longevity & Performance… based on reliable reports concerning how long & well the product holds up. (Scale of 1 to 10) 1 being the shortest longevity & lowest performance. And 10 being the most longevity & best performance.

4…Track Record & Wide Spread Use…How well has this substance or product in this technique held up over the years & how many places has it been used? (Scale of 1 to 10) 1 being the worst track record, least widely used, & least places used. And 10 being best track record, most wide spread use, & most places used.

5…Permanence…is the substance or product in this technique, reversible or nonreversible? (Scale of 1 to 10) 1 being the lowest possibility of reversal. And10 being the highest possibility of reversal.

6…Cost & Training…how expensive is the product & is there specified training required & what is its cost? (Scale of 1 to 10) 1 being highest cost & most training. And 10 being lowest cost & least training.

TOOLS & SUPPLIES…things we suggest to better aid in your cemetery preservation work can be found here.

TECHNICAL…is the place where we house all information for products used and has Product Explanations, Product Information Sheets, and MSDS

SAFETY…is always an important place you should visit at every step along the way

SAFETY – a place for all safety related issues found in cemeteries and in the preservation of cemeteries. Every year people are killed due to unstable stonework in our cemeteries. Over time many of these monuments begin to lean and teeter. And unsuspecting visitors are crushed because they disturbed one of these loose monuments. We wish to remind people of this situation and caution them from such tragedies. Safety is also equally important for those who choose to do some sort of restoration work. The hazards can range from a pinched finger to being killed by a large stone. I can say all of our members take safety very seriously and make it our constant number one priority in everything we do. We please ask that you do the same. This section will try to address this issue as much as possible. Let’s all be safe out there in all that we do. 

This is where you will find the latest video links to cemetery preservation and restoration. There are many great videos from both professional organization and CCUS members. We will constantly add new media as it becomes available. Mouse over VIDEO and choose an area of interest. You will find one of the six areas below to view.

Cleaning – the best ways to clean with no harm.

Hoist Work – lifting stones with a hoist type system.

Repair Work – putting the broken pieces back together again.

General Field Work – a collection of misc. preservation work.

Good Preservation – what good preservation looks like.

Bad Preservation – what bad preservation looks like.

ARCHIVES…is where we house downloadable pdf’s and FREE cemetery preservation related images for you to use. We have jam packed this ever expanding library with pdf’s on important cemetery related issues. We wanted you to have a place where you could easily view, print, or download important information. We encourage you to share it with other individuals or groups you may know that are interested. There is no such thing as too much cemetery awareness.

BEYOND BASICS…We are beginning to slowly delve into such cleaning areas like graffiti cautiously. There is a great deal more here than what meets the eye and to begin addressing these difficult issues, we have begun putting together the section BEYOND BASICS. Mouse over this section to find pin removal.

This section will address preservation in 2 ways. First…it addresses methods that touch on, or are an extension of things you will run across through the 6 Basic Standards. Secondly…this section will also address things you won’t necessarily find by utilizing the basic preservation procedures. With this we are attempting to do what we can to discuss the more complicated issues many of us run across in cemeteries. These more complicated issues won’t always be things that we can give step by step instruction on. But, we will do all we can to give guidance and explanation to them. We‘ve placed them here so they may be more clearly defined and understood. And also because we are a growing informational website, we felt the need for this room to expound overall. You will also find links and buttons that will connect you to other related things on our site as it applies.