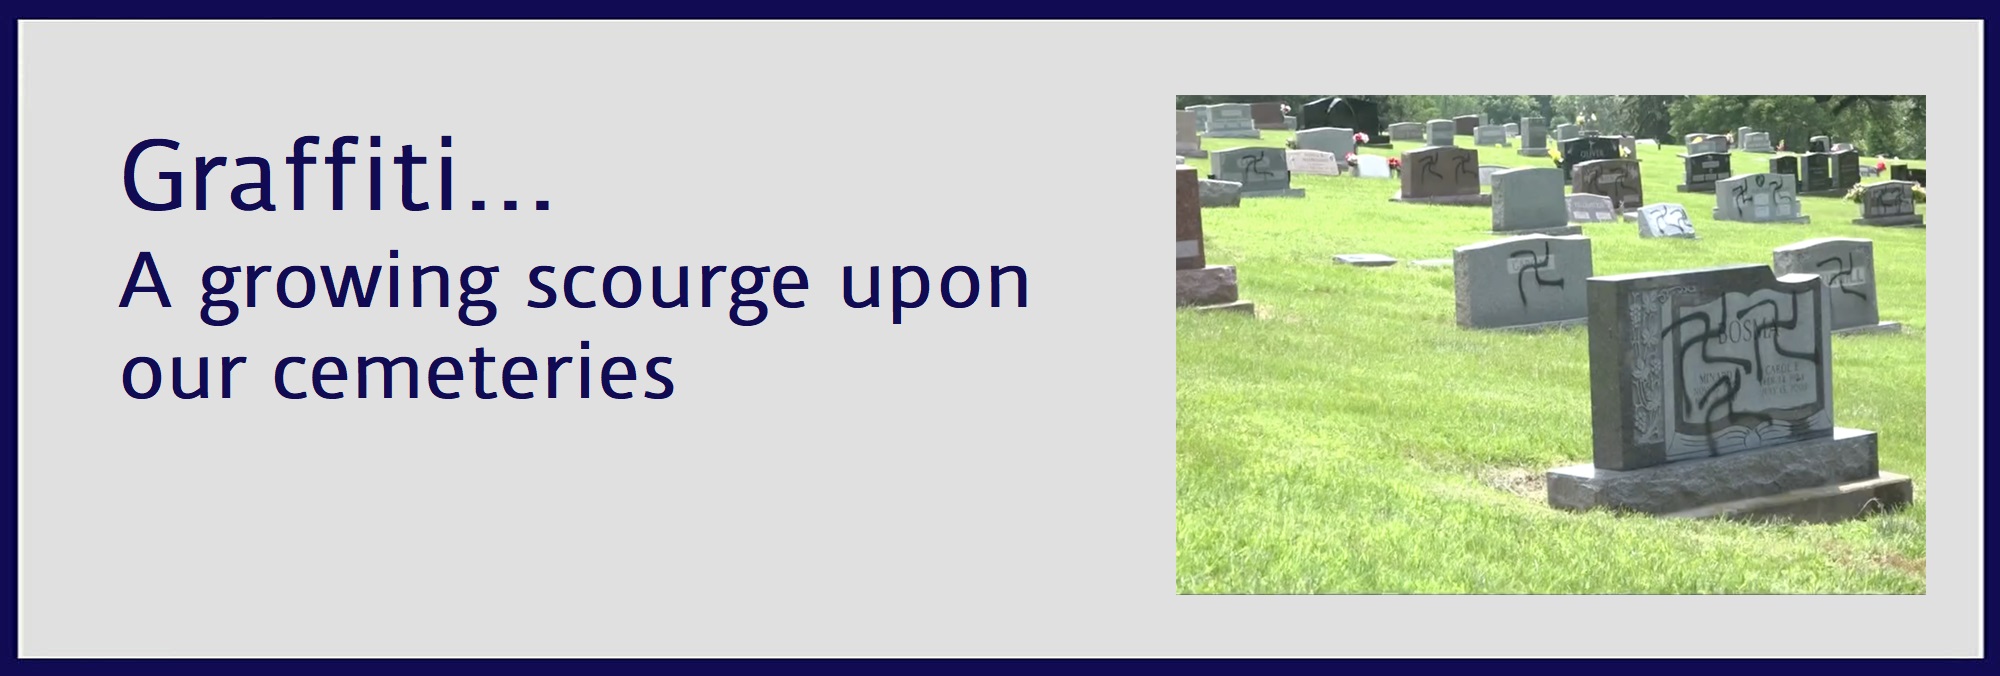
Cemetery vandalism has risen dramatically over the past several years, and a large portion of that vandalism has consisted of graffiti. Removing any type of paint from a given material is difficult, and historic stone presents its own sets of challenges to accomplish this successfully.
The CCUS is currently researching and vetting the many different techniques and products used for removing the many paint types from stone grave markers. It is a long list that includes many invasive procedures that often include strong chemicals and methods that may do damage to the original stone. As we examine all of these products and procedures, we will do our best to address it in an even manner that takes all factors into account. This will be a long journey to get close to anything we can call “do no harm” methodology for removing graffiti. This is usually the point where we say, “seek the advice of a professional conservator”, and then possibly list a trusted conservator to contact. The problem is finding any real true consensus of thought or opinion on this problem. At the moment the field of cemetery professionals is quite fractured and divided, and seems to be in an experimental stage. Making this an inconclusive subject for now. We are not even comfortable with telling you to simply use extreme caution.
One of the only things we have found that we are comfortable with putting on this website is the following link. This link is to an article by the National Park System that does a very good job as an overview to the graffiti issue. But, it was written in 1995 and we are sure many things have changed in almost 25 years. None the less, it is a place to start and get a better understanding of the problem at hand.
1995 NPS article link. You will also find a PDF version in our ARCHIVES section under PDF’s
In no way does The Cemetery Conservators For United Standards, recommend or advocate using any of the information from this 1995 article to resolve a situation concerning graffiti at this time. Graffiti removal is a very difficult situation at best and will involve a great deal of care, research, and help. At such time, after the professionals that reside in the field of historic stone and masonry have made a better determination. The CCUS will not be held accountable for things you may do in accordance with any of the information found in the article. As frustrating or heartbreaking as this may seem, we advise you to leave the situation alone for now.
Bronze
Bronze
By CCUS members Brad McGowan, Shane Peik, Mark Morton, and Lloyd Collins
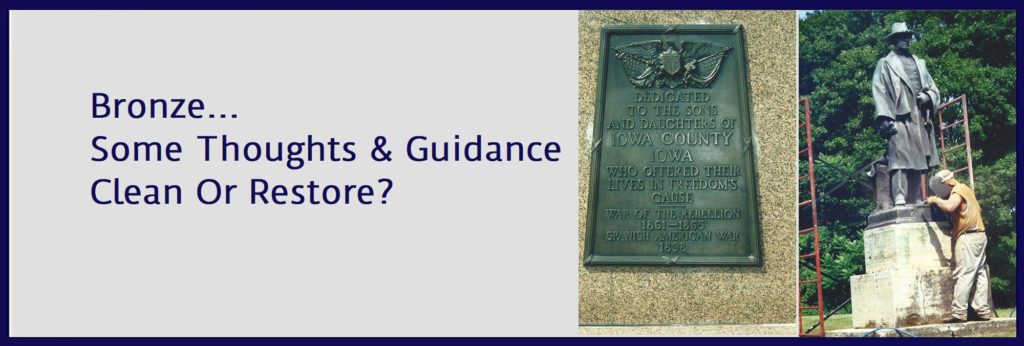
The subject of what to do concerning bronze is not always a straight forward one. This is why we have placed this subject under our “Beyond the Basics” section. Because bronze has been a part of many grave markers for many years, how to care for it has come up quite often. Due to the plain nature that bronze being a metal puts it in the category of metal and historic metal care. Metals rust and tarnish causing streaking on the surfaces they come into contact with. This opens an entirely new can of worms where just the methods and products are concerned to deal with this issue alone, and we have not even addressed cleaning or refinishing or mounting bronze and the other things that are part of this metal. We are going to divide bronze into several categories for some better understanding of this subject. But basically break it down to two things, clean and preserve or refinish and restore. Most anyone can clean and preserve and a professional should be found to refinish and restore. We are going to lean more heavily in the direction of clean and preserve much like we do when it comes to stone grave markers. These bronze items much like old white marble stones are not meant to look brand new. Patina is not a bad thing when it comes to bronze. The important thing is to preserve what is there and keep its information legible and not get too crazy about making it shinny like a mirror.
The following is a good in general statement from bronze conservation technician Brad McGowan that puts this subject in a nut shell and is a good place to begin.
I received formal training from the National Park Service in the early 1990’s. My wife and I did a lot of the bronze preservation/cleaning work on many of the plaques and sculptures that make up the Iowa Civil War Soldiers and Sailors Monument in Des Moines, Iowa in 1999. Many people have a preconceived notion as to what clean bronze should look like. I will tell you that it is not the look of a shiny new penny. Bronze over time takes on a patina which for the lack of a better term is corrosion, it is a natural occurrence. The process of cleaning bronze is similar to cleaning headstones, DO NO HARM ! If you have had no formal training in bronze cleaning you should not attempt to do anything. A soft brush and clean water should suffice for just a gentle cleaning, other than that I would just leave well enough alone. It is actually kind of a hot and dirty job, but very rewarding when you look back at the end result.
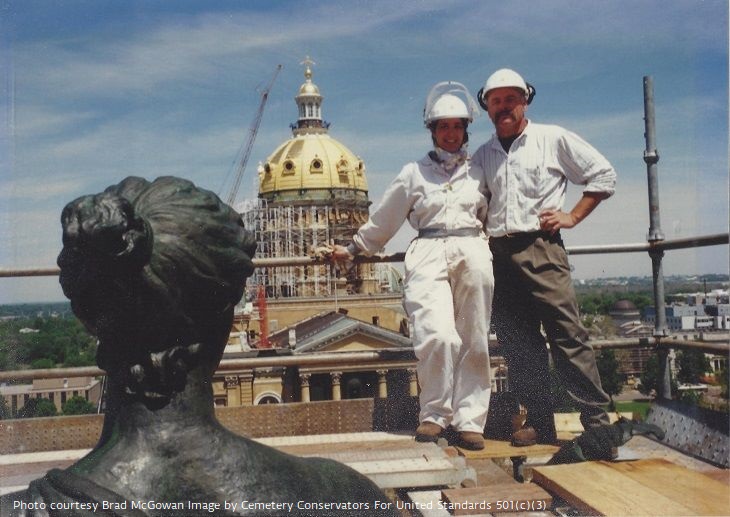
My wife and I at the top of the Iowa Civil War Soldiers and Sailors Monument in Des Moines, Iowa 1999. Overall height of 135′, the sculpture at the very top is 22′ tall and the bun on the back of her head is the size of a soccer ball. Jonathan Taggart was one of the co-conservators who worked on the monument. Working on that monument was the pinnacle of anything I could ever do in the area of preservation.
The monuments and statues described above are absolutely the projects for the professionals, but the point Brad has made about doing no harm & not making it look like a shiny new penny, hold true across the board where bronze is concerned. Below are examples of this belief.
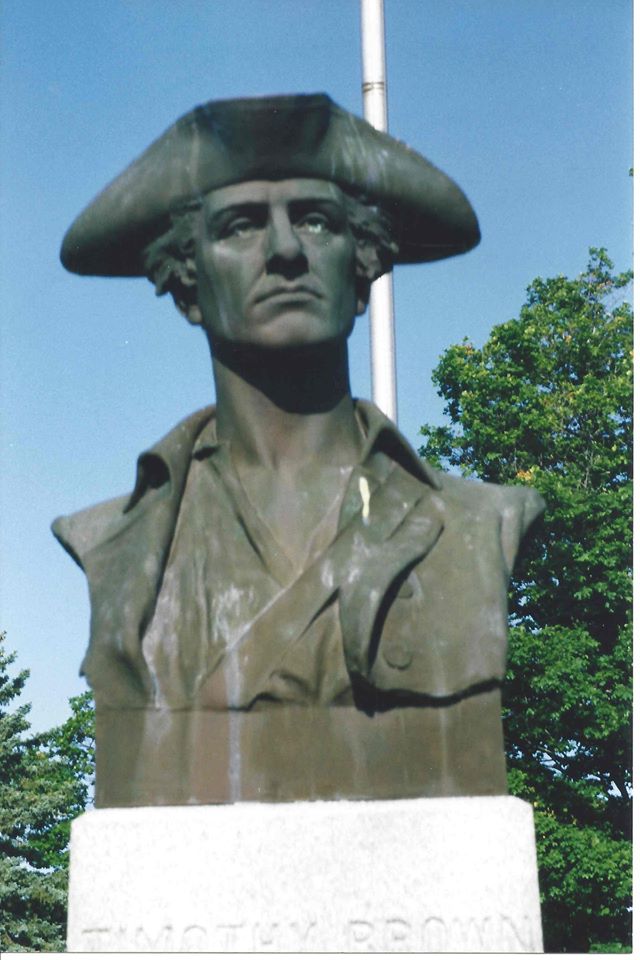
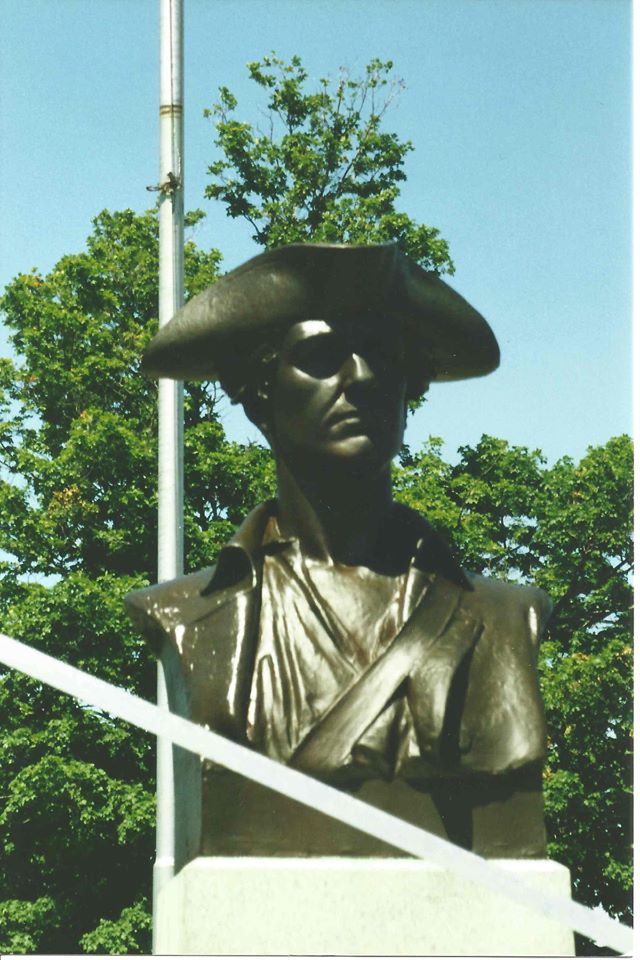
The goal here is more one of protect and preserve than to alter the original work by trying to induce some overly polished finish. And as with most things, the bigger and more complex the object is, the more you will need to contact a professional. The main thing that comes into play with some of these statues and busts concerns the metallurgy of the piece in itself. Things that concern its original casting and pureness of materials used in that casting. This can also be complicated by the time period they were cast, because as with all things, things change as technology improves. So more experience and knowledge of bronze casting in general and in specific becomes crucial to know.
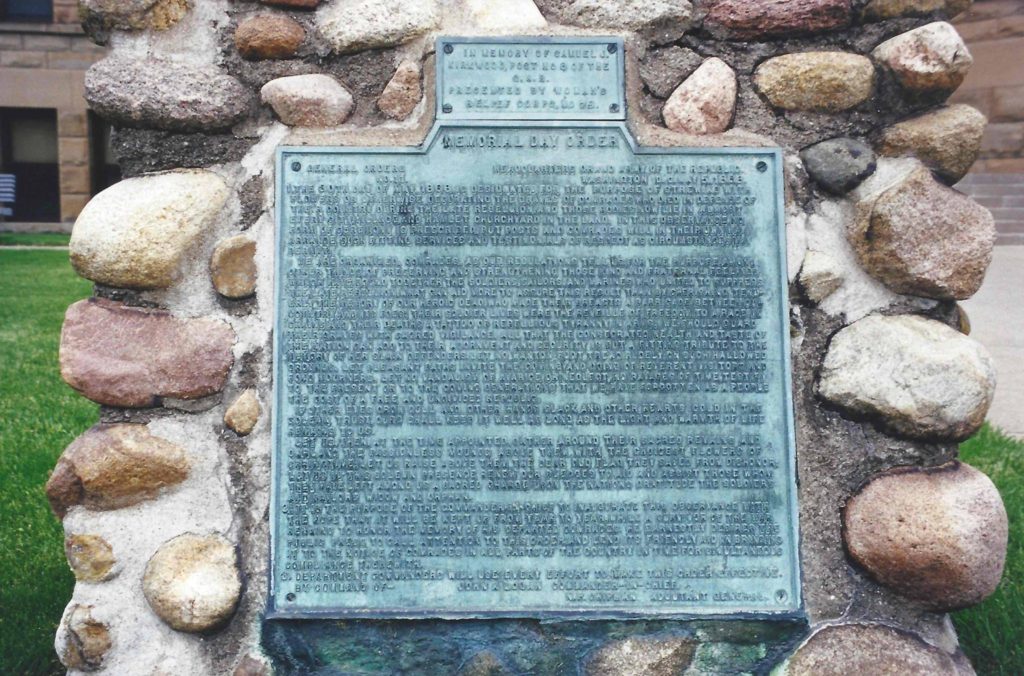
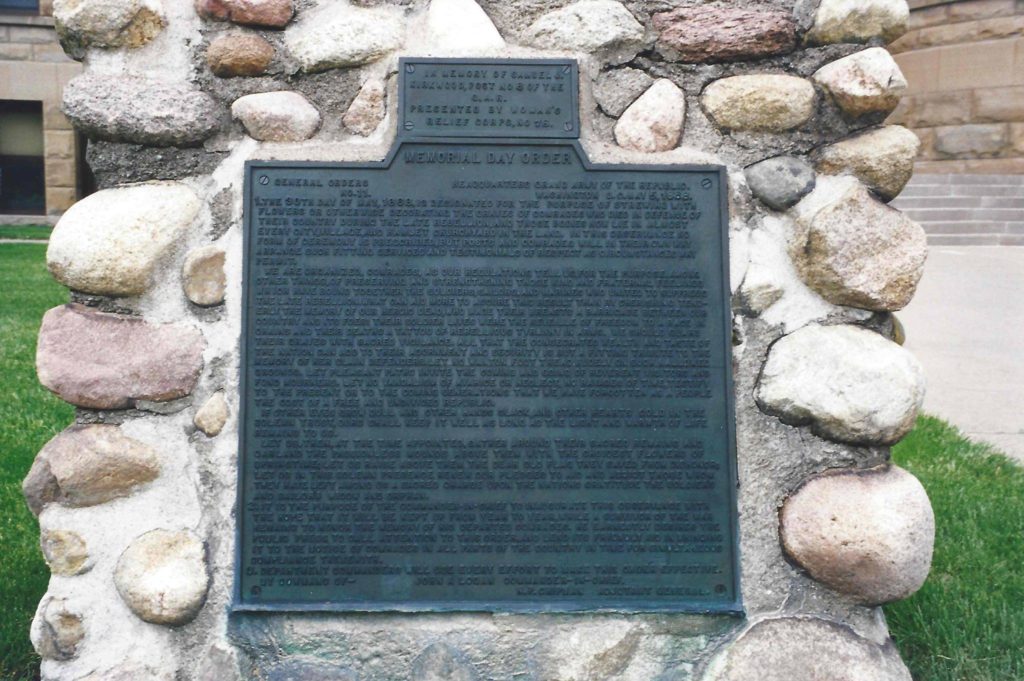
Now for what we can best explain and describe that empowers you to preserve the majority of bronze markers that you will run across. I’m speaking of the government or VA issue military style bronze plaques that honor and represent military service. Below are examples of these markers
An act of April 18, 1940, authorized the use of other materials and the standard. Flat bronze markers were adopted on July 12, 1940. (A new design was approved beginning with fiscal year 1973).
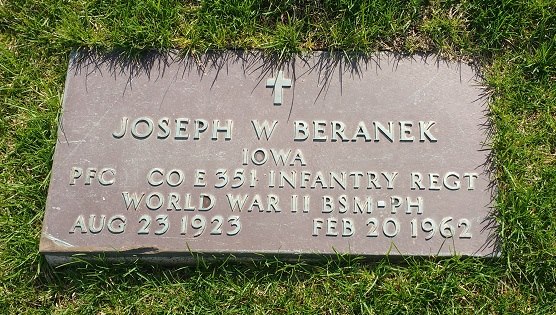

The early version that began in 1940 above left. Today’s version approved in 1973 above right.
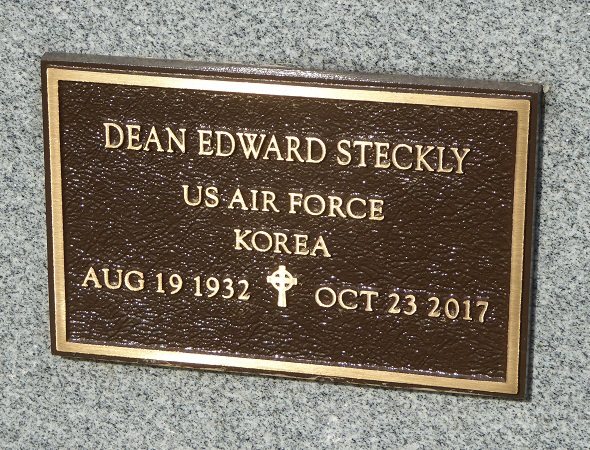
The large bronze markers above were not meant to be put on an existing full scale lettered headstone, the government also supplies a smaller version such as the one left that can be adhered to an existing stone grave marker.
This link will take you to our PDF section where you will find two PDF’s under the index BRONZE…Bronze Plaque Cleaning –step 1 and Bronze Plaque Cleaning –step 2. These are two docs put out by the National Park Service in 2005 that still hold up well as a good guideline for bronze plaque care. https://cemeteryconservatorsunitedstandards.org/archives/pdfs/ You should stop here and first read these two docs before proceeding.
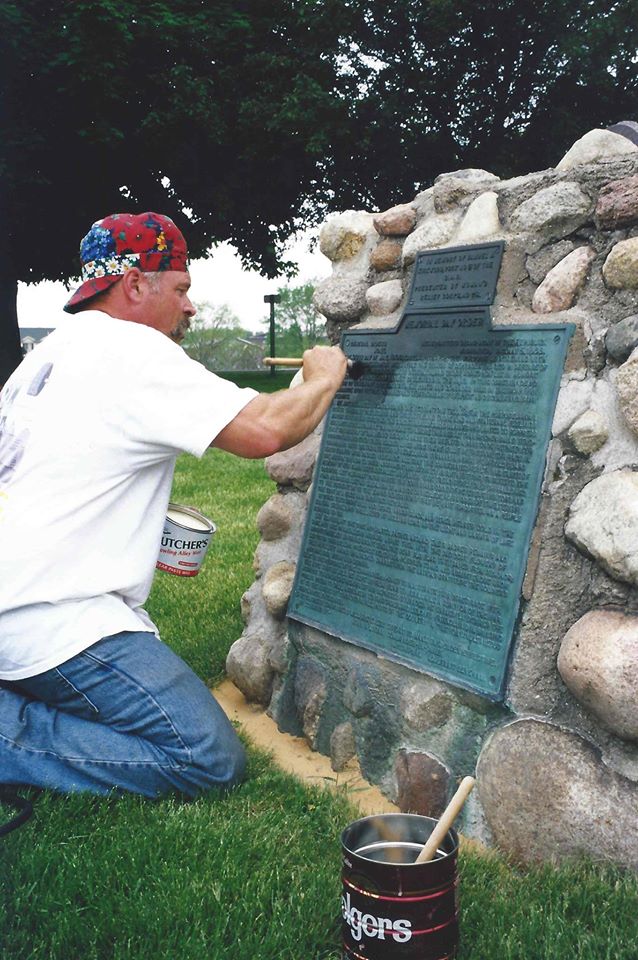
In the pictures above, Brad again adheres to this principal of keeping it simple in a do no harm manner by simply cleaning and waxing this placard.
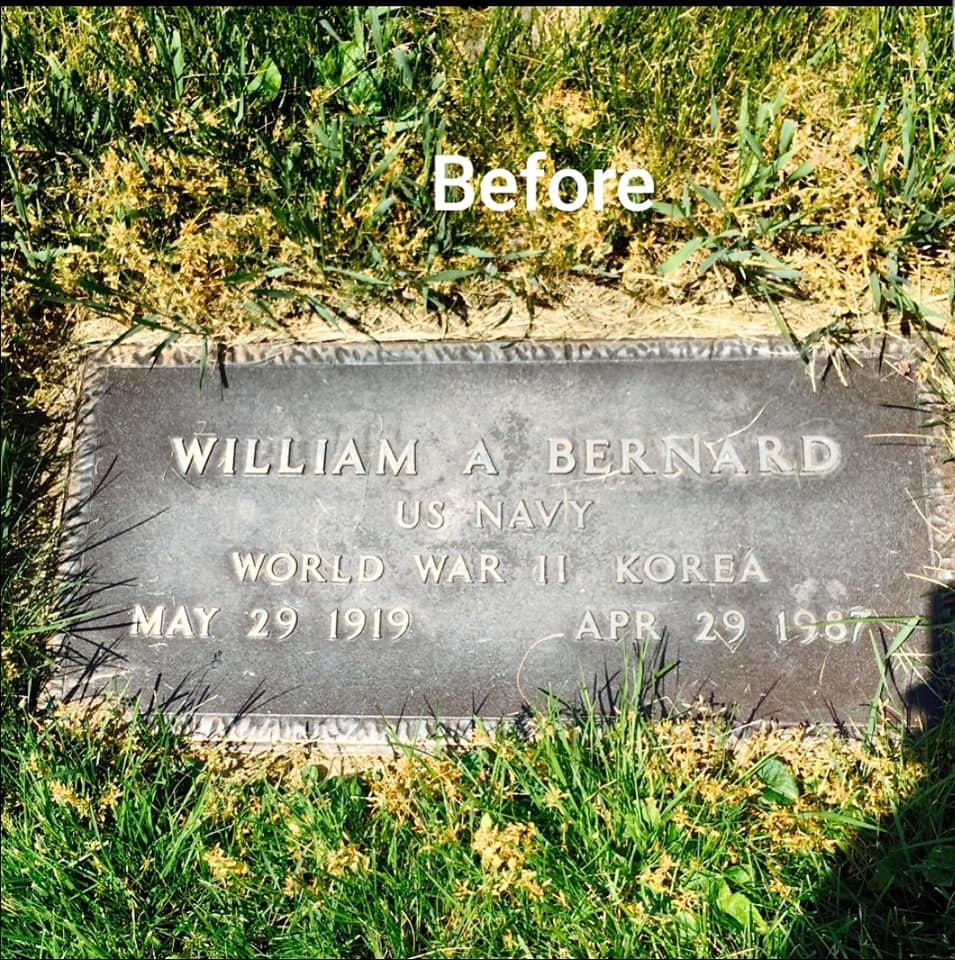
These pictures are from our CCUS member Zach Bernard and show the before and after of a simple wash and wax of his grandfather’s marker. In Zach’s words, “it doesn’t look brand new, but after 32 years, it shouldn’t” This is a good example of simple preservation. Brad McGowan backs this up by adding, “Without it being too involved a process the marker looks great. Periodic waxing will be the key to longevity. A thin coat of wax would be preferable.”
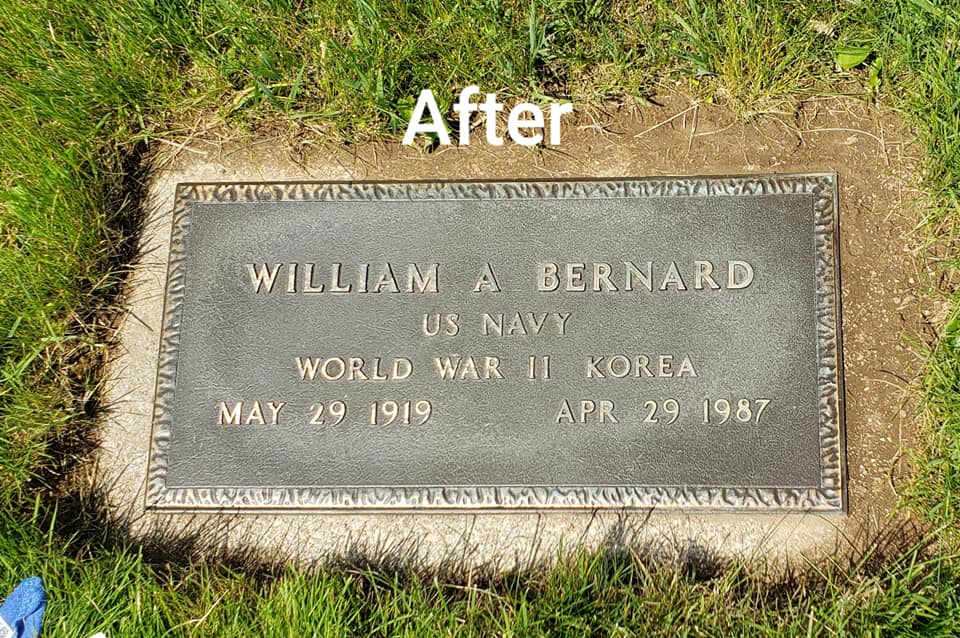
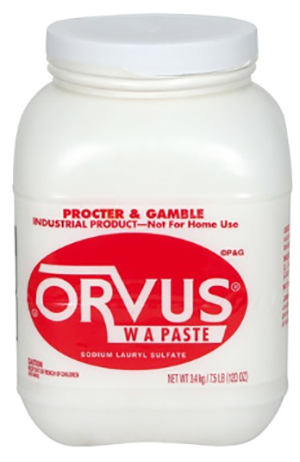
Some additional updated information to go along with the 2 articles from the National Park Service. For washing we recommend Orvus paste with a very thorough rinsing due to its concentrated formula. For waxing we recommend Butchers Wax.
We will add more later on the subject of bronze plaque refinishing as easier safer do no harm methods are explored and kept simple enough to explain on a website. To best understand more extensive bronze plaque care would involve some personalized training. The CCUS does not have this type of training available at this time, but we are exploring how we could provide this in the future.
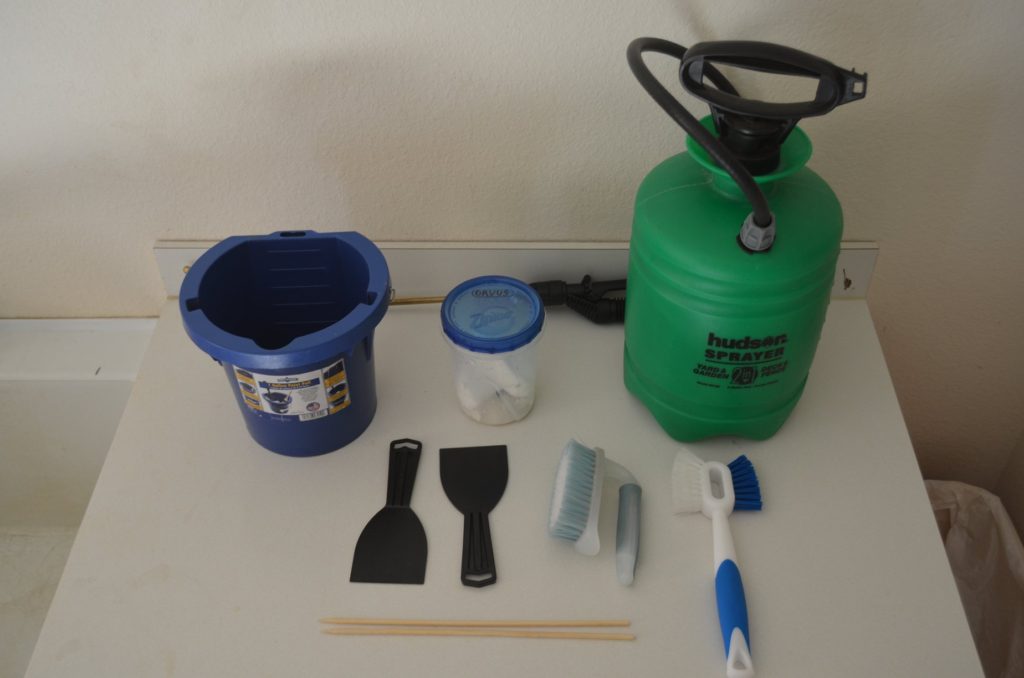
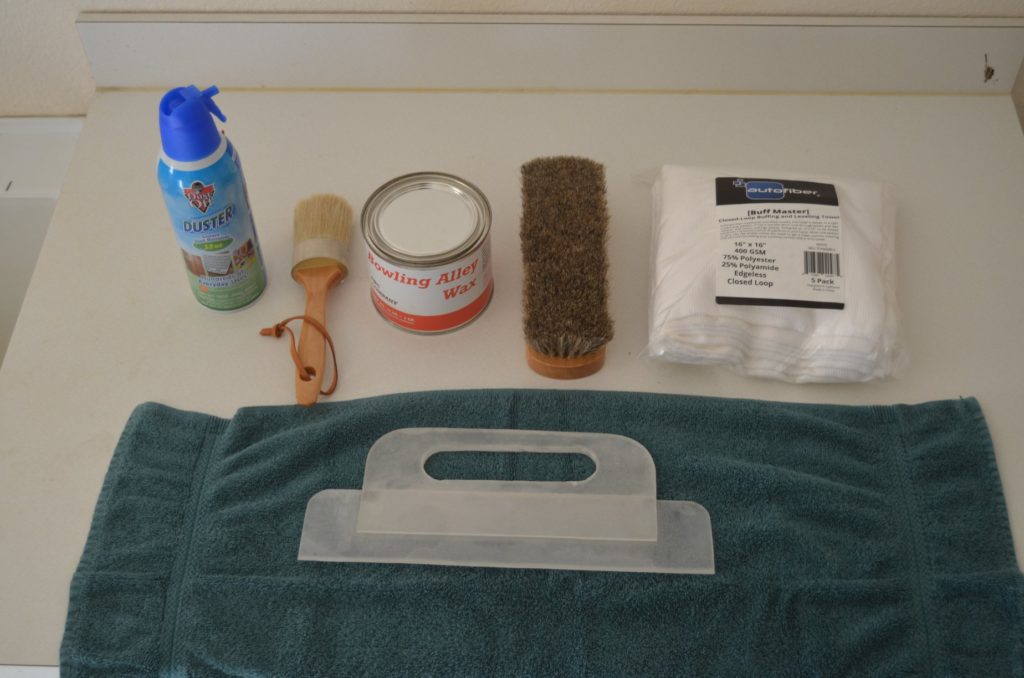
A Bronze plaque cleaning and preservation kit put together by Lloyd Collins of Polk Cemetery Savers
Cleaning and Preservation:
This procedure will clean the plaque and preserve it by applying a thin coat of paste wax. This procedure should not remove the patina, only the dirt and grime. The patina is common on aged bronze and is a type of protection for the marker. Most bronze plaques have stone surrounds. Some do not. This procedure will also clean the stone surround. The procedure will take some time. You must clean the bronze and let it dry and warm in the sun before you apply the paste wax. If the bronze is damaged or broken, do not attempt to use this procedure. If the plaque needs refinishing or restoring, leave that for professionals. They have the equipment, knowledge, and materials to do the job correctly.
Cleaning;
Ensure the marker is in good enough condition to be cleaned. Use the same criteria as for cleaning headstones. Do not use any metal utensils, wire brushes, or steel wool.
Clean the plaque and stone surround with water and a soft bristle brush. Remove any biological growth from the stone surround. Bronze normally will not support the growth of biologicals but may, depending on the climate, have some growth on its’ surface. If there is hard to remove grime on the surfaces, use a small amount of Orvus paste/soap to help dislodge the grime. Rinse thoroughly. You may notice black marks from the mowers tires on the bronze plaque. You may not be able to remove the marks using this procedure. Do not scrub hard enough to remove the patina. Once the plaque and stone surround have been cleaned and rinsed, inspect the plaque closely to ensure all grime has been cleaned from the nooks and crevices. Clean areas again if necessary. You don’t want to trap grime on the plaque when you apply the wax. Let the marker dry completely.
Preservation;
Allow the bronze plaque to dry thoroughly and warm in the sun. A warm plaque will help to spread the thin coat of wax more evenly. Use the compressed air to remove any dust and debris that may have accumulated on the plaque since it was cleaned. Open the can of wax and use the applicator brush to get a small amount of wax. Using the plastic paint edger to keep the wax from getting on the stone surround, apply the wax to the bronze. Brush so the wax is applied thinly and as evenly as you can. The warmer the plaque the easier this step will be. Get additional wax as needed. Spread a little wax at a time. Don’t try to spread a big glob of wax across the plaque. Remove any hair from the plaque that may have come loose from the applicator brush. When you have covered the bronze with a thin coat of wax, let it dry thoroughly. A haze will form on the plaque. This will tell you the wax has dried. Use the soft buffing brush and buff the bronze. Ensure you buff all of the plaque and get into the areas that appear to be crevices and the grooves around the lettering. After you have buffed the plaque, use the soft polishing cloth to polish the wax to a shine. Use the compressed air to remove any cloth debris from the plaque. If needed to control biologicals, spray D/2 on the stone surround. Protect the bronze plaque from any overspray.
For Cleaning;
1. Plastic Bucket….. 1 gallon or larger to hold cleaning water. Change water often.
2. Two Soft Bristle Cleaning Brushes…. One for general cleaning and one slightly stiffer grout brush to clean dirt from tight crevices and biologicals from the stone surround.
3. Plastic Scrapers….. To remove any biological growth. Mainly on the stone surround.
4. Wooden Skewers….. To clean biological growth and debris from grooves and crevices.
5. Orvus paste/soap….. Rarely needed but used to clean tough grime.
6. Two Gallon Garden Sprayer….. Filled with clean rinse water.
7. D/2….. If needed to control the biologicals on the stone surround. Probably not needed for the bronze plaque.
For Preserving;
1. Compressed Air….. To blow off any dust or debris after the cleaned plaque has dried.
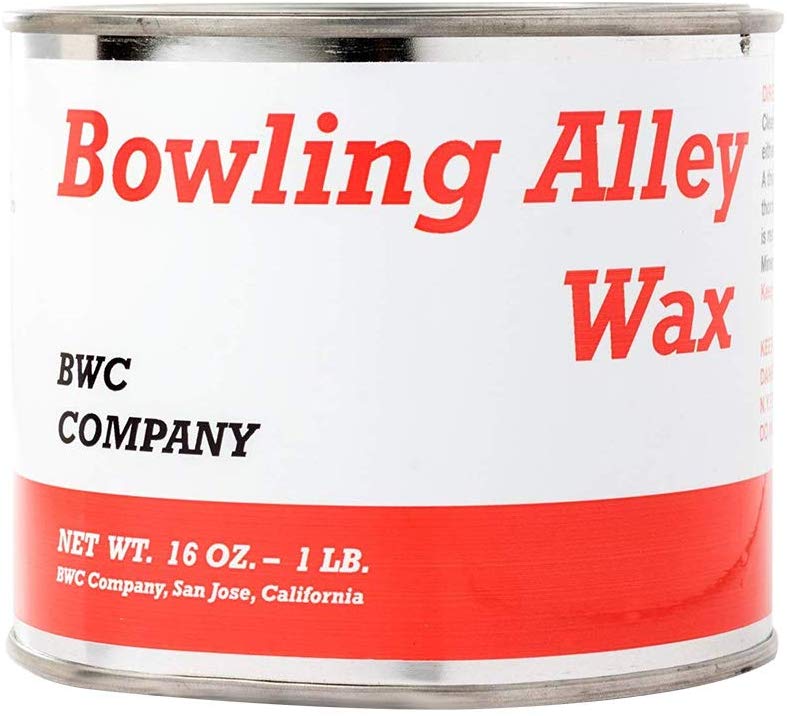
2. Bowling Alley Wax….. Or equivalent. Should be a paste wax, not liquid.
3. Applicator Brush….. Somewhat stiff to apply a thin coat of wax.
4. Plastic Paint Edger….. To prevent wax from getting on the stone surround.
5. Buffing Brush….. Very soft brush to buff the dried wax.
6. Polishing Cloth….. Soft cloth to polish the wax on the bronze plaque.
Additional Notes;
I couldn’t find a plastic paint edger that I thought was strong enough to last without breaking. I made the edger pictured. It is very strong. I didn’t want to put an edger that was made of metal in the kit.
In some cases it may be advisable to put a second thin coat of wax on the bronze plaque.
The wax preservative will probably not last more than a couple years. Those who have experience on waxing bronze may know how long it will last and/or how often it should be reapplied.
A piece of cardboard works well to protect the bronze from D/2 overspray.
January 22, 2020 – CEMETERY CONSERVATORS FOR UNITED STANDARDS